The row with the standard subgrid like on the picture below
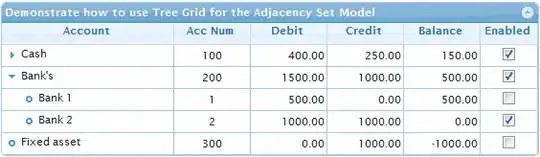
consist from three parts which I marked in different colors. The corresponding HTML structure looks like on the next picture
jqGrid creates an empty <div> (see <div class="tablediv" id="list_1"></div> marked in red) and calls subGridRowExpanded callback with the id of the div ("list_1" on the picture above) as the value of the first parameter. One places an empty <table> with some unique id attribute in the div with and creates grid from the <table>. The typical code looks like
subGridRowExpanded: function (subgridId, rowid) {
    var $table = $("<table id='" + subgridId + "_t'></table>");
    $("#" + subgridId).append($table);
    $table.jqGrid({
        // ...
    });
}
What you can to do is to set some CSS attributes on the <div> to place the table on the place where you need it. For example I have the column "sequence" in the parent grid of the demo used on the pictures. The header of the column of the header have gridId + "_sequence" id. So one can use the following code to set padding-left to skip the first column:
subGridRowExpanded: function (subgridId, rowid) {
    var $table = $("<table id='" + subgridId + "_t'></table>");
    $("#" + subgridId).append($table)
        // set padding-left to the outer width of the first column "sequence"
        // of the parent grid
        .css("padding-left", $("#" + this.id + "_sequence").outerWidth() + "px");
    $table.jqGrid({
        // ...
        autowidth: true
    });
}
The advantage of the usage padding-left: one can use autowidth: true in the subgrid to resize the subgrid to fill the right part of the row of subgrid.
The demo uses the code. The results looks like on the picture below

You can change other attributes of subgrid row inside of subGridRowExpanded to achieve your exact goals.