Answer & Demo
I've solved the problem, here is a JSFiddle.
Pros
- It's very easy to use.
- You can select any color in any format known to JavaScript.
- Your icon can have any color except white.
Cons
In order to be compatible with all the color formats, it needs the tinycolor.js library as a dependency. (However: this can be removed if you create your own color convertion functions)
It only works in IE9+ as it uses the HTML5 canvas. (Although to be honest coding for IE is always a pain).
The source images have to be in the same server, as canvas can't get tainted from cross-origin sources, and you can't get data from them, this is why the source image in the demo is in Data URI. (However: there is a solution if you are interested).
HTML
<input type="text" value="#669dbb">
<button>Change color</button>
<img src="data:image/png;base64,(..)">
Simple enough, an <input> for the color you want the image to change to, and a <button> to apply the changes. (By the way, the original value is the lightblueish you have on your default icon).
JavaScript
var img = document.querySelector("img");
var button = document.querySelector("button");
var text = document.querySelector("input");
var canvas = document.createElement("canvas");
var context = canvas.getContext("2d");

button.onclick = function () {
    changeColor(text.value);
};

changeColor = function (inputColor) {
    canvas.setAttribute("width", img.width);
    canvas.setAttribute("height", img.height);
    context.drawImage(img, 0, 0);
    var dataObject = context.getImageData(0, 0, canvas.width, canvas.height);
    var data = dataObject.data;
    for (var i = 0; i < data.length; i += 4) {
        var r = data[i],
            g = data[i + 1],
            b = data[i + 2],
            a = data[i + 3];
        var notTransparent = a != 0;
        var nonBackground = ( notTransparent && r != 255 && g != 255 && b != 255 );
        if ( nonBackground ) {
            var input = tinycolor(inputColor);
            var rgb = input.toRgb();
            data[i] = rgb.r;
            data[i + 1] = rgb.g;
            data[i + 2] = rgb.b;
            data[i + 3] = a;
        }
    }
    context.putImageData(dataObject, 0, 0);
    img.src = canvas.toDataURL();
}
Explanation
Okey, what's going on here, I'm going to center my explanation on the changeColor() function as the other code blocks are just background work.
- First, we match the
<img>'s width & height with the <canvas>.
- Then, we draw the image to the canvas.
- Then, we get the pixel array data from the whole canvas. (More on canvas pixel manipulation.
- Then we read the data (wich is a loooong array) and get each pixel value.
- Array[0] = Red
- Array[1] = Green
- Array[2] = Blue
- Array[3] = Alpha.
- Then, we check if the pixel is not a background pixel, by making sure is not transparent nor white.
- If it isn't, we get the input color and make it RGB.
- Then, we modify the pixel data and update the canvas.
- Finally, we get an
<img> source from the canvas, by transforming it to Data URI, and we update the <img>.
Just one more thing
Now, while that may be cool and all, it would take a lot of grunt-work to get going, so I've made it easier for you, here is a library that allows you to do what you want: AmazingIcon.js (Github)
It's not nearly polished, but it will do the job, here is how it works.
HTML(head)
<script src=tinycolor.js></script>
<script src=amazingicon.js></script>
HTML(body)
<a class="amazingIcon" href="some-url" data-src="icon-image-url">icon-label</a>
Fairly simple, we use the data-src to create a pseudo-custom attribute.
JavaScript
AmazingIcon.parseDocument();

AmazingIcon.hover(function(icon,ev){
    icon.setColor("lightblue");
});
The AmazingIcon.parseDocument() function will convert any anchor with the class amazingIcon to an Amazing Icon.
The AmazingIcon.hover(callback) function applies the hover event to all the amazing icons, the hover event function will recieve both (icon,event) arguments, which you can manipulate accordingly. (More on the documentation)
CSS
.AmazingIconObject{
    /* Display icons in the same row */
      display: inline-block;
    /* Aligning icons vertically inside parent */
      vertical-align: top;
    /* Centering labels */
      text-align: center;
    /* Sepparation between the icons */
      margin-right: 5px;
    /* Break label to fit icon width */
      word-wrap: break-word;
    /* Sets the width of the anchor (not the icon) */
      width: 100px;
    /* The following properties are design-subjective */
      font-family: Verdana;
      font-weight: bold;
      color: lightcoral;
      margin-right: 5px;
      text-decoration: none;
}
Very simple, if you'd like to know more of how it works of course it's all in the github, feel free to reproduce and modify the code as you and any other readers please.
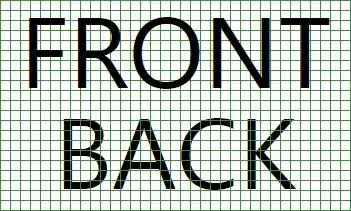
Demostration
As it's difficult to use demonstrate with non-crossorigin sources, I'll just show you an image of what that would look like.
Hope this helps, see ya!