12

I am currently working on implementing a thresholding algorithm called Bradley Adaptive Thresholding.

I have been following mainly two links in order to work out how to implement this algorithm. I have also successfully been able to implement two other thresholding algorithms, mainly, Otsu's Method and Balanced Histogram Thresholding.

Here are the two links that I have been following in order to create the Bradley Adaptive Thresholding algorithm.

http://citeseerx.ist.psu.edu/viewdoc/download?doi=10.1.1.420.7883&rep=rep1&type=pdf

Bradley Adaptive Thresholding Github Example

Here is the section of my source code in Python where I am running the algorithm and saving the image. I use the Python Imaging Library and no other tools to accomplish what I want to do.

def get_bradley_binary(inp_im):
    w, h = inp_im.size
    s, t = (w / 8, 0.15)

    int_im = Image.new('L', (w, h))
    out_im = Image.new('L', (w, h))

    for i in range(w):
        summ = 0
        for j in range(h):
            index = j * w + i

            summ += get_pixel_offs(inp_im, index)

            if i == 0:
                set_pixel_offs(int_im, index, summ)
            else:
                temp = get_pixel_offs(int_im, index - 1) + summ
                set_pixel_offs(int_im, index, temp)

    for i in range(w):
        for j in range(h):
            index = j * w + i

            x1,x2,y1,y2 = (i-s/2, i+s/2, j-s/2, j+s/2)

            x1 = 0 if x1 < 0 else x1
            x2 = w - 1 if x2 >= w else x2
            y1 = 0 if y1 < 0 else y1
            y2 = h - 1 if y2 >= h else y2

            count = (x2 - x1) * (y2 - y1)

            a1 = get_pixel_offs(int_im, y2 * w + x2)
            a2 = get_pixel_offs(int_im, y1 * w + x2)
            a3 = get_pixel_offs(int_im, y2 * w + x1)
            a4 = get_pixel_offs(int_im, y1 * w + x1)

            summ = a1 - a2 - a3 + a4

            temp = get_pixel_offs(inp_im, index)
            if temp * count < summ * (1.0 - t):
                set_pixel_offs(out_im, index, 0)
            else:
                set_pixel_offs(out_im, index, 255)

    return out_im

Here is the section of my code that illustrates the implementation of these set and get methods that you have not seen before.

def get_offs(image, x, y):
    return y * image.size[0] + x

def get_xy(image, offs):
    return (offs % image.size[0], int(offs / image.size[0]))

def set_pixel_xy(image, x, y, data):
    image.load()[x, y] = data

def set_pixel_offs(image, offs, data):
    x, y = get_xy(image, offs)
    image.load()[x, y] = data

def get_pixel_offs(image, offs):
    return image.getdata()[offs]

def get_pixel_xy(image, x, y):
    return image.getdata()[get_offs(image, x, y)]

And finally, here are the input and output images. These are the same images that are used in the original research paper in the first link that I provided you. Note: The output image is almost completely white and it may be hard to see, but I provided it anyway in case anyone really wanted to have it for reference.
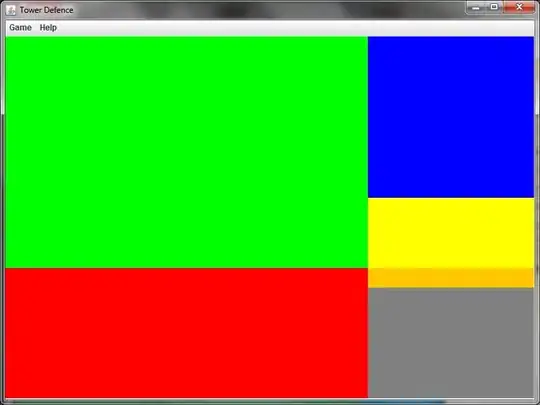
Input Image Output Image

Anthon
  • 69,918
  • 32
  • 186
  • 246
BigBerger
  • 1,765
  • 4
  • 23
  • 43
  • 1
    What is not working, the proper output image generation? Do you have any non-visual tests? – Ashalynd Apr 07 '15 at 22:21
  • Yeah the proper output image generation is not working, I used the exact same image that the research paper uses for their test and the output image is completely white and does not look anything like what the output image of the research paper's does. As for the non visual tests, I'm not sure what you mean. – BigBerger Apr 07 '15 at 22:23

2 Answers2

12

You cannot create the integral image with PIL the way that you are doing it because the image that you are packing data into cannot accept values over 255. The values in the integral image get very large because they are the sums of the pixels above and to the left (see page 3 of your white paper, below).

enter image description here

They will grow much much larger than 255, so you need 32 bits per pixel to store them.

You can test this by creating a PIL image in "L" mode and then setting a pixel to 1000000 or some large number. Then when you read back the value, it will return 255.

>>> from PIL import Image
>>> img = Image.new('L', (100,100))
>>> img.putpixel((0,0), 100000)
>>> print(list(img.getdata())[0])
255

EDIT: After reading the PIL documentation, you may be able to use PIL if you create your integral image in "I" mode instead of "L" mode. This should provide 32 bits per pixel.

For that reason I recommend Numpy instead of PIL.

Below is a rewrite of your threshold function using Numpy instead of PIL, and I get the correct/expected result. Notice that I create my integral image using a uint32 array. I used the exact same C example on Github that you used for your translation:

import numpy as np

def adaptive_thresh(input_img):

    h, w = input_img.shape

    S = w/8
    s2 = S/2
    T = 15.0

    #integral img
    int_img = np.zeros_like(input_img, dtype=np.uint32)
    for col in range(w):
        for row in range(h):
            int_img[row,col] = input_img[0:row,0:col].sum()

    #output img
    out_img = np.zeros_like(input_img)    

    for col in range(w):
        for row in range(h):
            #SxS region
            y0 = max(row-s2, 0)
            y1 = min(row+s2, h-1)
            x0 = max(col-s2, 0)
            x1 = min(col+s2, w-1)

            count = (y1-y0)*(x1-x0)

            sum_ = int_img[y1, x1]-int_img[y0, x1]-int_img[y1, x0]+int_img[y0, x0]

            if input_img[row, col]*count < sum_*(100.-T)/100.:
                out_img[row,col] = 0
            else:
                out_img[row,col] = 255

    return out_img

output

derricw
  • 6,757
  • 3
  • 30
  • 34
  • 1
    Took me a while to accept this answer as I have been busy, but yes! I didn't realize that they were adding values over 255 and that the integral image is just an abstract representation of data, thank you so much! – BigBerger Apr 10 '15 at 04:57
0

I attempted to re-implement the algorithm, but without using 1D array and switching to 2D numpy array to better go with the original algorithm mentioned in the actual paper. Im using this for research into Data analysis using Deep Learning models. This is the implementation:

import numpy, gc
from ctypes import *    

def adaptive_threshold(self):
    gc.collect()
    gc.disable()

    w, h = self._image.width, self._image.height
    s, t = w//8, 0.15
    summ = c_uint32(0)
    count = c_uint32(0)
    pixels = self._pixels

    int_img = numpy.ndarray(shape=(w, h), dtype=c_int64)

    for i in range(w):
        summ.value = 0
        for j in range(h):
            summ.value += sum(pixels[i, j])
            if i != 0:
                int_img[i, j] = int_img[i - 1, j] + summ.value
            else:
                int_img[i, j] = summ.value


    x1, x2, y1, y2 = c_uint16(0), c_uint16(0), c_uint16(0), c_uint16(0)
    for i in range(w):
        for j in range(h):
            x1.value = max(i - s // 2, 0)
            x2.value = min(i + s // 2, w - 1)
            y1.value = max(j - s // 2, 0)
            y2.value = min(j + s // 2, h - 1)

            count.value = (x2.value - x1.value) * (y2.value - y1.value)

            summ.value = int_img[x2.value][y2.value] - int_img[x1.value][y2.value] - \
                int_img[x2.value][y1.value] + int_img[x1.value][y1.value]

            if sum(pixels[i, j]) * count.value < summ.value * (1.0 - t):
                pixels[i, j] = 0, 0, 0
            else:
                pixels[i, j] = 255, 255, 255

    gc.enable()

Notice this is part of a class. It mainly has two variables, _image which points to actual image and _pixels which is the PixelAccess class that allows access to pixels as set values. I used floor division (//) instead of regular division (/) because it ensures that all values are integer. So far the results look good. I used C data types to control memory usage and keep values in fixed positions. My understanding is it helps to have small amount of data allocation controlled to minimize fragmented data.

Plus this is 2018's last quarter. People still are using PIL and frankly it does the job for now. This works great for RGB color space. If you're using this on generic images, you might want to convert the image's data to RGB space using:

Image.convert('RGB')

where 'Image' is an instance of open image

It takes a couple of seconds on images that are considered HD like 1200x700 images but it took few fractions of a second on the sample image. Result Image

Hope this helps someone.