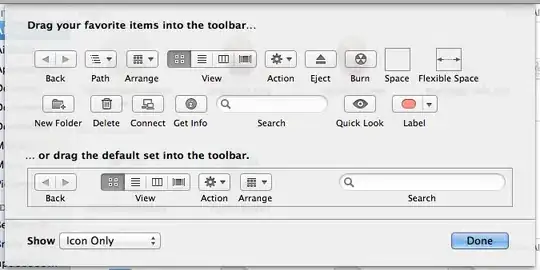
How can I create a button inside Android's Toolbar that looks like this iOS example?

How can I create a button inside Android's Toolbar that looks like this iOS example?

1 - Add library compatibility inside build.gradle
dependencies {
    compile fileTree(dir: 'libs', include: ['*.jar'])
    compile 'com.android.support:appcompat-v7:21.0.3'
}
2 - Create a file name color.xml to define the Toolbar colors
<?xml version="1.0" encoding="utf-8"?>
<resources>
    <color name="ColorPrimary">#FF5722</color>
    <color name="ColorPrimaryDark">#E64A19</color>
</resources>
3 - Modify your style.xml file
<resources>
    <!-- Base application theme. -->
    <style name="AppTheme" parent="Theme.AppCompat.Light.NoActionBar">

        <item name="colorPrimary">@color/ColorPrimary</item>
        <item name="colorPrimaryDark">@color/ColorPrimaryDark</item>
        <!-- Customize your theme here. -->
    </style>
</resources>
4 - Create a xml file like tool_bar.xml
<?xml version="1.0" encoding="utf-8"?>
<android.support.v7.widget.Toolbar
 xmlns:android="http://schemas.android.com/apk/res/android"
    android:layout_width="match_parent"
    android:layout_height="wrap_content"
    android:background="@color/colorPrimary"
    android:elevation="4dp" />
5 - Include the Toolbar into your main_activity.xml
<RelativeLayout xmlns:android="http://schemas.android.com/apk/res/android"
    xmlns:tools="http://schemas.android.com/tools"
    android:layout_width="match_parent"
    android:layout_height="match_parent"
    tools:context=".MainActivity">

    <include
        android:id="@+id/tool_bar"
        layout="@layout/tool_bar" />

    <TextView
        android:layout_below="@+id/tool_bar"
        android:layout_width="wrap_content"
        android:layout_height="wrap_content"
        android:layout_marginTop="@dimen/TextDimTop"
        android:text="@string/hello_world" />

</RelativeLayout>
6 - Then, put it inside your MainActivity class
package com.example.hp1.materialtoolbar;

import android.support.v4.widget.DrawerLayout;
import android.support.v7.app.ActionBarActivity;
import android.os.Bundle;
import android.support.v7.app.ActionBarDrawerToggle;
import android.support.v7.widget.LinearLayoutManager;
import android.support.v7.widget.RecyclerView;
import android.support.v7.widget.Toolbar;
import android.view.Menu;
import android.view.MenuItem;
import android.view.MotionEvent;
import android.view.View;
import android.widget.Toast;

/* When using AppCompat support library
 * (you need to extend Main Activity to
 * ActionBarActivity)
 * ActionBarActivity has deprecated, use AppCompatActivity
 */
public class MainActivity extends ActionBarActivity {
    // Declaring the Toolbar Object
    private Toolbar toolbar;

    @Override
    protected void onCreate(Bundle savedInstanceState) {
        super.onCreate(savedInstanceState);
        setContentView(R.layout.main_activity);

        // Attaching the layout to the toolbar object
        toolbar = (Toolbar) findViewById(R.id.tool_bar);
        // Setting toolbar as the ActionBar with setSupportActionBar() call
        setSupportActionBar(toolbar);
    }

    @Override
    public boolean onCreateOptionsMenu(Menu menu) {
        // Inflate the menu; this adds items to the action bar if it is present.
        getMenuInflater().inflate(R.menu.menu_main, menu);
        return true;
    }

    @Override
    public boolean onOptionsItemSelected(MenuItem item) {
        // Handle action bar item clicks here. The action bar will
        // automatically handle clicks on the Home/Up button, so long
        // as you specify a parent activity in AndroidManifest.xml.
        int id = item.getItemId();

        //noinspection SimplifiableIfStatement
        if (id == R.id.action_settings) {
            return true;
        }

        return super.onOptionsItemSelected(item);
    }
}
7 - And finally, add your "Button Items" to the menu_main.xml inside of /res/menu/ directory
<?xml version="1.0" encoding="utf-8"?>
   <menu
        xmlns:android="http://schemas.android.com/apk/res/android"
        xmlns:app="http://schemas.android.com/apk/res-auto"
        xmlns:tools="http://schemas.android.com/tools"
        tools:context=".MainActivity">
        <item
            android:id="@+id/action_settings"
            android:orderInCategory="100"
            android:title="@string/action_settings"
            app:showAsAction="never" />
        <item
            android:id="@+id/action_search"
            android:orderInCategory="200"
            android:title="Search"
            android:icon="@drawable/ic_search"
            app:showAsAction="ifRoom"/>
        <item
            android:id="@+id/action_user"
            android:orderInCategory="300"
            android:title="User"
            android:icon="@drawable/ic_user"
            app:showAsAction="ifRoom" />
    </menu>
Toolbar customization can done by following ways
write button and textViews code inside toolbar as shown below
<android.support.v7.widget.Toolbar
    xmlns:app="http://schemas.android.com/apk/res-auto"
    android:id="@+id/app_bar"
    android:layout_width="match_parent"
    android:layout_height="wrap_content"
    >

    <Button
      android:layout_width="wrap_content"
        android:layout_height="@dimen/btn_height_small"
        android:text="Departure"
        android:layout_gravity="right"
        />
</android.support.v7.widget.Toolbar>
Other way is to use item menu as shown below
@Override
public boolean onCreateOptionsMenu(Menu menu) {
    // Inflate the menu; this adds items to the action bar if it is present.
    getMenuInflater().inflate(R.menu.menu_main, menu);
    return true;
}
Another possibility is to set the app:actionViewClass attribute in your menu:
<menu xmlns:android="http://schemas.android.com/apk/res/android"
      xmlns:app="http://schemas.android.com/apk/res-auto">
  <item
     android:id="@+id/get_item"
     android:orderInCategory="1"
     android:text="Get"
     app:showAsAction="always"
     app:actionViewClass="android.support.v7.widget.AppCompatButton"/>
</menu>
In your code you can access this button after the menu was inflated:
public boolean onCreateOptionsMenu(Menu menu) {
    MenuInflater menuInflater = getMenuInflater();
    menuInflater.inflate(R.menu.sample, menu);

    MenuItem getItem = menu.findItem(R.id.get_item);
    if (getItem != null) {
        AppCompatButton button = (AppCompatButton) getItem.getActionView();
        //Set a ClickListener, the text,
        //the background color or something like that
    }

    return super.onCreateOptionsMenu(menu);
}
I have added text in ToolBar :
menu_skip.xml
<menu xmlns:android="http://schemas.android.com/apk/res/android"
    xmlns:app="http://schemas.android.com/apk/res-auto"
    xmlns:tools="http://schemas.android.com/tools"
    tools:context=".MainActivity">

    <item
        android:id="@+id/action_settings"
        android:title="@string/text_skip"
        app:showAsAction="never" />
</menu>
MainActivity.java
@Override
boolean onCreateOptionsMenu(Menu menu) {
    inflater = getMenuInflater();
    inflater.inflate(R.menu.menu_otp_skip, menu);
    return true;
}

@Override
public boolean onOptionsItemSelected(MenuItem item) {
    switch (item.getItemId()) {
        // action with ID action_refresh was selected
        case R.id.menu_item_skip:
            Toast.makeText(this, "Skip selected", Toast.LENGTH_SHORT)
                    .show();
            break;
        default:
            break;
    }
    return true;
}
They are called menu items or action buttons in toolbar/actionbar. Here you have Google tutorial how it works and how to add them https://developer.android.com/training/basics/actionbar/adding-buttons.html
You can actually put anything inside a toolbar. See the below code.
<android.support.v7.widget.Toolbar
        android:id="@+id/toolbar"
        android:layout_width="match_parent"
        android:layout_height="wrap_content"
        android:layout_alignParentStart="true"
        android:background="@color/colorPrimary">

</android.support.v7.widget.Toolbar>
Between the above toolbar tag you can put almost anything. That is the benefit of using a Toolbar.
Source: Android Toolbar Example
You could use actionLayout from the support library.
menu.xml
<?xml version="1.0" encoding="utf-8"?>
<menu xmlns:android="http://schemas.android.com/apk/res/android"
xmlns:app="http://schemas.android.com/apk/res-auto">

<item
    android:id="@+id/button_item"
    android:title=""
    app:actionLayout="@layout/button_layout"
    app:showAsAction="always"
    />
</menu>
button_layout.xml
<?xml version="1.0" encoding="utf-8"?>
<RelativeLayout
xmlns:android="http://schemas.android.com/apk/res/android"
android:layout_width="fill_parent"
android:layout_height="match_parent"
android:orientation="horizontal">

<Button
    android:id="@+id/button"
    android:layout_width="wrap_content"
    android:layout_height="wrap_content"
    android:layout_centerHorizontal="true"
    android:layout_centerVertical="true"
    />

</RelativeLayout>
Activity.java
@Override
public boolean onCreateOptionsMenu(Menu menu) {
    getMenuInflater().inflate(R.menu.menu, menu);
    MenuItem item = menu.findItem(R.id.button_item);
    Button btn = item.getActionView().findViewById(R.id.button);
    btn.setOnClickListener(new View.OnClickListener() {
        @Override
        public void onClick(View view) {
            Toast.makeText(MainActivity.this, "Toolbar Button Clicked!", Toast.LENGTH_SHORT).show();
        }
    });
    return true;
}
I was able to achieve that by wrapping Button with ConstraintLayout:
<androidx.coordinatorlayout.widget.CoordinatorLayout xmlns:android="http://schemas.android.com/apk/res/android"
    xmlns:app="http://schemas.android.com/apk/res-auto"
    xmlns:tools="http://schemas.android.com/tools"
    android:layout_width="match_parent"
    android:layout_height="match_parent">

    <com.google.android.material.appbar.AppBarLayout
        android:layout_width="match_parent"
        android:layout_height="wrap_content"
        app:elevation="0dp">

        <androidx.appcompat.widget.Toolbar
            android:id="@+id/top_toolbar"
            android:layout_width="match_parent"
            android:layout_height="?attr/actionBarSize"
            android:background="@color/white_color">

            <androidx.constraintlayout.widget.ConstraintLayout
                android:layout_width="match_parent"
                android:layout_marginTop="10dp"
                android:layout_height="wrap_content">

                <TextView
                    android:id="@+id/cancel"
                    android:layout_width="wrap_content"
                    android:layout_height="wrap_content"
                    android:text="@string/cancel"
                    android:layout_marginStart="5dp"
                    app:layout_constraintBottom_toBottomOf="parent"
                    app:layout_constraintLeft_toLeftOf="parent"
                    app:layout_constraintTop_toTopOf="parent" />

                <Button
                    android:id="@+id/btn_publish"
                    android:layout_width="wrap_content"
                    android:layout_height="wrap_content"
                    android:text="@string/publish"
                    android:background="@drawable/button_publish_rounded"
                    app:layout_constraintTop_toTopOf="parent"
                    app:layout_constraintBottom_toBottomOf="parent"
                    app:layout_constraintEnd_toEndOf="parent"
                    android:layout_marginEnd="10dp"
                    app:layout_constraintLeft_toRightOf="@id/cancel"
                    tools:layout_editor_absoluteY="0dp" />

            </androidx.constraintlayout.widget.ConstraintLayout>

        </androidx.appcompat.widget.Toolbar>

    </com.google.android.material.appbar.AppBarLayout>

</androidx.coordinatorlayout.widget.CoordinatorLayout>
You may create a drawable resourcebutton_publish_rounded, define the button properties and assign this file to button's android:background property:
<?xml version="1.0" encoding="utf-8"?>
<shape xmlns:android="http://schemas.android.com/apk/res/android">
    <solid android:color="@color/green" />
    <corners android:radius="100dp" />
</shape>