13

I'm wanting to know if there's a way I can transform my view to look something like iPhone folders. In other words, I want my view to split somewhere in the middle and reveal a view underneath it. Is this possible?

alt text

EDIT: Per the suggestion below, I could take a screenshot of my application by doing this:

UIGraphicsBeginImageContext(self.view.bounds.size);
[self.view.layer renderInContext:UIGraphicsGetCurrentContext()];
UIImage *viewImage = UIGraphicsGetImageFromCurrentImageContext();
UIGraphicsEndImageContext();

Not sure what to do with this, however.

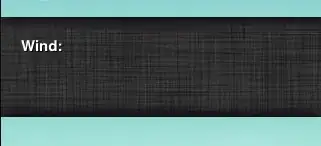
EDIT:2 I've figured out how to add some shadows to my view, and here's what I've achieved (cropped to show relevant part):

alt text

EDIT:3

http://github.com/jwilling/JWFolders

Luke Mcneice
  • 3,012
  • 4
  • 38
  • 50
sudo rm -rf
  • 29,408
  • 19
  • 102
  • 161
  • ahhh well, I found you on cocoacontrols.com my good fellow ^^. open source FTW! =) –  Feb 03 '13 at 19:58
  • Indeed you did. Thanks for helping me get started on that in the first place. ;) – sudo rm -rf Feb 03 '13 at 19:59
  • You can have a look at `OGActionChooser` ;) but it seems they have server problems currently :( –  Feb 03 '13 at 20:03

3 Answers3

6

the basic thought will be to take a picture of your current state and split it somewhere. Then animate both parts by setting a new frame. I don't know how to take a screenshot programmatically so I can't provide sample code…

EDIT: hey hey it's not looking great but it works ^^

// wouldn't be sharp on retina displays, instead use "withOptions" and set scale to 0.0
// UIGraphicsBeginImageContext(self.view.bounds.size);
UIGraphicsBeginImageContextWithOptions(self.view.bounds.size, NO, 0.0);
[self.view.layer renderInContext:UIGraphicsGetCurrentContext()];
UIImage *f = UIGraphicsGetImageFromCurrentImageContext();
UIGraphicsEndImageContext();

CGRect fstRect = CGRectMake(0, 0, 320, 200);
CGRect sndRect = CGRectMake(0, 200, 320, 260); // was 0,200,320,280


CGImageRef fImageRef = CGImageCreateWithImageInRect([f CGImage], fstRect);
UIImage *fCroppedImage = [UIImage imageWithCGImage:fImageRef];
CGImageRelease(fImageRef);

CGImageRef sImageRef = CGImageCreateWithImageInRect([f CGImage], sndRect);
UIImage *sCroppedImage = [UIImage imageWithCGImage:sImageRef];
CGImageRelease(sImageRef);


UIImageView *first = [[UIImageView alloc]initWithFrame:fstRect];
first.image = fCroppedImage;
//first.contentMode = UIViewContentModeTop;
UIImageView *second = [[UIImageView alloc]initWithFrame:sndRect];
second.image = sCroppedImage;
//second.contentMode = UIViewContentModeBottom;

UIView *blank = [[UIView alloc]initWithFrame:CGRectMake(0, 0, 320, 460)];
blank.backgroundColor = [UIColor darkGrayColor];

[self.view addSubview:blank];
[self.view addSubview:first];
[self.view addSubview:second];

[UIView animateWithDuration:2.0 animations:^{
    second.center = CGPointMake(second.center.x, second.center.y+75);
}];

You can uncomment the two .contentMode lines and the quality will improve but in my case the subview has an offset of 10px or so (you can see it by setting a background color to both subviews)

//EDIT 2: ok found that bug. Had used the whole 320x480 screen, but had to cut off the status bar so it should be 320x460 and all is working great ;)

  • I think CoreGraphics or Cocos2d should work but maybe it's simpler to take to screenshots if you can specify a region to capture / or if you will use a UIImageView you can set the automatic resize to stay always in the top/bottom corner and then cut off the frame a little bit –  Dec 20 '10 at 21:19
  • Thanks for your hard work, it's looking good. How would I return to the main view after doing this? – sudo rm -rf Dec 20 '10 at 22:23
  • I think there are million ways xD but the easiest is to remove the 3 subviews (or more if its getting complex). For example if the user touches somewhere outside, I would handle it in touchesBegan:withEvent: –  Dec 20 '10 at 22:30
  • [UIView animateWithDuration:2.0 animations:^{ second.center = CGPointMake(second.center.x, second.center.y-75); }]; and only after the animation period remove it from superview –  Dec 20 '10 at 22:40
  • comon it's not that hard to save the subview in a class variable ;) and by the way I would create a whole ViewController for this purpose –  Dec 20 '10 at 22:55
  • Already posted a question for this, but do you know how you'd change this to work with Retina? – sudo rm -rf Feb 28 '11 at 19:43
  • that's the UIGraphicsBeginImageContextWithOptions() magic :D. scale 0.0 is used to take the resolution of the current screen (in fact retina if supported) –  Mar 01 '11 at 16:26
2

Instead of taking a snapshot of the view, you could use a separate view for each row of icons. You'll have to do a bit more work with repositioning stuff, but the rows won't be static when the folder is open (in other words, they'll keep redrawing as necessary).

Dave DeLong
  • 242,470
  • 58
  • 448
  • 498
  • Dave, thanks for your comment! I actually wasn't wanting the icons (should've clarified in my answer), but I just wanted to effect of splitting the view in half. – sudo rm -rf Dec 21 '10 at 16:55
1

I took relikd's code as a base and made it a bit more dynamic.

You can specify split position and direction when calling the function and I added a boarder to the split images.

#define splitAnimationTime 0.5
- (void)split:(SplitDirection)splitDirection
 atYPostition:(int)splitYPosition
withRevealedViewHeight:(int)revealedViewHeight{

    // wouldn't be sharp on retina displays, instead use "withOptions" and set scale to 0.0
    // UIGraphicsBeginImageContext(self.view.bounds.size);
    UIGraphicsBeginImageContextWithOptions(self.view.bounds.size, NO, 0.0);
    [self.view.layer renderInContext:UIGraphicsGetCurrentContext()];
    UIImage *f = UIGraphicsGetImageFromCurrentImageContext();
    UIGraphicsEndImageContext();

    CGRect fullScreenRect = [self getScreenFrameForCurrentOrientation];

    CGRect upperSplitRect = CGRectMake(0, 0,fullScreenRect.size.width, splitYPosition);
    CGRect lowerSplitRect = CGRectMake(0, splitYPosition, fullScreenRect.size.width, fullScreenRect.size.height-splitYPosition);


    CGImageRef upperImageRef = CGImageCreateWithImageInRect([f CGImage], upperSplitRect);
    UIImage *upperCroppedImage = [UIImage imageWithCGImage:upperImageRef];
    CGImageRelease(upperImageRef);

    CGImageRef lowerImageRef = CGImageCreateWithImageInRect([f CGImage], lowerSplitRect);
    UIImage *lowerCroppedImage = [UIImage imageWithCGImage:lowerImageRef];
    CGImageRelease(lowerImageRef);


    UIImageView *upperImage = [[UIImageView alloc]initWithFrame:upperSplitRect];
    upperImage.image = upperCroppedImage;
    //first.contentMode = UIViewContentModeTop;

    UIView *upperBoarder = [[UIView alloc]initWithFrame:CGRectMake(0, splitYPosition, fullScreenRect.size.width, 1)];
    upperBoarder.backgroundColor = [UIColor whiteColor];
    [upperImage addSubview:upperBoarder];


    UIImageView *lowerImage = [[UIImageView alloc]initWithFrame:lowerSplitRect];
    lowerImage.image = lowerCroppedImage;
    //second.contentMode = UIViewContentModeBottom;

    UIView *lowerBoarder = [[UIView alloc]initWithFrame:CGRectMake(0, 0, fullScreenRect.size.width, 1)];
    lowerBoarder.backgroundColor = [UIColor whiteColor];
    [lowerImage addSubview:lowerBoarder];

    int reveledViewYPosition = splitYPosition;

    if(splitDirection==SplitDirectionUp){
        reveledViewYPosition = splitYPosition - revealedViewHeight;
    }


    UIView *revealedView = [[UIView alloc]initWithFrame:CGRectMake(0, reveledViewYPosition, fullScreenRect.size.width, revealedViewHeight)];
    revealedView.backgroundColor = [UIColor scrollViewTexturedBackgroundColor];


    [self.view addSubview:revealedView];
    [self.view addSubview:upperImage];
    [self.view addSubview:lowerImage];

    [UIView animateWithDuration:splitAnimationTime animations:^{
        if(splitDirection==SplitDirectionUp){
            upperImage.center = CGPointMake(upperImage.center.x, upperImage.center.y-revealedViewHeight);
        } else { //assume down
            lowerImage.center = CGPointMake(lowerImage.center.x, lowerImage.center.y+revealedViewHeight);
        }
    }];
}

This means I can call it like this:

[self split:SplitDirectionUp atYPostition:500 withRevealedViewHeight:200];

I used these conveniance functions in the updated split function:

- (CGRect)getScreenFrameForCurrentOrientation {
    return [self getScreenFrameForOrientation:[UIApplication sharedApplication].statusBarOrientation];
}

- (CGRect)getScreenFrameForOrientation:(UIInterfaceOrientation)orientation {

    UIScreen *screen = [UIScreen mainScreen];
    CGRect fullScreenRect = screen.bounds;
    BOOL statusBarHidden = [UIApplication sharedApplication].statusBarHidden;

    //implicitly in Portrait orientation.
    if(orientation == UIInterfaceOrientationLandscapeRight || orientation ==  UIInterfaceOrientationLandscapeLeft){
        CGRect temp = CGRectZero;
        temp.size.width = fullScreenRect.size.height;
        temp.size.height = fullScreenRect.size.width;
        fullScreenRect = temp;
    }

    if(!statusBarHidden){
        CGFloat statusBarHeight = 20;
        fullScreenRect.size.height -= statusBarHeight;
    }

    return fullScreenRect;
}

and this enum:

typedef enum SplitDirection
{
    SplitDirectionDown,
    SplitDirectionUp
}SplitDirection;

Adding a return to normaal function and adding the arrow would be a great addition.
Community
  • 1
  • 1
Luke Mcneice
  • 3,012
  • 4
  • 38
  • 50