I would like to increase the height of a tableview whenever the keyboard disappears. I have a tableview that is populated from the bottom upwards. The tableview is not filled entirely with data, meaning there is some empty space at the top of the tableview. There will be some cells in the tableview. Since the table view is populated from the bottom upwards, these cells should be towards the bottom of the tableview. When the keyboard is shown, the total height of the tableview is about half of the screen. When the keyboard disappears, the total height of the tableview should be almost the whole screen. This means that when the keyboard disappears, the cells should start from further down on the screen.
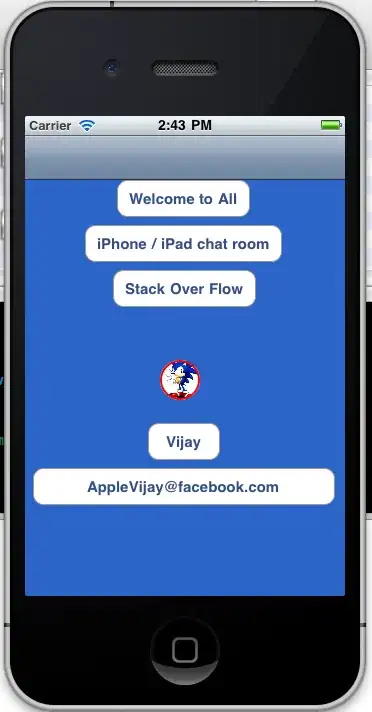
This is what it looks like when there are two cells in the tableview:
This is what it looks like when two more cells have been added to the tableview:
This is what it looks like when the keyboard disappears:
When the keyboard disappears, the four cells should start from the bottom of the screen, not from halfway up the screen. The four cells should move downwards so that they start from where the gray line at the bottom of the screen is. There should not be a big gap between where the first cell (which says "Apple") is and where the gray line at the bottom of the screen is. At the same time, the tableView itself should be bigger. This means that while the top of the tableview remains in the same place, the bottom of the tableview is now lower than it was before, because the keyboard is now not taking up approximately half of the screen. How can I do this? Thanks.
Here is my code right now:
class ViewController: UIViewController, UITableViewDataSource, UITableViewDelegate {

    @IBOutlet weak var textField: UITextField!
    @IBOutlet weak var lowerGrayLine: UIView!

    @IBOutlet weak var tableView: UITableView!

    var fruits = [FruitModel]()

    override func viewDidLoad() {
        super.viewDidLoad()

        //Adjust height of the lower Gray Line
        lowerGrayLine.frame.origin.y = 411

        //No dividing lines in the tableview initially
        self.tableView.separatorStyle = .none

        tableView.rowHeight = UITableViewAutomaticDimension
        tableView.estimatedRowHeight = 140

        if (self.tableView(self.tableView, numberOfRowsInSection: 0) > 0)
        {
            self.updateTableContentInset()
        }

        // Allow for keyboard dismissal
        let tap: UITapGestureRecognizer = UITapGestureRecognizer(target: self, action: #selector(ViewController.dismissKeyboard))
        view.addGestureRecognizer(tap)

        NotificationCenter.default.addObserver(self, selector: #selector(ViewController.keyboardWillShow), name: NSNotification.Name.UIKeyboardWillShow, object: nil)
        NotificationCenter.default.addObserver(self, selector: #selector(ViewController.keyboardWillHide), name: NSNotification.Name.UIKeyboardWillHide, object: nil)

        // Show keyboard
        textField.becomeFirstResponder()
    }

    func keyboardWillShow(notification: NSNotification) {
        if let keyboardSize = (notification.userInfo?[UIKeyboardFrameBeginUserInfoKey] as? NSValue)?.cgRectValue {
            //Adjust text box, and dividing line placement
            textField.frame.origin.y = 416
            lowerGrayLine.frame.origin.y = 411
        }
    }

    func keyboardWillHide(notification: NSNotification) {
        if let keyboardSize = (notification.userInfo?[UIKeyboardFrameBeginUserInfoKey] as? NSValue)?.cgRectValue {
            textField.frame.origin.y = 597
            lowerGrayLine.frame.origin.y = 557
        }
    }

    //Calls this function when the tap is recognized.
    func dismissKeyboard() {
        //Causes the view (or one of its embedded text fields) to resign the first responder status.
        view.endEditing(true)
    }

    func tableView(_ tableView: UITableView, numberOfRowsInSection section: Int) -> Int {
        return self.fruits.count;
    }

    func tableView(_ tableView: UITableView, cellForRowAt indexPath: IndexPath) -> UITableViewCell {
        let cellIdentifier = "fruitCell"
        guard let cell = tableView.dequeueReusableCell(withIdentifier: cellIdentifier, for: indexPath) as? FruitTableViewCell else {
            fatalError("The dequeued cell is not an instance of FruitTableViewCell.")
        }

        var fruitName = fruits[indexPath.row]
        var fruitNamename = fruitName.name

        var colon = ":"

        cell.nameLabel.text = fruitNamename + colon

        cell.fruitLabel.text = fruitName.fruit

        //Make some adjustments to make a line appear when a fruitCell is actually being shown
        cell.preservesSuperviewLayoutMargins = false
        cell.separatorInset = UIEdgeInsets.zero
        cell.layoutMargins = UIEdgeInsets.zero

        // This causes the bottom-most cell to not have a cell separator
        if (indexPath.row == fruits.count-1) {
            cell.separatorInset = UIEdgeInsetsMake(0, cell.bounds.size.width, 0, 0);
        }
        return cell
    }

    func tableView(_ tableView: UITableView, heightForRowAt indexPath: IndexPath) -> CGFloat {
        return UITableViewAutomaticDimension
    }

    // Adjust the tableView
    func updateTableContentInset() {
        let numRows = tableView(tableView, numberOfRowsInSection: 0)

        var contentInsetTop = tableView.bounds.size.height
        for i in 0..<numRows {
            contentInsetTop -= tableView(tableView, heightForRowAt: IndexPath(item: i, section: 0))
            if contentInsetTop <= 0 {
                contentInsetTop = 0
            }
        }
        self.tableView.contentInset = UIEdgeInsetsMake(contentInsetTop, 0, 0, 0)
        self.tableView.scrollToRow(at: IndexPath(item: numRows-1, section: 0), at: .bottom, animated: false)
        //Prevent scrolling
        self.tableView.bounces = false;
        //When we have actual fruit Cells to show, we want the line divisions
        self.tableView.separatorStyle = .singleLine
    }
}
I have tried adding the following code to my keyboardWillShow function:
var tableViewFrame: CGRect!
tableViewFrame = self.tableView.frame
tableViewFrame.size.height += 146.0
tableView.frame = tableViewFrame
tableView.contentInset = UIEdgeInsetsMake(146.0, 0, 0, 0);
However, when the keyboard disappears, there are horizontal gray lines that span the screen, as shown below:
EDIT:
These horizontal gray lines (six in total) should not be there. How do I prevent them from appearing when the keyboard has disappeared?


