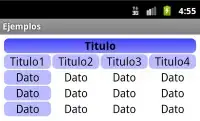
You cannot change/add constraint to default UITableViewCell. Thus, you should start with first creating a new class which should be a subclass of UITableViewCell.
A tip on creating a new UITableViewCell class would be: from the create a new file page, go with the Cocoa Touch Class option and in the new window, after naming your cell make sure you type UITableViewCell to subclass section and select Also create a XIB file. This will create you both a .swift and .xib file.
Go to .xib file and design your cell as you wish. Put the label at the top left corner of the cell.
After you are done with designing your custom cell, add below lines first to your tableView:cellForRow function so that you can make use of your custom UITableViewCell.
func tableView(_ tableView: UITableView, cellForRowAt indexPath: IndexPath) -> UITableViewCell {

    var cell : SomeTableViewCell!

    let tempCell = tableView.dequeueReusableCell(withIdentifier: reuseIdentifier)
    if tempCell != nil {
        cell = tempCell as! SomeTableViewCell
    }
    if(cell == nil)
    {
        cell = Bundle.main.loadNibNamed("SomeTableViewCell", owner: self, options: nil)?.first as! SomeTableViewCell
    }

    ...
    Do other customizations with your cell here.
    e.g. -> cell.label.textAlignment = .center
    ...
}
I know this is not a full documentation of how to use UITableViewCell, but I tried to give you the minimal required information for designing and using a custom UITableViewCell. For a full explanation you can use any tutorial you like or for example you can take a look for this question as a start:
creating custom tableview cells in swift
Of course, feel free to ask me if there is something missing on my answer.
Hope this helps you to start with!
Edit: I noticed I passed reuseIdentifier. reuseIdentifier is just a string that you better assign to your custom cell from its .xib and use the same string here

