131

How can I do to put the value passed in the construction, to make a timer that rounds to the first decimal and shows at the child text of my RaisedButton? I've tried but without luck. I manage to make work the callback function with a simple Timer but no periodic and with no update of value in real time in the text...

import 'package:flutter/material.dart';
import 'dart:ui';
import 'dart:async';

class TimerButton extends StatefulWidget {
  final Duration timerTastoPremuto;


  TimerButton(this.timerTastoPremuto);

  @override
  _TimerButtonState createState() => _TimerButtonState();
}

class _TimerButtonState extends State<TimerButton> {
  @override
  Widget build(BuildContext context) {
    return Container(
      margin: EdgeInsets.all(5.0),
      height: 135.0,
      width: 135.0,
      child: new RaisedButton(
        elevation: 100.0,
        color: Colors.white.withOpacity(.8),
        highlightElevation: 0.0,
        onPressed: () {
          int _start = widget.timerTastoPremuto.inMilliseconds;

          const oneDecimal = const Duration(milliseconds: 100);
          Timer _timer = new Timer.periodic(
              oneDecimal,
                  (Timer timer) =>
                  setState(() {
                    if (_start < 100) {
                      _timer.cancel();
                    } else {
                      _start = _start - 100;
                    }
                  }));

        },
        splashColor: Colors.red,
        highlightColor: Colors.red,
        //shape: RoundedRectangleBorder e tutto il resto uguale
        shape: BeveledRectangleBorder(
            side: BorderSide(color: Colors.black, width: 2.5),
            borderRadius: new BorderRadius.circular(15.0)),
        child: new Text(
          "$_start",
          style: new TextStyle(fontFamily: "Minim", fontSize: 50.0),
        ),
      ),
    );
  }
}
Floris Marpepa
  • 1,891
  • 4
  • 12
  • 22
  • please add some code, your question is not cleared. – satish Feb 09 '19 at 19:57
  • 1
    Yes, simply use `setState` to update the value, don't put any widget in it – Yann39 Feb 09 '19 at 19:58
  • what's the code for a timer? can you link me something? – Floris Marpepa Feb 09 '19 at 21:23
  • Use the `Timer` class which represent a timer that can be fired repeatedly using [Timer.periodic](https://docs.flutter.io/flutter/dart-async/Timer/Timer.periodic.html). You can also take a look at the [Stopwatch](https://api.dartlang.org/stable/2.1.0/dart-core/Stopwatch-class.html) class. – Yann39 Feb 09 '19 at 22:32

14 Answers14

284

Here is an example using Timer.periodic :

Countdown starts from 10 to 0 on button click :

import 'dart:async';

[...]

Timer _timer;
int _start = 10;

void startTimer() {
  const oneSec = const Duration(seconds: 1);
  _timer = new Timer.periodic(
    oneSec,
    (Timer timer) {
      if (_start == 0) {
        setState(() {
          timer.cancel();
        });
      } else {
        setState(() {
          _start--;
        });
      }
    },
  );
}

@override
void dispose() {
  _timer.cancel();
  super.dispose();
}

Widget build(BuildContext context) {
  return new Scaffold(
    appBar: AppBar(title: Text("Timer test")),
    body: Column(
      children: <Widget>[
        RaisedButton(
          onPressed: () {
            startTimer();
          },
          child: Text("start"),
        ),
        Text("$_start")
      ],
    ),
  );
}

Result :

Flutter countdown timer example

You can also use the CountdownTimer class from the quiver.async library, usage is even simpler :

import 'package:quiver/async.dart';

[...]

int _start = 10;
int _current = 10;

void startTimer() {
  CountdownTimer countDownTimer = new CountdownTimer(
    new Duration(seconds: _start),
    new Duration(seconds: 1),
  );

  var sub = countDownTimer.listen(null);
  sub.onData((duration) {
    setState(() { _current = _start - duration.elapsed.inSeconds; });
  });

  sub.onDone(() {
    print("Done");
    sub.cancel();
  });
}

Widget build(BuildContext context) {
  return new Scaffold(
    appBar: AppBar(title: Text("Timer test")),
    body: Column(
      children: <Widget>[
        RaisedButton(
          onPressed: () {
            startTimer();
          },
          child: Text("start"),
        ),
        Text("$_current")
      ],
    ),
  );
}

EDIT : For the question in comments about button click behavior

With the above code which uses Timer.periodic, a new timer will indeed be started on each button click, and all these timers will update the same _start variable, resulting in a faster decreasing counter.

There are multiple solutions to change this behavior, depending on what you want to achieve :

  • disable the button once clicked so that the user could not disturb the countdown anymore (maybe enable it back once timer is cancelled)
  • wrap the Timer.periodic creation with a non null condition so that clicking the button multiple times has no effect
if (_timer != null) {
  _timer = new Timer.periodic(...);
}
  • cancel the timer and reset the countdown if you want to restart the timer on each click :
if (_timer != null) {
  _timer.cancel();
  _start = 10;
}
_timer = new Timer.periodic(...);
  • if you want the button to act like a play/pause button :
if (_timer != null) {
  _timer.cancel();
  _timer = null;
} else {
  _timer = new Timer.periodic(...);
}

You could also use this official async package which provides a RestartableTimer class which extends from Timer and adds the reset method.

So just call _timer.reset(); on each button click.

Finally, Codepen now supports Flutter ! So here is a live example so that everyone can play with it : https://codepen.io/Yann39/pen/oNjrVOb

Yann39
  • 14,285
  • 11
  • 56
  • 84
  • Ehm seeing your code helps me a littlebit to understand. Now I have some questions. What's the difference beetween Timer and Timer.periodic? If I would like to make a Timer that counts down like yours but that shows the first decimal too. – Floris Marpepa Feb 10 '19 at 18:26
  • 5
    `Timer` creates a new timer whose callback function is called only once after the specified duration (e.g. to delay an operation). `Timer.periodic` creates a new **repeating** timer so that the callback function is invoked repeatedly according to the specified duration interval. If you want to display a decimal number use a `double` instead of an `int`. If your question is to change the interval so that it decreases by 0.1 then just change `1` to `0.1` in the code above. Finally if you need to format the output see [NumberFormat](https://docs.flutter.io/flutter/intl/NumberFormat-class.html). – Yann39 Feb 11 '19 at 09:33
  • @Yann39 There's a delay like 2-3 seconds from when you click the startTimer button. Any idea on how to remove this? I still want my timer to be periodic – Bmbariah Jun 12 '19 at 12:40
  • How to make the timer survive its host program being killed, and restarted? – Yu Shen Mar 03 '20 at 22:17
  • 1
    You could simply store the timer start time in the shared preferences, then on app start, set the timer value to current time minus start time in seconds. – Yann39 Mar 04 '20 at 18:14
  • @Yann39 Question about your Timer.periodic example. Would the button not continue subtracting 1 every time it is clicked hence causing the timer to speed up with every click? Thanks! – Andrew Caprario May 29 '20 at 01:03
  • 1
    @AndrewCaprario I added some more information at the end of the answer as it is too much for a comment. I also added a codepen link. – Yann39 May 29 '20 at 10:43
  • @Yann39 that is quite an explanation. thank you so much, this has been a great learning opportunity! Very complete explanation. – Andrew Caprario May 29 '20 at 17:00
  • @Yann39 I recently used the countdowntimer you mentioned for my Pomodoro app, however, I'm facing the issue of it having delays when it runs in the background. I read somewhere that you could have callback on each state, but I am not sure how to ensure I resume the timer seamlessly or not having to pause it at all. – bingcheng45 Jun 17 '20 at 03:24
  • Hard to answer without seeing how you implemented it. But what do you mean by "runs in the background" ? I think you shouldn't run it in the background but store the state instead and retrieve it later. See this answer https://stackoverflow.com/a/58065869/1274485. I think you better have to create a new SO question for this. – Yann39 Jun 18 '20 at 07:41
  • This is a fantastic answer. I'm noticing that since setState is called every second, allowing a user to type into a textfield while the timer is running is very frustrating because there is a pause during the setState where the text is not recognized. Is there a way to fix this? – Coltuxumab Jun 30 '20 at 16:37
  • 1
    @Coltuxumab Simply have your counter in a different widget with its own build method. – Yann39 Jul 01 '20 at 10:29
  • This causing my entire blocbuilder to redraw continuously for the duration. Couldn't make use of it. – EngineSense Dec 03 '20 at 07:18
  • thank you so much for your great effort. but how can make this timer works in background?! – M. Reyhani Feb 20 '21 at 15:30
  • @M.Reyhani Running tasks in background is something discouraged on mobile systems, a better solution is to simply store the timer's start time in the user shared preferences, then retrieve it when needed so you can compute the current duration. – Yann39 Feb 20 '21 at 19:51
  • anyway, i have a question if we running countdown without button trigger. can be possible if we use Timer.periodic ? – Michael Fernando Jun 03 '22 at 04:20
50

I have created a Generic Timer Widget which can be used to display any kind of timer and its flexible as well.

This Widget takes following properties

  1. secondsRemaining: duration for which timer needs to run in seconds
  2. whenTimeExpires: what action needs to be performed if timer finished
  3. countDownStyle: any kind of style which you want to give to timer
  4. countDownFormatter: the way user wants to display the count down timer e.g hh mm ss string like 01 hours: 20 minutes: 45 seconds

you can provide a default formatter ( formatHHMMSS ) in case you don't want to supply it from every place.

// provide implementation for this - formatHHMMSS(duration.inSeconds); or use below one which I have provided.

import 'package:flutter/material.dart';
class CountDownTimer extends StatefulWidget {
  const CountDownTimer({
    Key key,
    int secondsRemaining,
    this.countDownTimerStyle,
    this.whenTimeExpires,
    this.countDownFormatter,
  })  : secondsRemaining = secondsRemaining,
        super(key: key);

  final int secondsRemaining;
  final Function whenTimeExpires;
  final Function countDownFormatter;
  final TextStyle countDownTimerStyle;

  State createState() => new _CountDownTimerState();
}

class _CountDownTimerState extends State<CountDownTimer>
    with TickerProviderStateMixin {
  AnimationController _controller;
  Duration duration;

  String get timerDisplayString {
    Duration duration = _controller.duration * _controller.value;
    return widget.countDownFormatter != null
        ? widget.countDownFormatter(duration.inSeconds)
        : formatHHMMSS(duration.inSeconds);
      // In case user doesn't provide formatter use the default one
     // for that create a method which will be called formatHHMMSS or whatever you like
  }

  @override
  void initState() {
    super.initState();
    duration = new Duration(seconds: widget.secondsRemaining);
    _controller = new AnimationController(
      vsync: this,
      duration: duration,
    );
    _controller.reverse(from: widget.secondsRemaining.toDouble());
    _controller.addStatusListener((status) {
      if (status == AnimationStatus.completed || status == AnimationStatus.dismissed) {
        widget.whenTimeExpires();
      }
    });
  }

  @override
  void didUpdateWidget(CountDownTimer oldWidget) {
    if (widget.secondsRemaining != oldWidget.secondsRemaining) {
      setState(() {
        duration = new Duration(seconds: widget.secondsRemaining);
        _controller.dispose();
        _controller = new AnimationController(
          vsync: this,
          duration: duration,
        );
        _controller.reverse(from: widget.secondsRemaining.toDouble());
        _controller.addStatusListener((status) {
          if (status == AnimationStatus.completed) {
            widget.whenTimeExpires();
          } else if (status == AnimationStatus.dismissed) {
            print("Animation Complete");
          }
        });
      });
    }
  }

  @override
  void dispose() {
    _controller.dispose();
    super.dispose();
  }

  @override
  Widget build(BuildContext context) {
    return new Center(
        child: AnimatedBuilder(
            animation: _controller,
            builder: (_, Widget child) {
              return Text(
                timerDisplayString,
                style: widget.countDownTimerStyle,
              );
            }));
  }
}

Usage:

 Container(
       width: 60.0,
       padding: EdgeInsets.only(top: 3.0, right: 4.0),
         child: CountDownTimer(
           secondsRemaining: 30,
           whenTimeExpires: () {
              setState(() {
                hasTimerStopped = true;
              });
            },
            countDownTimerStyle: TextStyle(
                color: Color(0XFFf5a623),
                fontSize: 17.0,
                height: 1.2,
            ),
          ),
        )

example for formatHHMMSS:

String formatHHMMSS(int seconds) {
  int hours = (seconds / 3600).truncate();
  seconds = (seconds % 3600).truncate();
  int minutes = (seconds / 60).truncate();

  String hoursStr = (hours).toString().padLeft(2, '0');
  String minutesStr = (minutes).toString().padLeft(2, '0');
  String secondsStr = (seconds % 60).toString().padLeft(2, '0');

  if (hours == 0) {
    return "$minutesStr:$secondsStr";
  }

  return "$hoursStr:$minutesStr:$secondsStr";
}

Null Safe Version of the Above Code

import 'package:flutter/material.dart';

class CountDownTimer extends StatefulWidget {
  const CountDownTimer({
    Key? key,
    required this.secondsRemaining,
    required this.whenTimeExpires,
    this.countDownFormatter,
    this.countDownTimerStyle,
  }) : super(key: key);

  final int secondsRemaining;
  final VoidCallback whenTimeExpires;
  final TextStyle? countDownTimerStyle;
  final Function(int seconds)? countDownFormatter;

  @override
  State createState() => _CountDownTimerState();
}

class _CountDownTimerState extends State<CountDownTimer>
    with TickerProviderStateMixin {
  late final AnimationController _controller;
  late final Duration duration;

  String get timerDisplayString {
    final duration = _controller.duration! * _controller.value;
    if (widget.countDownFormatter != null) {
      return widget.countDownFormatter!(duration.inSeconds) as String;
    } else {
      return formatHHMMSS(duration.inSeconds);
    }
  }

  String formatHHMMSS(int seconds) {
    final hours = (seconds / 3600).truncate();
    seconds = (seconds % 3600).truncate();
    final minutes = (seconds / 60).truncate();

    final hoursStr = (hours).toString().padLeft(2, '0');
    final minutesStr = (minutes).toString().padLeft(2, '0');
    final secondsStr = (seconds % 60).toString().padLeft(2, '0');

    if (hours == 0) {
      return '$minutesStr:$secondsStr';
    }

    return '$hoursStr:$minutesStr:$secondsStr';
  }

  @override
  void initState() {
    super.initState();
    duration = Duration(seconds: widget.secondsRemaining);
    _controller = AnimationController(
      vsync: this,
      duration: duration,
    );
    _controller
      ..reverse(from: widget.secondsRemaining.toDouble())
      ..addStatusListener((status) {
        if (status == AnimationStatus.completed ||
            status == AnimationStatus.dismissed) {
          widget.whenTimeExpires();
        }
      });
  }

  @override
  void didUpdateWidget(CountDownTimer oldWidget) {
    super.didUpdateWidget(oldWidget);
    if (widget.secondsRemaining != oldWidget.secondsRemaining) {
      setState(() {
        duration = Duration(seconds: widget.secondsRemaining);
        _controller.dispose();
        _controller = AnimationController(
          vsync: this,
          duration: duration,
        );
        _controller
          ..reverse(from: widget.secondsRemaining.toDouble())
          ..addStatusListener((status) {
            if (status == AnimationStatus.completed) {
              widget.whenTimeExpires();
            }
          });
      });
    }
  }

  @override
  void dispose() {
    _controller.dispose();
    super.dispose();
  }

  @override
  Widget build(BuildContext context) {
    return Center(
      child: AnimatedBuilder(
        animation: _controller,
        builder: (_, Widget? child) {
          return Text(
            timerDisplayString,
            style: widget.countDownTimerStyle,
          );
        },
      ),
    );
  }
}

Vipin Malik
  • 105
  • 2
  • 10
WitVault
  • 23,445
  • 19
  • 103
  • 133
34

Little late to the party but why don't you guys try animation.No I am not telling you to manage animation controllers and disposing them off and all that stuff, there's a built-in widget for that called TweenAnimationBuilder. You can animate between values of any type, here's an example with a Duration class

TweenAnimationBuilder<Duration>(
  duration: Duration(minutes: 3),
  tween: Tween(begin: Duration(minutes: 3), end: Duration.zero),
  onEnd: () {
    print('Timer ended');
  },
  builder: (BuildContext context, Duration value, Widget? child) {
    final minutes = value.inMinutes;
    final seconds = value.inSeconds % 60;
    return Padding(
      padding: const EdgeInsets.symmetric(vertical: 5),
      child: Text('$minutes:$seconds',
               textAlign: TextAlign.center,
               style: TextStyle(
               color: Colors.black,
               fontWeight: FontWeight.bold,
               fontSize: 30)));
    }),

and You also get onEnd call back which notifies you when the animation completes;

here's the output

Mahesh Jamdade
  • 17,235
  • 8
  • 110
  • 131
22

Here is my Timer widget, not related to the Question but may help someone.

import 'dart:async';

import 'package:flutter/material.dart';

class OtpTimer extends StatefulWidget {
  @override
  _OtpTimerState createState() => _OtpTimerState();
}

class _OtpTimerState extends State<OtpTimer> {
  final interval = const Duration(seconds: 1);

  final int timerMaxSeconds = 60;

  int currentSeconds = 0;

  String get timerText =>
      '${((timerMaxSeconds - currentSeconds) ~/ 60).toString().padLeft(2, '0')}: ${((timerMaxSeconds - currentSeconds) % 60).toString().padLeft(2, '0')}';

  startTimeout([int milliseconds]) {
    var duration = interval;
    Timer.periodic(duration, (timer) {
      setState(() {
        print(timer.tick);
        currentSeconds = timer.tick;
        if (timer.tick >= timerMaxSeconds) timer.cancel();
      });
    });
  }

  @override
  void initState() {
    startTimeout();
    super.initState();
  }

  @override
  Widget build(BuildContext context) {
    return Row(
      mainAxisSize: MainAxisSize.min,
      children: <Widget>[
        Icon(Icons.timer),
        SizedBox(
          width: 5,
        ),
        Text(timerText)
      ],
    );
  }
}

You will get something like this

enter image description here

Favas Kv
  • 2,961
  • 2
  • 28
  • 38
  • 6
    You have to wrap your startTimeout function with a mounted check of the widget like this if(mounted){startTimeout();}, or you will go to memory leak caused by the effect of setState and async code – Ali Abbas Nov 03 '20 at 06:41
18

doesnt directly answer your question. But helpful for those who want to start something after some time.

Future.delayed(Duration(seconds: 1), () {
            print('yo hey');
          });
Soropromo
  • 1,212
  • 12
  • 17
10

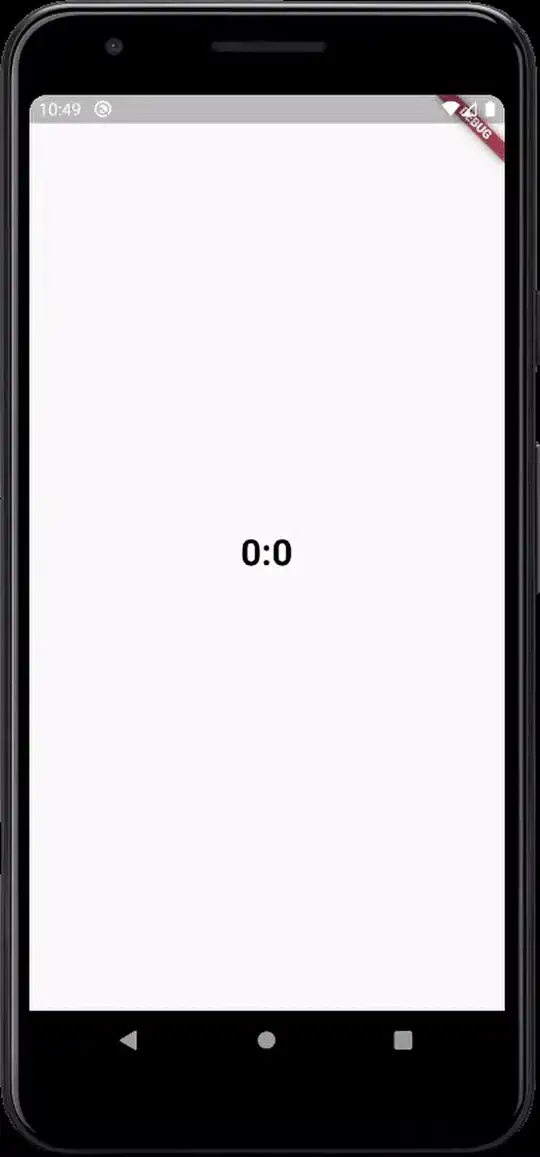
I've Created a amazing timer without any plugin, here you can also get count down timer. And don't forget to stop the timer on back pressed.

Here is the link of my timer full Project. *Hope this will help someone. Thank you. *

enter image description here

   import 'dart:async';

import 'package:flutter/material.dart';

void main() {
  runApp(const MyApp());
}

class MyApp extends StatelessWidget {
  const MyApp({Key? key}) : super(key: key);

  // This widget is the root of your application.
  @override
  Widget build(BuildContext context) {
    return MaterialApp(
      title: 'Flutter Demo',
      theme: ThemeData(
        primarySwatch: Colors.blue,
      ),
      home: AttendanceScreen(),
    );
  }
}

class AttendanceScreen extends StatefulWidget {
  AttendanceScreen();

  @override
  _AttendanceScreenState createState() => _AttendanceScreenState();
}

class _AttendanceScreenState extends State<AttendanceScreen> {
  static var countdownDuration = Duration(minutes: 10);
  static var countdownDuration1 = Duration(minutes: 10);
  Duration duration = Duration();
  Duration duration1 = Duration();
  Timer? timer;
  Timer? timer1;
  bool countDown = true;
  bool countDown1 = true;

  @override
  void initState() {
    var hours;
    var mints;
    var secs;
    hours = int.parse("00");
    mints = int.parse("00");
    secs = int.parse("00");
    countdownDuration = Duration(hours: hours, minutes: mints, seconds: secs);
    startTimer();
    reset();
    var hours1;
    var mints1;
    var secs1;
    hours1 = int.parse("10");
    mints1 = int.parse("00");
    secs1 = int.parse("00");
    countdownDuration1 =
        Duration(hours: hours1, minutes: mints1, seconds: secs1);
    startTimer1();
    reset1();
    super.initState();
  }

  @override
  Widget build(BuildContext context) {
    return WillPopScope(
      onWillPop: _onWillPop,
      child: Scaffold(
        appBar: AppBar(
          title: Text("Timer Example"),
          leading: IconButton(
            icon: Icon(Icons.arrow_back_ios),
            color: Colors.white,
            onPressed: () {
              _onWillPop();
            },
          ),
        ),
        body: Container(
          color: Colors.black12,
          width: double.infinity,
          child: Column(
              mainAxisAlignment: MainAxisAlignment.start,
              crossAxisAlignment: CrossAxisAlignment.center,
              children: [
                SizedBox(
                  height: 20,
                ),
                Text(
                  "Timer",
                  style: TextStyle(fontSize: 25),
                ),
                Container(
                    margin: EdgeInsets.only(top: 30, bottom: 30),
                    child: buildTime()),
                SizedBox(
                  height: 20,
                ),
                Text(
                  "Count down timer",
                  style: TextStyle(fontSize: 25),
                ),
                Container(
                    margin: EdgeInsets.only(top: 30, bottom: 30),
                    child: buildTime1()),
              ]),
        ),
      ),
    );
  }

  Future<bool> _onWillPop() async {
    final isRunning = timer == null ? false : timer!.isActive;
    if (isRunning) {
      timer!.cancel();
    }
    Navigator.of(context, rootNavigator: true).pop(context);
    return true;
  }

  void reset() {
    if (countDown) {
      setState(() => duration = countdownDuration);
    } else {
      setState(() => duration = Duration());
    }
  }

  void reset1() {
    if (countDown) {
      setState(() => duration1 = countdownDuration1);
    } else {
      setState(() => duration1 = Duration());
    }
  }

  void startTimer() {
    timer = Timer.periodic(Duration(seconds: 1), (_) => addTime());
  }

  void startTimer1() {
    timer = Timer.periodic(Duration(seconds: 1), (_) => addTime1());
  }

  void addTime() {
    final addSeconds = 1;
    setState(() {
      final seconds = duration.inSeconds + addSeconds;
      if (seconds < 0) {
        timer?.cancel();
      } else {
        duration = Duration(seconds: seconds);
      }
    });
  }

  void addTime1() {
    final addSeconds = 1;
    setState(() {
      final seconds = duration1.inSeconds - addSeconds;
      if (seconds < 0) {
        timer1?.cancel();
      } else {
        duration1 = Duration(seconds: seconds);
      }
    });
  }

  Widget buildTime() {
    String twoDigits(int n) => n.toString().padLeft(2, '0');
    final hours = twoDigits(duration.inHours);
    final minutes = twoDigits(duration.inMinutes.remainder(60));
    final seconds = twoDigits(duration.inSeconds.remainder(60));
    return Row(mainAxisAlignment: MainAxisAlignment.center, children: [
      buildTimeCard(time: hours, header: 'HOURS'),
      SizedBox(
        width: 8,
      ),
      buildTimeCard(time: minutes, header: 'MINUTES'),
      SizedBox(
        width: 8,
      ),
      buildTimeCard(time: seconds, header: 'SECONDS'),
    ]);
  }

  Widget buildTime1() {
    String twoDigits(int n) => n.toString().padLeft(2, '0');
    final hours = twoDigits(duration1.inHours);
    final minutes = twoDigits(duration1.inMinutes.remainder(60));
    final seconds = twoDigits(duration1.inSeconds.remainder(60));
    return Row(mainAxisAlignment: MainAxisAlignment.center, children: [
      buildTimeCard(time: hours, header: 'HOURS'),
      SizedBox(
        width: 8,
      ),
      buildTimeCard(time: minutes, header: 'MINUTES'),
      SizedBox(
        width: 8,
      ),
      buildTimeCard(time: seconds, header: 'SECONDS'),
    ]);
  }

  Widget buildTimeCard({required String time, required String header}) =>
      Column(
        mainAxisAlignment: MainAxisAlignment.center,
        children: [
          Container(
            padding: EdgeInsets.all(8),
            decoration: BoxDecoration(
                color: Colors.white, borderRadius: BorderRadius.circular(20)),
            child: Text(
              time,
              style: TextStyle(
                  fontWeight: FontWeight.bold,
                  color: Colors.black,
                  fontSize: 50),
            ),
          ),
          SizedBox(
            height: 24,
          ),
          Text(header, style: TextStyle(color: Colors.black45)),
        ],
      );
}
Anand
  • 4,355
  • 2
  • 35
  • 45
  • While this link may answer the question, it is better to include the essential parts of the answer here and provide the link for reference. Link-only answers can become invalid if the linked page changes. - [From Review](/review/late-answers/30709564) – Sercan Jan 05 '22 at 15:09
7

If all you need is a simple countdown timer, this is a good alternative instead of installing a package. Happy coding!

countDownTimer() async {
 int timerCount;
 for (int x = 5; x > 0; x--) {
   await Future.delayed(Duration(seconds: 1)).then((_) {
     setState(() {
       timerCount -= 1;
    });
  });
 }
}
FidelHen
  • 73
  • 1
  • 8
4
import 'dart:async';
import 'package:flutter/material.dart';

class CustomTimer extends StatefulWidget {
  @override
  _CustomTimerState createState() => _CustomTimerState();
}

class _CustomTimerState extends State<CustomTimer> {
  final _maxSeconds = 61;
  int _currentSecond = 0;
  Timer _timer;

  String get _timerText {
    final secondsPerMinute = 60;
    final secondsLeft = _maxSeconds - _currentSecond;

    final formattedMinutesLeft =
        (secondsLeft ~/ secondsPerMinute).toString().padLeft(2, '0');
    final formattedSecondsLeft =
        (secondsLeft % secondsPerMinute).toString().padLeft(2, '0');

    print('$formattedMinutesLeft : $formattedSecondsLeft');
    return '$formattedMinutesLeft : $formattedSecondsLeft';
  }

  @override
  void initState() {
    super.initState();
    _startTimer();
  }

  @override
  void dispose() {
    _timer.cancel();
    super.dispose();
  }

  @override
  Widget build(BuildContext context) {
    return Scaffold(
      body: Center(
        child: Row(
          mainAxisAlignment: MainAxisAlignment.center,
          children: [
            Icon(Icons.timer),
            Text(_timerText),
          ],
        ),
      ),
    );
  }

  void _startTimer() {
    final duration = Duration(seconds: 1);
    _timer = Timer.periodic(duration, (Timer timer) {
      setState(() {
        _currentSecond = timer.tick;
        if (timer.tick >= _maxSeconds) timer.cancel();
      });
    });
  }
}
Yauheni Prakapenka
  • 1,056
  • 11
  • 10
3

I'm using https://pub.dev/packages/flutter_countdown_timer

dependencies: flutter_countdown_timer: ^1.0.0

$ flutter pub get

CountdownTimer(endTime: 1594829147719)

1594829147719 is your timestamp in milliseconds

Ricardo
  • 2,086
  • 25
  • 35
  • Hi Ricardo , I am also using this.. I have one query, may be you can help. Can you let me know how can I change the default text that comes when Timer ends? I tried returning Text with OnEnd() function but it seems to be not working... – Ashootosh Bhardwaj Dec 25 '20 at 12:58
  • My question is how you create and dispose of the controller? I don't understand the documentation of this package. They initialise the controller, then reassign everything again? – Michael T Feb 05 '21 at 13:05
3

For showing your total seconds in this format hh:mm:ss, you can use below method:

 String getDuration(int totalSeconds) {
    String seconds = (totalSeconds % 60).toInt().toString().padLeft(2, '0');
    String minutes =
   ((totalSeconds / 60) % 60).toInt().toString().padLeft(2, '0');
   String hours = (totalSeconds ~/ 3600).toString().padLeft(2, '0');

   return "$hours\:$minutes\:$seconds";


}
M Karimi
  • 1,991
  • 1
  • 17
  • 34
  • This is very helpful, in my case all I needed was a text based timer with custom colors based on time left. So this helps me perfectly. Appreciate the simplicity. Thank you! – RobbB Dec 30 '22 at 00:17
1

Many answer already provided. I suggest a shortcut way-

Use this package Custom_timer

Add this to your package's pubspec.yaml file:

dependencies:
  custom_timer: ^0.0.3 

(use latest version)

and very simple to implement

@override
  Widget build(BuildContext context) {
    return MaterialApp(
      debugShowCheckedModeBanner: false,
      home: Scaffold(
        appBar: AppBar(
          title: Text("CustomTimer example"),
        ),
        body: Center(
          child: CustomTimer(
            from: Duration(hours: 12),
            to: Duration(hours: 0),
            onBuildAction: CustomTimerAction.auto_start,
            builder: (CustomTimerRemainingTime remaining) {
              return Text(
                "${remaining.hours}:${remaining.minutes}:${remaining.seconds}",
                style: TextStyle(fontSize: 30.0),
              );
            },
          ),
        ),
      ),
    );
  }
Zoe
  • 27,060
  • 21
  • 118
  • 148
Abir Ahsan
  • 2,649
  • 29
  • 51
  • Thanks Abir, can this package count up instead of counting down? How do I save the time elapsed (counting up) when a button is pressed and the page navigates away? – VegetaSaiyan May 24 '21 at 03:50
0
import 'package:rxdart/rxdart.dart';

final BehaviorSubject<int> resendTimeController = BehaviorSubject<int>();
static const timerDuration = 90;
int resendTimer = 0;
Timer? timer;

void startTimer() {
  timer?.cancel();
  resendTimer = timerDuration;

  timer = Timer.periodic(const Duration(seconds: 1), (timer) {
    if (resendTimer > 0) {
      resendTimer--;
      resendTimeController.add(resendTimer);

      if (resendTimer == 0) {
        timer.cancel();
      }
    }
  });
}
and use intl this

StreamBuilder<int>(
  stream: _bloc.resendTimeController,
  builder: (context, snapshot) {
    if (!snapshot.hasData) {
      return Container();
    }

    final DateTime date = DateTime.fromMillisecondsSinceEpoch(snapshot.data! * 1000);

    return GestureDetector(
      onTap: () {
        if (snapshot.data == 0) {
          _bloc.resendCode();
        }
      },
      child: Text(
        snapshot.data! > 0 ? 'Resend code ${DateFormat('mm:ss').format(date)}' : 'Resend SMS',
      ),
    );
  },
),
  • 1
    As it’s currently written, your answer is unclear. Please [edit] to add additional details that will help others understand how this addresses the question asked. You can find more information on how to write good answers [in the help center](/help/how-to-answer). – Community Feb 09 '22 at 01:01
0
import 'package:async/async.dart';
    
late CancelableOperation? cancellableOperation;
int counter = 5;

StatefulBuilder(
   builder: (context, setState) {
              if (counter > 0) {
                cancellableOperation = CancelableOperation.fromFuture(
                  Future.delayed(const Duration(seconds: 1)),
                  onCancel: () => {},
                );
                cancellableOperation?.value.whenComplete(() => setState(() => counter--));
                return buildButton(
                  text: 'Wait($counter)',
                  textColor: getTextColor,
                  backgroundColor: Colors.grey.withOpacity(0.5),
                  onPressed: () {},
                );
              }
              return buildButton(
                text: 'Complete',
                textColor: Colors.green,
                backgroundColor: Colors.greenAccent.withOpacity(0.5),
                onPressed: () {},
              );
            },
          )

I did something like this for my dialog's complete button. It counts for 5 seconds before to show complete button. But do not forget to call cancellableOperation?.cancel() if you close the dialog or page before counting complete.

-3

Countdown timer in one line

CountdownTimer(Duration(seconds: 5), Duration(seconds: 1)).listen((data){
})..onData((data){
  print('data $data');
})..onDone((){
  print('onDone.........');
});
Sher Ali
  • 5,513
  • 2
  • 27
  • 29