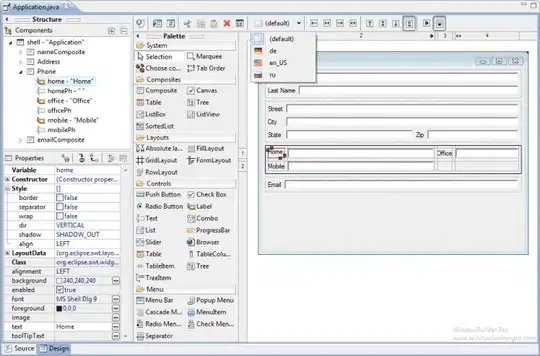
Here's a shot. Tested, no leaks. No crashes.
.h
#import <UIKit/UIKit.h>

@interface ImageModViewController : UIViewController {

}
@property (nonatomic, retain) IBOutlet UIButton *test_button;
@property (nonatomic, retain) IBOutlet UIImageView *source_image;
@property (nonatomic, retain) IBOutlet UIImageView *destination_image;
@property (nonatomic, assign) float kr;
@property (nonatomic, assign) float kg;
@property (nonatomic, assign) float kb;
@property (nonatomic, assign) float ka;


-(IBAction)touched_test_button:(id)sender;

-(UIImage *) MultiplyImagePixelsByRGBA:(UIImage *)source  kr:(float)red_k  kg:(float)green_k  kb:(float)blue_k  ka:(float)alpha_k;


@end
.m
#define BITS_PER_WORD       32
#define BITS_PER_CHANNEL    8
#define COLOR_CHANNELS      4
#define BYTES_PER_PIXEL     BITS_PER_WORD / BITS_PER_CHANNEL


#import "ImageModViewController.h"

@implementation ImageModViewController

@synthesize test_button;
@synthesize source_image;
@synthesize destination_image;
@synthesize kr;
@synthesize kg;
@synthesize kb;
@synthesize ka;


-(IBAction)touched_test_button:(id)sender
{

    // Setup coefficients

    kr = 1.0;
    kg = 0.0;
    kb = 0.0;
    ka = 1.0;

    // Set UIImageView image to the result of multiplying the pixels by the coefficients

    destination_image.image = [self MultiplyImagePixelsByRGBA:source_image.image kr:kr kg:kg kb:kb ka:ka];

}

-(UIImage *) MultiplyImagePixelsByRGBA:(UIImage *)source  kr:(float)red_k  kg:(float)green_k  kb:(float)blue_k  ka:(float)alpha_k
{

    // Get image information
    CGImageRef bitmap     = [source CGImage];
    int width             = source.size.width;
    int height            = source.size.height;
    int total_pixels      = width * height;

    // Allocate a buffer
    unsigned char *buffer = malloc(total_pixels * COLOR_CHANNELS);

    // Copy image data to buffer
    CGColorSpaceRef cs   = CGColorSpaceCreateDeviceRGB();
    CGContextRef context = CGBitmapContextCreate(buffer, width, height, BITS_PER_CHANNEL, width * BYTES_PER_PIXEL, cs, kCGImageAlphaPremultipliedLast | kCGBitmapByteOrderDefault);
    CGColorSpaceRelease(cs);
    CGContextDrawImage(context, CGRectMake(0, 0, width, height), bitmap);
    CGContextRelease(context);

    // Bounds limit coefficients
    kr = ((((kr < 0.0) ? 0.0 : kr) > 1.0) ? 1.0 : kr);
    kg = ((((kg < 0.0) ? 0.0 : kg) > 1.0) ? 1.0 : kg);
    kb = ((((kb < 0.0) ? 0.0 : kb) > 1.0) ? 1.0 : kb);
    ka = ((((ka < 0.0) ? 0.0 : ka) > 1.0) ? 1.0 : ka);

    // Process the image in the buffer

    int offset = 0;     // Used to index into the buffer

    for (int i = 0 ; i < total_pixels; i++)
    {
        buffer[offset] = (char)(buffer[offset] * red_k);   offset++;

        buffer[offset] = (char)(buffer[offset] * green_k); offset++;

        buffer[offset] = (char)(buffer[offset] * blue_k);  offset++;

        buffer[offset] = (char)(buffer[offset] * alpha_k); offset++;
    }

    // Put the image back into a UIImage
    context = CGBitmapContextCreate(buffer, width, height, BITS_PER_CHANNEL, width * BYTES_PER_PIXEL, cs, kCGImageAlphaPremultipliedLast | kCGBitmapByteOrderDefault);
    bitmap  = CGBitmapContextCreateImage(context);
    UIImage *output = [UIImage imageWithCGImage:bitmap];

    CGContextRelease(context);
    free(buffer);

    return output;

}


- (void)dealloc
{
    [super dealloc];
}

- (void)didReceiveMemoryWarning
{
    // Releases the view if it doesn't have a superview.
    [super didReceiveMemoryWarning];

    // Release any cached data, images, etc that aren't in use.
}

#pragma mark - View lifecycle

/*
// Implement viewDidLoad to do additional setup after loading the view, typically from a nib.
- (void)viewDidLoad
{
    [super viewDidLoad];
}
*/

- (void)viewDidUnload
{
    [super viewDidUnload];
    // Release any retained subviews of the main view.
    // e.g. self.myOutlet = nil;
}

- (BOOL)shouldAutorotateToInterfaceOrientation:(UIInterfaceOrientation)interfaceOrientation
{
    // Return YES for supported orientations
    return (interfaceOrientation == UIInterfaceOrientationPortrait);
}

@end
I setup the xib with two UIImageViews and one UIButton. The top UIImageView was pre-loaded with an image with Interface Builder. Touch the text button and the image is processed and set to the second UIImageView.
BTW, I had a little trouble with your icons copied right off your post. The transparency didn't work very well for some reason. I used fresh PNG test images of my own created in Photoshop with and without transparency and it all worked as advertised.
What you do inside the loop is to be modified per your needs, of course.
Watch endianess, it can really mess things up!


