1

I have an application with a TabLayout that has a ViewPager that handles the tabs. The two tabs instantiate different fragments.

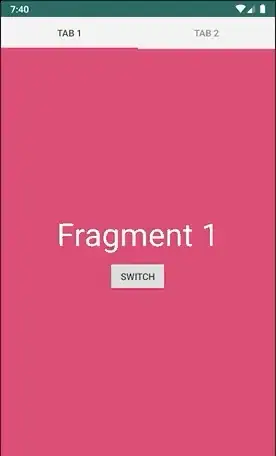
What I am trying to achieve is to switch fragments within the same tab. Since each fragment within the same tab holds a different layout (as it relies on a specific user flow), using a FrameLayout and switching it's contents, only creates the new fragment's layout on top of the previous fragment.

Should I create a general fragment with a container and replace it with each fragment? If so, would I need to build the layout for each fragment at runtime?

I have searched online and in SO, but failed to find a solution that addresses my scenario specifically.

Is there a way to achieve this or should I approach this problem from a different angle?

Some code for reference:

MainActivtiy XML:

<?xml version="1.0" encoding="utf-8"?> <androidx.coordinatorlayout.widget.CoordinatorLayout xmlns:android="http://schemas.android.com/apk/res/android"
    xmlns:app="http://schemas.android.com/apk/res-auto"
    xmlns:tools="http://schemas.android.com/tools"
    android:layout_width="match_parent"
    android:layout_height="match_parent"
    tools:context=".Main2Activity">

    <com.google.android.material.appbar.AppBarLayout
        android:layout_width="match_parent"
        android:layout_height="wrap_content">

        <com.google.android.material.tabs.TabLayout
            android:id="@+id/tabs"
            android:layout_width="match_parent"
            android:layout_height="wrap_content"
            android:background="?attr/colorPrimary" />
    </com.google.android.material.appbar.AppBarLayout>

    <androidx.viewpager.widget.ViewPager
        android:id="@+id/view_pager"
        android:layout_width="match_parent"
        android:layout_height="match_parent"
        app:layout_behavior="@string/appbar_scrolling_view_behavior" />

</androidx.coordinatorlayout.widget.CoordinatorLayout>

First fragment's XML:

<?xml version="1.0" encoding="utf-8"?>
<FrameLayout
    xmlns:android="http://schemas.android.com/apk/res/android"
    android:layout_height="match_parent"
    android:layout_width="match_parent"
    android:gravity="center"
    android:layout_gravity="center"
    android:orientation="vertical"
    android:id="@+id/container">

    <TextView
        android:layout_width="match_parent"
        android:layout_height="wrap_content"
        android:textSize="20dp"
        android:gravity="center"
        ></TextView>

    <ProgressBar
        android:layout_width="match_parent"
        android:layout_height="wrap_content"
        style="?android:attr/progressBarStyleLarge"
        android:id="@+id/progress_bar"
        android:layout_gravity="center">

    </ProgressBar>
    <GridView
        android:rowCount="3"
        android:numColumns="2"
        android:gravity="center"
        android:layout_gravity="center"
        android:layout_width="wrap_content"
        android:layout_height="wrap_content"
        android:verticalSpacing="10dp"
        android:horizontalSpacing="10dp"
        android:stretchMode="columnWidth"
        android:layout_marginLeft="40dp"
        >


    </GridView>

</FrameLayout>

Second Fragment's XML:

<?xml version="1.0" encoding="utf-8"?>
<LinearLayout xmlns:android="http://schemas.android.com/apk/res/android"
    android:orientation="vertical"
    android:layout_width="match_parent"
    android:layout_height="match_parent">

    <TextView
        android:layout_width="wrap_content"
        android:layout_height="wrap_content"
        android:textSize="20dp"
        android:layout_gravity="center"
        android:layout_marginBottom="5dp">
    </TextView>

    <RadioGroup
        android:layout_width="wrap_content"
        android:layout_height="wrap_content"
        android:layout_gravity="center"
        android:id="@+id/myRadioGroup"
        android:orientation="horizontal">

    </RadioGroup>

    <EditText
        android:layout_width="wrap_content"
        android:layout_height="wrap_content"
        android:layout_gravity="center"
        android:inputType="numberDecimal">

    </EditText>

    <androidx.appcompat.widget.AppCompatButton
        android:layout_width="wrap_content"
        android:layout_height="wrap_content"
        android:layout_gravity="center"
        android:layout_marginTop="10dp"
        android:text="Submit"
        android:id="@+id/submit_btn">

    </androidx.appcompat.widget.AppCompatButton>

</LinearLayout>

-- EDIT --

The code I am using to switch between fragments (found inside the first fragment) is this (while I have tried various others ways as well):

getActivity().getSupportFragmentManager()
                    .beginTransaction()
                    .replace(R.id.container,secondFragment, "secondFragment")
                    .addToBackStack(null)
                    .commit();

-- EDIT #2 --

Below is the FragmentPagerAdapter code:

public class SectionsPagerAdapter extends FragmentPagerAdapter {

    @StringRes
    private static final int[] TAB_TITLES = new int[]{R.string.tab_text_1, R.string.tab_text_2};
    private final Context mContext;

    public SectionsPagerAdapter(Context context, FragmentManager fm) {
        super(fm);
        mContext = context;
    }

    @Override
    public Fragment getItem(int position) {
        // getItem is called to instantiate the fragment for the given page.
        // Return a PlaceholderFragment (defined as a static inner class below).
        if (position == 1) {
            return firstFragment.newInstance("One", "Two");
        }
        return PlaceholderFragment.newInstance(position + 1);
    }

    @Nullable
    @Override
    public CharSequence getPageTitle(int position) {
        return mContext.getResources().getString(TAB_TITLES[position]);
    }

    @Override
    public int getCount() {
        // Show 2 total pages.
        return 2;
    }
}

And this code is from the mainActivity:

@Override
protected void onCreate(Bundle savedInstanceState) {
    super.onCreate(savedInstanceState);
    setContentView(R.layout.activity_main);
    SectionsPagerAdapter sectionsPagerAdapter = new SectionsPagerAdapter(this, getSupportFragmentManager());
    ViewPager viewPager = findViewById(R.id.view_pager);
    viewPager.setAdapter(sectionsPagerAdapter);
    TabLayout tabs = findViewById(R.id.tabs);
    tabs.setupWithViewPager(viewPager);
}
Bryan
  • 14,756
  • 10
  • 70
  • 125
tomerpacific
  • 4,704
  • 13
  • 34
  • 52
  • Please also post the code you use to switch the fragments – nulldroid Nov 16 '19 at 13:12
  • Help me understand the intent behind the switch. Do you want to navigate from FirstFragment to SecondFragment by clicking a button? Or do you want to show SecondFragment directly skipping the FirstFragment altogether? In any case, do you wish to keep the backstack for fragments? – JavaGhost Nov 21 '19 at 17:31
  • @JavaGhost - There is no mention of skipping any fragment. The flow is pretty basic and I have outlined it in the question. You have a tab layout. It has two tabs. Each tab is a fragment. For simplicity's sake, imagine the first tab that holds fragment A, has an edit text and a button. When user presses the button, fragment A switches to fragment B. The tabs DO NOT change or any additional tabs being are being loaded. – tomerpacific Nov 21 '19 at 20:49
  • I updated my answer based on ur comment – Mohamed Ashik Nov 24 '19 at 05:59
  • @tomerpacific there are multiple solutions that work provided for you. Please specify why the proposed solutions do not work for you. – skryshtafovych Nov 25 '19 at 22:38

11 Answers11

1

You flow would be to Inflate Layout

<LinearLayout xmlns:android="http://schemas.android.com/apk/res/android">
    <com.google.android.material.tabs.TabLayout/>
    <FrameLayout />
</LinearLayout>

The Frame layout is what will change dynamically based on Tab Layout Selection. TabLayout will be populated at RunTime During onCreateView in which you will add Tabs programatically. You will need to Create Separate Fragment for each Tab you plan on inflating or Dynamically pass in Parcel which one to inflate.

After which you will add .addOnTabSelectedListener To know when user clicks a Tab. Next you will implement Custom Classes to Control Visible Layout for FrameLayout which will receive fragment as variable fragment = new ManualEntryTabsMainFragment(); addCenterFragments(fragment); The Add Center Method will look like this

private FragmentTransaction fragmentTransaction;
private List<Fragment> activeCenterFragments = new ArrayList<Fragment>();

private void addCenterFragments(Fragment fragment) {
    removeActiveCenterFragments();
    FragmentManager fm = getActivity().getSupportFragmentManager();
    fragmentTransaction = fm.beginTransaction();
    fragmentTransaction.add(R.id.{YOUR FRAMELAYOUT}, fragment);
    fragmentTransaction.setTransition(FragmentTransaction.TRANSIT_FRAGMENT_OPEN);
    activeCenterFragments.add(fragment);
    fragmentTransaction.commit();
}

private void removeActiveCenterFragments() {
    if (activeCenterFragments.size() > 0) {
        FragmentManager fm = getActivity().getSupportFragmentManager();
        fragmentTransaction = fm.beginTransaction();
        for (Fragment activeFragment : activeCenterFragments) {
            fragmentTransaction.remove(activeFragment);
        }
        activeCenterFragments.clear();
        fragmentTransaction.commit();
    }
}

Full Sample with Error: https://gist.github.com/skryshtafovych/dd3abead65692690c6b0de5524da2af9

skryshtafovych
  • 572
  • 4
  • 16
1

From my understanding, you need to switch between fragments within another fragment(say Tab A). I tried the below code: First tab contains only container:

<?xml version="1.0" encoding="utf-8"?>
<FrameLayout xmlns:android="http://schemas.android.com/apk/res/android"
xmlns:tools="http://schemas.android.com/tools"
android:id="@+id/container"
android:layout_width="match_parent"
android:layout_height="match_parent"
tools:context=".FirstTabFragment">   
</FrameLayout>

corresponding First Tab java codes:

public class FirstTabFragment extends Fragment implements TypeOneFragment.OnButtonClick {
@Override
public View onCreateView(LayoutInflater inflater, ViewGroup container,
                         Bundle savedInstanceState) {
    // Inflate the layout for this fragment
    View rootView = inflater.inflate(R.layout.fragment_first_tab, container, false);
    switchFragment(new TypeOneFragment());        
    return rootView;
}


void switchFragment(Fragment fragment) {
    getChildFragmentManager().beginTransaction().
            replace(R.id.container, fragment).
            commit();
}

You need to use getChildFragmentManager() to replace fragments with fragment

EDIT: And my ViewPagerAdapter looks like:

public class SectionsPagerAdapter extends FragmentStatePagerAdapter {
    SectionsPagerAdapter(FragmentManager fm) {
        super(fm, FragmentStatePagerAdapter.BEHAVIOR_RESUME_ONLY_CURRENT_FRAGMENT);
    }

    @NonNull
    @Override
    public Fragment getItem(int position) {
        if (position == 0)
            return FirstTabFragment.newInstance("One","Two");
        else {
            return new SecondTabFragment();
        } 
    }

    @Override
    public int getCount() {
       return 2;
    }

    @Override
    public CharSequence getPageTitle(int position) {          
        if (position == 0)
           return "First Tab";
        else 
           return "Second Tab"; 
    }
}

EDIT 2:

Based on ur comment "imagine the first tab that holds fragment A, has an edit text and a button. When user presses the button, fragment A switches to fragment B.". I added interface in TypeOneFragment(i.e Fragment A). So button click in Fragment A will call its parent fragment method throught interface, from there u can switch the fragment.

TypeOneFragment java:

public class TypeOneFragment extends Fragment {
@Override
public View onCreateView(LayoutInflater inflater, ViewGroup container,
                         Bundle savedInstanceState) {
    View rootView = inflater.inflate(R.layout.fragment_type_one, container, false);
    onAttachToParentFragment(getParentFragment()); //Added this line to initialize the interface
    Button btnClick = rootView.findViewById(R.id.btnSwitch);
    btnClick.setOnClickListener(new View.OnClickListener() {
        @Override
        public void onClick(View view) {
            if (mListener != null) {
                mListener.btnClicked();
            }
        }
    });
    return rootView;
}

private OnButtonClick mListener;
interface OnButtonClick {
    void btnClicked();
}

private void onAttachToParentFragment(Fragment parentFragment) {
    try {
        mListener = (OnButtonClick) parentFragment;
    } catch (ClassCastException e) {
        throw new ClassCastException(parentFragment.toString() + " must implement OnButtonClick");
    }
}
}

Need to implement the interface in its parent fragment(FirstTabFragment)

public class FirstTabFragment extends Fragment implements TypeOneFragment.OnButtonClick {
///.....

@Override
public void btnClicked() {
    if (something) {
        switchFragment(new TypeOneFragment());
    } else {
        switchFragment(new TypeTwoFragment());
    }
    something = !something;
}
}
Community
  • 1
  • 1
Mohamed Ashik
  • 332
  • 3
  • 14
  • I have tried implementing your solution, but it does not work. I am getting the same experience as my posted code, where the layout of the second fragment overlaps the layout of the first. – tomerpacific Nov 22 '19 at 09:51
  • You have to use three fragments for one tab - first fragment contains only container(framelayout), In that container you are going to switch between 2nd fragment and 3rd fragment. So, even if 1st fragment and 2nd fragment overlapped there will be no changes in UI(as 1st fragment contains no Views except container) – Mohamed Ashik Nov 22 '19 at 09:59
  • Also I updated the answer with viewpager adapter class as I didnt understand getItem() method of your SectionsPagerAdapter class – Mohamed Ashik Nov 22 '19 at 10:17
0

The replace code seems correct, however: how do you instantiate the fragments? See this related answer. You cannot replace a fragment that is statically placed in an xml layout. Put your first fragment in another LinearLayout for example and inflate it programmatically. Do the same for secondFragment. Keep using the FrameLayout as container.

Update (since you posted more code):

You are still using your first fragment as container for the second. Is that really what you want? I guess you rather want to have a layout as tab in viewpager with just a "container", and 2 extra xml layouts (LinearLayout or whatever) for the 2 fragments.

Viewpager page as container:

<?xml version="1.0" encoding="utf-8"?>
<FrameLayout xmlns:android="http://schemas.android.com/apk/res/android"
    android:id="@+id/container"
    android:layout_width="match_parent"
    android:layout_height="match_parent">


</FrameLayout>

First Fragment:

<?xml version="1.0" encoding="utf-8"?>
<LinearLayout xmlns:android="http://schemas.android.com/apk/res/android"
    android:orientation="vertical" 
    android:layout_width="match_parent"
    android:layout_height="match_parent">


    <TextView
        android:layout_width="match_parent"
        android:layout_height="wrap_content"
        android:textSize="20dp"
        android:gravity="center" />

    <ProgressBar
        android:layout_width="match_parent"
        android:layout_height="wrap_content"
        style="?android:attr/progressBarStyleLarge"
        android:id="@+id/progress_bar"
        android:layout_gravity="center">

    </ProgressBar>

    <GridView
        android:rowCount="3"
        android:numColumns="2"
        android:gravity="center"
        android:layout_gravity="center"
        android:layout_width="wrap_content"
        android:layout_height="wrap_content"
        android:verticalSpacing="10dp"
        android:horizontalSpacing="10dp"
        android:stretchMode="columnWidth"
        android:layout_marginLeft="40dp">
    </GridView>

</LinearLayout>

Second Fragment:

<?xml version="1.0" encoding="utf-8"?>
<LinearLayout xmlns:android="http://schemas.android.com/apk/res/android"
    android:orientation="vertical" android:layout_width="match_parent"
    android:layout_height="match_parent">

    <TextView
        android:layout_width="wrap_content"
        android:layout_height="wrap_content"
        android:textSize="20dp"
        android:layout_gravity="center"
        android:layout_marginBottom="5dp">
    </TextView>

    <RadioGroup
        android:layout_width="wrap_content"
        android:layout_height="wrap_content"
        android:layout_gravity="center"
        android:id="@+id/myRadioGroup"
        android:orientation="horizontal">

    </RadioGroup>

    <EditText
        android:layout_width="wrap_content"
        android:layout_height="wrap_content"
        android:layout_gravity="center"
        android:inputType="numberDecimal">

    </EditText>

    <androidx.appcompat.widget.AppCompatButton
        android:layout_width="wrap_content"
        android:layout_height="wrap_content"
        android:layout_gravity="center"
        android:layout_marginTop="10dp"
        android:text="Submit"
        android:id="@+id/submit_btn"/>
</LinearLayout>

Then, to switch fragments in your first fragment, as Mohamed said in his answer, you need to use getChildFragmentManager(), which is responsible for nested fragments.

void switchFragment(Fragment fragment) {
        getActivity().getChildFragmentManager()
                    .beginTransaction().
                    replace(R.id.container,secondFragment, "secondFragment")
                    .addToBackStack(null)
                    .commit();
}
nulldroid
  • 1,150
  • 8
  • 15
  • I have not statically placed a fragment in any of the layouts presented and am adding fragments at runtime. The link you have posted does not address my situation. – tomerpacific Nov 16 '19 at 15:35
  • Ok, can you post the code where you instantiate the fragments then please? – nulldroid Nov 16 '19 at 15:41
0

I cannot see how you are filling the ViewPager in the first place.

I would recommend a PagerAdapter, this can be FragmentPagerAdapter or FragmentStatePagerAdapter depending on your needs.

From what I understood, you want to replace one of the Fragment inside the ViewPager with another one, right?

This becomes (almost) like any other RecyclerView, or ListView problem, where you handle the Adapter data.

You can either:

  • Create the Adapter/ViewPager after your logic that determines the tabs to be displayed, or
  • Show the ViewPager, modify the adapter data and call notifyDataSetChanged().

If going for the notifyDataSetChanged() option, please read this, about FragmentPagerAdapter & notifyDatasetChanged().

Example, using the Adapter data set change:

public class SectionsPagerAdapter extends FragmentPagerAdapter {
    private final Context mContext;
    private List<FragmentTabDescriber> fragmentDescribers = new ArrayList();

    public SectionsPagerAdapter(Context context, FragmentManager fm) {
        super(fm);
        mContext = context;
    }

    public void setContent(List<FragmentTabDescriber> fragmentDescribers) {
        this.fragmentDescribers = fragmentDescribers;
        notifyDataSetChanged();
    }

    @Override
    public Fragment getItem(int position) {
        return fragmentDescribers.get(position)
                .instantiateFragment(position);
    }

    @Override
    public int getItemPosition(@NonNull Object object) {
        return POSITION_NONE; //Either this, or use a FragmentStatePagerAdapter
    }

    @Nullable
    @Override
    public CharSequence getPageTitle(int position) {
        return fragmentDescribers.get(position).getTitle();
    }

    @Override
    public int getCount() {
        return fragmentDescribers.size();
    }

}

interface FragmentTabDescriber {
    Fragment instantiateFragment(int position);
    String getTitle();
}

Usage:

    FragmentTabDescriber fragmentOneDescriber = new FragmentTabDescriber() {
        @Override
        public Fragment instantiateFragment(int position) {
            return TypeOneFragment.newInstance("yey", "uhu");
        }

        @Override
        public String getTitle() {
            return "Fragment one";
        }
    };
    FragmentTabDescriber fragmentXDescriber = new FragmentTabDescriber() {
        @Override
        public Fragment instantiateFragment(int position) {
            return TypeXFragment.newInstance(position);
        }

        @Override
        public String getTitle() {
            return "Fragment X";
        }
    };
    FragmentTabDescriber fragmentYDescriber = new FragmentTabDescriber() {
        @Override
        public Fragment instantiateFragment(int position) {
            return TypeYFragment.newInstance(position);
        }

        @Override
        public String getTitle() {
            return "Fragment Y";
        }
    };

    public void createTabs() {
        List<FragmentTabDescriber> tabDescribers = Arrays.asList(fragmentOneDescriber, fragmentXDescriber);
        sectionsAdapter.setContent(tabDescribers);

        /// /// Some events happen, then change fragment 
        List<FragmentTabDescriber> tabDescribers = Arrays.asList(fragmentOneDescriber, fragmentYDescriber);
        sectionsAdapter.setContent(tabDescribers);
    }
Vitor Hugo Schwaab
  • 1,545
  • 20
  • 31
  • I am filling the ViewPager using a FragmentPageAdapter (which comes out of the box when you create a TabbedActivity). Replacing one fragment with another is what it does with no effort when you switch between tabs, which is not what I meant. – tomerpacific Nov 21 '19 at 17:16
  • I'm not talking about switch between tabs. Focus on the "like any other RecyclerView, or ListView". Change the adapter content and notifyDataSetChanged(). – Vitor Hugo Schwaab Nov 22 '19 at 09:45
  • I added an example of implementation, of how to change the fragment of one tab – Vitor Hugo Schwaab Nov 22 '19 at 10:06
0

I have created project based on your requirements. I have created a repo for you.

I have made fragment pager adapter dynamically.

halfer
  • 19,824
  • 17
  • 99
  • 186
Arunachalam k
  • 734
  • 1
  • 7
  • 20
  • I have cloned your repository and saw your solution, but this does not apply to what I am trying to do. You are handling the switching of the fragments from the main activity and not from the fragment itself. This requires every fragment to be aware of the adapter. – tomerpacific Nov 22 '19 at 10:45
  • @tomerpacific please clone latest one i have updated based on your requirements – Arunachalam k Nov 23 '19 at 03:29
0

maybe i can understand what is you want.

try this, first in the XML fragment_second.xml update:

<?xml version="1.0" encoding="utf-8"?>
<androidx.coordinatorlayout.widget.CoordinatorLayout
xmlns:android="http://schemas.android.com/apk/res/android"
android:layout_width="match_parent"
android:layout_height="match_parent"
>
<androidx.core.widget.NestedScrollView
    android:layout_width="match_parent"
    android:layout_height="match_parent">

    <LinearLayout
        android:orientation="vertical"
        android:layout_width="match_parent"
        android:layout_height="match_parent">

        <TextView
            android:layout_width="wrap_content"
            android:layout_height="wrap_content"
            android:text="Type Button to Add Fragment"
            android:textSize="20dp"
            android:layout_gravity="center"
            android:layout_marginBottom="5dp">
        </TextView>

        <androidx.appcompat.widget.AppCompatButton
            android:layout_width="wrap_content"
            android:layout_height="wrap_content"
            android:layout_gravity="center"
            android:layout_marginTop="10dp"
            android:text="Submit"
            android:id="@+id/submit_btn"/>
        <LinearLayout
            android:layout_width="match_parent"
            android:layout_height="wrap_content"/>
        <LinearLayout
            android:id="@+id/linear_dynamic_fragments_containers"
            android:orientation="vertical"
            android:layout_width="match_parent"
            android:layout_height="wrap_content"/>
    </LinearLayout>
</androidx.core.widget.NestedScrollView>

next step in PlaceholderFragment.java update for this:

import android.os.Bundle;
import android.view.LayoutInflater;
import android.view.View;
import android.view.ViewGroup;
import android.widget.FrameLayout;
import android.widget.LinearLayout;
import androidx.annotation.NonNull;
import androidx.annotation.Nullable;
import androidx.fragment.app.Fragment;

public class PlaceholderFragment extends Fragment {

public static PlaceholderFragment newInstance(int i) {

    Bundle args = new Bundle();

    PlaceholderFragment fragment = new PlaceholderFragment();
    fragment.setArguments(args);
    return fragment;
}

@Nullable
@Override
public View onCreateView(@NonNull LayoutInflater inflater, @Nullable ViewGroup container, @Nullable Bundle savedInstanceState) {
    return inflater.inflate(R.layout.fragment_second, container, false);
}

@Override
public void onViewCreated(@NonNull final View view, @Nullable Bundle savedInstanceState) {
    super.onViewCreated(view, savedInstanceState);
    view.findViewById(R.id.submit_btn).setOnClickListener(new View.OnClickListener() {
        @Override
        public void onClick(View v) {
            addDynamicFragment(view);
        }
    });
}

private void addDynamicFragment(View view) {
    if(view == null){
        return;
    }
    LinearLayout container = view.findViewById(R.id.linear_dynamic_fragments_containers);
    FrameLayout childFragmentContainer = getChildFragmentContainer();
    addFragmentToContainer(container.getChildCount(), childFragmentContainer);
    container.addView(childFragmentContainer);
}

private void addFragmentToContainer(int position, FrameLayout childFragmentContainer) {
    Fragment childFragment = ChildFragment.newInstance(position);
    getChildFragmentManager()
            .beginTransaction().
                    replace(childFragmentContainer.getId(), childFragment,"ChildFragment")
            .addToBackStack(null)
            .commit();
}

private FrameLayout getChildFragmentContainer() {
    FrameLayout frameLayout = new FrameLayout(getActivity());
    frameLayout.setId(View.generateViewId());
    LinearLayout.LayoutParams params = new LinearLayout.LayoutParams(ViewGroup.LayoutParams.MATCH_PARENT, ViewGroup.LayoutParams.MATCH_PARENT);
    frameLayout.setLayoutParams(params);
    return frameLayout;
}
}

And add this new layout fragment_child.xml

<?xml version="1.0" encoding="utf-8"?>
<FrameLayout xmlns:android="http://schemas.android.com/apk/res/android"
android:layout_width="match_parent"
android:layout_height="350dp"
android:orientation="vertical"
android:background="@color/colorPrimary"
android:layout_margin="4dp">

<TextView
    android:id="@+id/text_child_fragment"
    style="@style/TextAppearance.AppCompat.Title"
    android:layout_gravity="center"
    android:textColor="@android:color/white"
    android:text="ChildFragment Count: "
    android:layout_width="wrap_content"
    android:layout_height="wrap_content"/>
</FrameLayout>

And Add this new class ChildFragment.java

import android.os.Bundle;
import android.view.LayoutInflater;
import android.view.View;
import android.view.ViewGroup;
import android.widget.TextView;

import androidx.annotation.NonNull;
import androidx.annotation.Nullable;
import androidx.fragment.app.Fragment;

public class ChildFragment extends Fragment {

public static ChildFragment newInstance(int position) {

    Bundle args = new Bundle();
    args.putInt("KEY_INT", position);
    ChildFragment fragment = new ChildFragment();
    fragment.setArguments(args);
    return fragment;
}


@Nullable
@Override
public View onCreateView(@NonNull LayoutInflater inflater, @Nullable ViewGroup container, @Nullable Bundle savedInstanceState) {
    return inflater.inflate(R.layout.fragment_child, container, false);
}

@Override
public void onViewCreated(@NonNull View view, @Nullable Bundle savedInstanceState) {
    super.onViewCreated(view, savedInstanceState);
    TextView textView = view.findViewById(R.id.text_child_fragment);
    textView.setText("ChildFragment Count: " + getArguments().getInt("KEY_INT"));
}
}

And you should show something like this:

enter image description here

  • Thank you for the detailed answer, but I did not mention in my question any support for scrolling fragments. This is not the case. – tomerpacific Nov 23 '19 at 09:25
0

Mohamed Ashik

has provided you with the tools you need, but i want to add a few notes.

Supposing the following user flow:

      Tab 1         Tab 2
     /  |  \       /  |  \
  1.1  1.2  1.3  2.1 2.2  2.3
  /                   |
1.1.1               2.2.2

Tab 1 and Tab 2 are handled by your ViewPager. Each of them will handle their specific user flow to 1.1, 1.2, 1.3 (analog 2.1, 2.2, 2.3) on their own.

To maintain the ViewPager-Scroll-Abilities, you have to make sure that these child-fragments life within their parentFragments (Tab 1, Tab 2). Additionally, their root-layout needs the attribute android:clickable="true".

You archive this by using the childFragmentManager of these tabs, adding (replacing when 1.1.1 or 2.2.2) into the R.id.container, which should be within the layouts of Tab 1 and Tab 2! Your FirstFragment.xml has this attribute already declared on its FrameLayout.The second one misses an id-attribute there.

Now, an child could additionally use its own childFragmentManager to add another fragment to itself, but the same restrictions will apply. Also, i suppose there is no need to keep all childrens alive at the same time, therefore i would just replace the "first layer" of tabs (1.1, 1.2, etc.). Note, that you need to replace the fragments with the same childFragmentManager.

Even though your FragmentPagerAdapter just holds two Fragments, which should not result in loosing the references while within the app, you should probably declare your fragments as fields of the SectionsPagerAdapter.

Surviving orientation changes would require to restore previous shown fragments, which restore their children automatically.

public class SectionsPagerAdapter extends FragmentPagerAdapter {

@StringRes
private static final int[] TAB_TITLES = new int[]{R.string.tab_text_1, R.string.tab_text_2};
private final Context mContext;
private final FirstFragment first;
private final PlaceholderFragment second;

public SectionsPagerAdapter(Context context, FragmentManager fm) {
    super(fm);
    FirstFragment firstFrag = fm.findFragmentByTag("first");
    if (firstFrag == null) {
        first = FirstFragment.newInstance("one", "two");
    } else {
        first = firstFrag;
    }
    PlaceholderFragment placeFrag = fm.findFragmentByTag("second");
    if (placeFrag == null) {
        second = PlaceholderFragment.newInstance(1);     // your logic provided
    } else {
        second = placeFrag;
    }
    mContext = context;
}

@Override
public Fragment getItem(int position) {
    // getItem is called to instantiate the fragment for the given page.
    // Return a PlaceholderFragment (defined as a static inner class below).
    if (position == 1) {
        return first;
    }
    second.updateState(1);              // in case this is really required
    return second;
}

}

Via your Activity you can access your viewPager and the childFragmentManager at any time: (within an Fragment):

((YourActivity) getActivity()).getSectionsViewPager().getFirst().getChildFragmentManager()

//edit : I just saw your comment here: from yesterday.. that you just want to switch tabs programatically? in that case, you can just call

tabLayout.setScrollPosition(position, 0f, true);

when using com.google.android.material.tabs or

tabLayout.selectTab(tabLayout.getTabAt(position));

when using non androidx android.support.design.widget

Tomes
  • 173
  • 3
  • 13
0

Define an interface SwitchFragmentInterface.

public interface SwitchFragmentInterface {

    void switchFragment(int id);
}

and define a PlaceholderFragment (which contains a FrameLayout with id container) and implement the above interface in this fragment.

public class PlacholderFragment extends Fragment implements SwitchFragmentInterface{

    private static String ARG_POSITION = "position";

    private int fragmentId = 0;

    public PlacholderFragment() {
        // Required empty public constructor
    }

    public static PlacholderFragment newInstance(int position) {
        PlacholderFragment fragment = new PlacholderFragment();
        Bundle bundle = new Bundle();
        bundle.putInt(ARG_POSITION,position);
        fragment.setArguments(bundle);
        return fragment;
    }

    @Override
    public void onCreate(Bundle savedInstanceState) {
        super.onCreate(savedInstanceState);

        fragmentId = getArguments().getInt(ARG_POSITION,0);
    }

    @Override
    public View onCreateView(LayoutInflater inflater, ViewGroup container,
                             Bundle savedInstanceState) {
        // Inflate the layout for this fragment
        return inflater.inflate(R.layout.fragment_placeholder, container, false);
    }

    @Override
    public void onViewCreated(@NonNull View view, @Nullable Bundle savedInstanceState) {
        super.onViewCreated(view, savedInstanceState);
        loadFragment(fragmentId);
    }

    void loadFragment(int id) {
        Fragment fragment ;
        if(id == FirstFragment.ID){
            fragment = FirstFragment.newInstance();
        }else if(id == SecondFragment.ID){
            fragment = SecondFragment.newInstance();
        }else {
            // unindentified fragment
            return;
        }
        getChildFragmentManager().beginTransaction().
                replace(R.id.container, fragment).
                commit();
    }

    @Override
    public void onAttach(Context context) {
        super.onAttach(context);

    }

    @Override
    public void onDetach() {
        super.onDetach();
    }

    //all children fragments call this method when a switch to a different fragment is needed.

    @Override
    public void switchFragment(int id) {
        loadFragment(id);
    }
}

In your FirstFragment, cast parent fragment (PlaceholderFragment)to SwitchFragmentInterface and use it to switch fragments.

public class FirstFragment extends Fragment {

    SwitchFragmentInterface mCallback;
    public static int ID = 0;

    public FirstFragment() {
        // Required empty public constructor
    }

    public static FirstFragment newInstance() {
        FirstFragment fragment = new FirstFragment();
        return fragment;
    }

    @Override
    public void onCreate(Bundle savedInstanceState) {
        super.onCreate(savedInstanceState);
    }

    @Override
    public View onCreateView(LayoutInflater inflater, ViewGroup container,
                             Bundle savedInstanceState) {
        // Inflate the layout for this fragment
        return inflater.inflate(R.layout.fragment_first, container, false);
    }

    @Override
    public void onViewCreated(@NonNull View view, @Nullable Bundle savedInstanceState) {
        super.onViewCreated(view, savedInstanceState);

        Button switchButton = view.findViewById(R.id.switch_frag_button);
        switchButton.setOnClickListener(new View.OnClickListener() {
            @Override
            public void onClick(View view) {

                mCallback.switchFragment(SecondFragment.ID);
            }
        });

    }

    @Override
    public void onAttach(Context context) {
        super.onAttach(context);

        try {
            mCallback = (SwitchFragmentInterface ) getParentFragment();
        } catch (ClassCastException e) {

            throw new ClassCastException(getParentFragment().toString()
                    + " must implement MyInterface ");
        }
    }

    @Override
    public void onDetach() {
        super.onDetach();
        mCallback = null;
    }

}

Do the same for your second fragment.

public class SecondFragment extends Fragment {

    SwitchFragmentInterface mCallback;

    public static int ID = 1;

    public SecondFragment() {
        // Required empty public constructor
    }

    public static SecondFragment newInstance() {
        SecondFragment fragment = new SecondFragment();
        return fragment;
    }

    @Override
    public void onCreate(Bundle savedInstanceState) {
        super.onCreate(savedInstanceState);
    }

    @Override
    public View onCreateView(LayoutInflater inflater, ViewGroup container,
                             Bundle savedInstanceState) {
        // Inflate the layout for this fragment
        return inflater.inflate(R.layout.fragment_second, container, false);
    }

    @Override
    public void onViewCreated(@NonNull View view, @Nullable Bundle savedInstanceState) {
        super.onViewCreated(view, savedInstanceState);

        Button switchButton = view.findViewById(R.id.switch_frag_button);
        switchButton.setOnClickListener(new View.OnClickListener() {
            @Override
            public void onClick(View view) {

                mCallback.switchFragment(FirstFragment.ID);
            }
        });

    }


    @Override
    public void onAttach(Context context) {
        super.onAttach(context);

        try {
            mCallback = (SwitchFragmentInterface ) getParentFragment();
        } catch (ClassCastException e) {
            throw new ClassCastException(getParentFragment().toString()
                    + " must implement MyInterface ");
        }
    }

    @Override
    public void onDetach() {
        super.onDetach();
        mCallback = null;
    }

}

I changed SectionsAdapter to this to give activity more control over which fragments are loaded into the viewpager.

public class SectionsPagerAdapter extends FragmentPagerAdapter {

    @StringRes
    private static final int[] TAB_TITLES = new int[]{R.string.tab_text_1, R.string.tab_text_2};
    private final Context mContext;
    private ArrayList<Fragment> frags = new ArrayList<>();

    public SectionsPagerAdapter(Context context, FragmentManager fm) {
        super(fm);
        mContext = context;
    }

    @Override
    public Fragment getItem(int position) {
        // getItem is called to instantiate the fragment for the given page.
        // Return a PlaceholderFragment (defined as a static inner class below).
        return frags.get(position);
    }

    public void addFragment(Fragment fragment){
        frags.add(fragment);
    }

    @Nullable
    @Override
    public CharSequence getPageTitle(int position) {
        return mContext.getResources().getString(TAB_TITLES[position]);
    }

    @Override
    public int getCount() {
        // Show 2 total pages.
        // returns two since only two fragments will be added
        return frags.size();
    }

}

Then in your Activity

public class FragmentSwitchActivity extends AppCompatActivity {

    TabLayout tabs;
    ViewPager viewPager;
    SectionsPagerAdapter adapter;
    @Override
    protected void onCreate(@Nullable Bundle savedInstanceState) {
        super.onCreate(savedInstanceState);
        setContentView(R.layout.activity_fragment_switch);

        tabs = findViewById(R.id.tabs);
        viewPager = findViewById(R.id.view_pager);

        adapter = new SectionsPagerAdapter(this,getSupportFragmentManager());
        adapter.addFragment(PlacholderFragment.newInstance(FirstFragment.ID));
        adapter.addFragment(PlacholderFragment.newInstance(SecondFragment.ID));

        viewPager.setAdapter(adapter);
        tabs.setupWithViewPager(viewPager);
    }


}

You should get something like this:

enter image description here

Networks
  • 2,144
  • 1
  • 10
  • 17
0

Answer to your replacement issue you are facing: R.id.container is root layout of fragment which is attached to your activity. If you try replacing this R.id.container with FragmentB from anywhere (activity or fragment) this will only replace the layout and add FragmentB as child fragment to original fragment. Remember, R.id.container is part of FragmentA, activity cannot replace FragmentA when it is being used, rather it will add that as part of that fragment itself.

Answer of how you can achieve this in better way:

              FragmentA (Instantiated by ViewPagerAdapter)
       ___________|____________
      |           |            |
  FragStep1   FragStep2    FragStep3
  (Initial)   (On Action)  (On Action)

In your FragmentA layout, have only the container that will be used to hold fragments. Lets say something like this:

<?xml version="1.0" encoding="utf-8"?>
<FrameLayout
    xmlns:android="http://schemas.android.com/apk/res/android"
    android:layout_height="match_parent"
    android:layout_width="match_parent"
    android:id="@+id/container">
</FrameLayout>

Create a step interface:

public interface Step {
    void switchStep(int step);
}

Your FragmentA class should look like this:

public class FragmentA extends Fragment implements Step {
    public FragmentA newInstance(Bundle bundle) {
        FragmentA fragment = new FragmentA();
        fragment.setArguments(bundle);
        return fragment;
    }

    @Override
    public View onCreateView(LayoutInflater inflater, @Nullable ViewGroup 
                             container, @Nullable Bundle savedInstanceState) {
       View view = inflater.inflate(R.layout.fragmentA, container, false);
       switchStep(0);
       return view;
    }

    @Override
    public void switchStep(int step) {
        Fragment fragment = null;
        switch (step) {
            case 0:
                fragment = FragStep1.newInstance(this);
                break;
            case 1:
                fragment = FragStep2.newInstance(this);
                break;
            case 2:
                fragment = FragStep3.newInstance(this);
                break;
        }
        if (fragment != null) {
            FragmentManager manager = getChildFragmentManager();
            FragmentTransaction transaction = manager.beginTransaction();
            transaction.replace(R.id.container, fragment);
            transaction.commit();
        }
    }
}

FragStep1/FragStep2/FragStep3 will contain reference to Step so that they can invoke switch function.

public class FragStep1 extends Fragment {
    private Step stepInitiator;

    public FragStep1 newInstance(Step step) {
        FragStep1 fragment = new FragStep1();
        fragStep1.stepInitiator = step;
        return fragment;
    }

    @Override
    public View onCreateView(LayoutInflater inflater, @Nullable ViewGroup 
                         container, @Nullable Bundle savedInstanceState) {
       View view = inflater.inflate(R.layout.fragment_step1, container, false);
       return view;
    }

    @Override
    public void onViewCreated(View view, @Nullable Bundle savedInstanceState) {
        Button nextButton = view.findViewById(R.id.next_step);
        nextButton.setOnClickListener(new View.OnClickListener() {
            @Override
            public void onClick(View v) {
                if (stepInitiator != null) {
                    stepInitiator.switchStep(1);
                }
            }
        }
    }
}

Note: I've not tested this, but this would work if you fix compile issues if any.

JavaGhost
  • 406
  • 4
  • 8
0

A fragment can not switch another fragment directly(not recommended), this is done only through activity that holds all the fragment. Place the below code in your activity

ViewPager viewPager;

@Override
protected void onCreate(Bundle savedInstanceState) {
    super.onCreate(savedInstanceState);
    setContentView(R.layout.activity_main);
    SectionsPagerAdapter sectionsPagerAdapter = new SectionsPagerAdapter(this, 
    getSupportFragmentManager());
    viewPager = findViewById(R.id.view_pager);
    viewPager.setAdapter(sectionsPagerAdapter);
    TabLayout tabs = findViewById(R.id.tabs);
    tabs.setupWithViewPager(viewPager);
}

public void onClickFirstFragButton(int index){
    viewPager.setCurrentItem(index);
}

And inside your fragment, after clicking the button do not commit the another fragment directly, instead navigate the click action to activity like this.

(MainActivity getActivity()).onClickFirstFragButton(index);

That's it.

Anbarasu Chinna
  • 975
  • 9
  • 28
  • 1
    This answer achieves the minimum of understanding the scenario and explaining that fragments cannot communicate with one another. All the rest of the answers failed to describe this. – tomerpacific Nov 26 '19 at 17:44
  • Understand clearly. Fragments can communicate with other fragments directly, but it is not recommended as it leads to lots of complexity. – Anbarasu Chinna Nov 27 '19 at 06:57
0

You can use ViewPager:

    viewPager = view.findViewById(R.id.viewPager)
    tab = view.findViewById(R.id.tab1)
    viewPager.adapter = getSupportFragmentManager()?.let { ViewPagerAdapter(it) }
    tab.setupWithViewPager(viewPager)