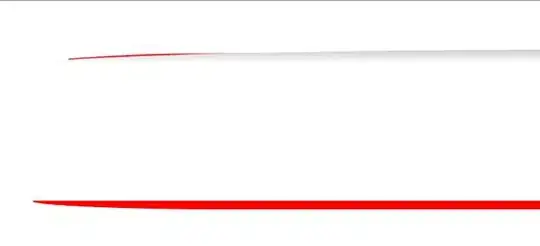
I'm trying to create a custom route transition using Flutter. The existing route transitions (fade, scale, etc) are fine, but I want to create screen transitions that manipulate the screens' content by capturing their render and applying effects to it. Basically, I want to recreate DOOM screen melt effect as a route transition with Flutter.
It feels to me that its reliance on Skia and its own Canvas for rendering screen elements would make this possible, if not somewhat trivial. I haven't been able to do it, though. I can't seem to be able to capture the screen, or at least to render the target screen in chunks using clipping paths. A lot of this has to do with my lack of understanding of how Flutter composition works, so I'm still uncertain on which avenues to investigate.
My first approach was creating a custom transition by basically replicating what FadeTransition does.
Route createRouteWithTransitionCustom() {
  return PageRouteBuilder(
    pageBuilder: (context, animation, secondaryAnimation) => ThirdScreen(),
    transitionsBuilder: (context, animation, secondaryAnimation, child) {
      return CustomTransition(
        animation: animation,
        child: child,
      );
    },
  );
}

RaisedButton(
  child: Text('Open Third screen (custom transition, custom code)'),
  onPressed: () {
    Navigator.push(context, createRouteWithTransitionCustom());
  },
),
In this case, CustomTransition is a near exact duplicate of FadeTransition, with some light renaming (opacity becomes animation).
import 'package:flutter/rendering.dart';
import 'package:flutter/widgets.dart';

import 'RenderAnimatedCustom.dart';

/// A custom transition to animate a widget.
/// This is a copy of FadeTransition: https://github.com/flutter/flutter/blob/27321ebbad/packages/flutter/lib/src/widgets/transitions.dart#L530
class CustomTransition extends SingleChildRenderObjectWidget {
  const CustomTransition({
    Key key,
    @required this.animation,
    this.alwaysIncludeSemantics = false,
    Widget child,
  }) : assert(animation != null),
       super(key: key, child: child);

  final Animation<double> animation;

  final bool alwaysIncludeSemantics;

  @override
  RenderAnimatedCustom createRenderObject(BuildContext context) {
    return RenderAnimatedCustom(
      buildContext: context,
      phase: animation,
      alwaysIncludeSemantics: alwaysIncludeSemantics,
    );
  }

  @override
  void updateRenderObject(BuildContext context, RenderAnimatedCustom renderObject) {
    renderObject
      ..phase = animation
      ..alwaysIncludeSemantics = alwaysIncludeSemantics;
  }

  @override
  void debugFillProperties(DiagnosticPropertiesBuilder properties) {
    super.debugFillProperties(properties);
    properties.add(DiagnosticsProperty<Animation<double>>('animation', animation));
    properties.add(FlagProperty('alwaysIncludeSemantics', value: alwaysIncludeSemantics, ifTrue: 'alwaysIncludeSemantics'));
  }
}
This new CustomTransition also creates a new RenderAnimatedCustom inside createRenderObject() (instead of FadeTransition's own RenderAnimatedOpacity). Sure enough, my custom RenderAnimatedCustom is a near duplicate of RenderAnimatedOpacity:
import 'package:flutter/rendering.dart';
import 'package:flutter/widgets.dart';

/// A custom renderer.
/// This is a copy of RenderAnimatedOpacity: https://github.com/flutter/flutter/blob/27321ebbad/packages/flutter/lib/src/rendering/proxy_box.dart#L825
class RenderAnimatedCustom extends RenderProxyBox {
  RenderAnimatedCustom({
    @required BuildContext buildContext,
    @required Animation<double> phase,
    bool alwaysIncludeSemantics = false,
    RenderBox child,
  }) : assert(phase != null),
       assert(alwaysIncludeSemantics != null),
       _alwaysIncludeSemantics = alwaysIncludeSemantics,
       super(child) {
    this.phase = phase;
    this.buildContext = buildContext;
  }

  BuildContext buildContext;
  double _lastUsedPhase;

  @override
  bool get alwaysNeedsCompositing => child != null && _currentlyNeedsCompositing;
  bool _currentlyNeedsCompositing;

  Animation<double> get phase => _phase;
  Animation<double> _phase;
  set phase(Animation<double> value) {
    assert(value != null);
    if (_phase == value) return;
    if (attached && _phase != null) _phase.removeListener(_updatePhase);
    _phase = value;
    if (attached) _phase.addListener(_updatePhase);
    _updatePhase();
  }

  /// Whether child semantics are included regardless of the opacity.
  ///
  /// If false, semantics are excluded when [opacity] is 0.0.
  ///
  /// Defaults to false.
  bool get alwaysIncludeSemantics => _alwaysIncludeSemantics;
  bool _alwaysIncludeSemantics;
  set alwaysIncludeSemantics(bool value) {
    if (value == _alwaysIncludeSemantics) return;
    _alwaysIncludeSemantics = value;
    markNeedsSemanticsUpdate();
  }

  @override
  void attach(PipelineOwner owner) {
    super.attach(owner);
    _phase.addListener(_updatePhase);
    _updatePhase(); // in case it changed while we weren't listening
  }

  @override
  void detach() {
    _phase.removeListener(_updatePhase);
    super.detach();
  }

  void _updatePhase() {
    final double newPhase = _phase.value;
    if (_lastUsedPhase != newPhase) {
      _lastUsedPhase = newPhase;
      final bool didNeedCompositing = _currentlyNeedsCompositing;
      _currentlyNeedsCompositing = _lastUsedPhase > 0 && _lastUsedPhase < 1;
      if (child != null && didNeedCompositing != _currentlyNeedsCompositing) {
        markNeedsCompositingBitsUpdate();
      }
      markNeedsPaint();
      if (newPhase == 0 || _lastUsedPhase == 0) {
        markNeedsSemanticsUpdate();
      }
    }
  }

  @override
  void paint(PaintingContext context, Offset offset) {
    if (child != null) {
      if (_lastUsedPhase == 0) {
        // No need to keep the layer. We'll create a new one if necessary.
        layer = null;
        return;
      }
      if (_lastUsedPhase == 1) {
        // No need to keep the layer. We'll create a new one if necessary.
        layer = null;
        context.paintChild(child, offset);
        return;
      }
      assert(needsCompositing);

      // Basic example, slides the screen in
      context.paintChild(child, Offset((1 - _lastUsedPhase) * 255, 0));
    }
  }

  @override
  void visitChildrenForSemantics(RenderObjectVisitor visitor) {
    if (child != null && (_lastUsedPhase != 0 || alwaysIncludeSemantics)) {
      visitor(child);
    }
  }

  @override
  void debugFillProperties(DiagnosticPropertiesBuilder properties) {
    super.debugFillProperties(properties);
    properties.add(DiagnosticsProperty<Animation<double>>('phase', phase));
    properties.add(FlagProperty('alwaysIncludeSemantics', value: alwaysIncludeSemantics, ifTrue: 'alwaysIncludeSemantics'));
  }
}
Finally, the problem is as such. In the above file, inside paint(), this placeholder code simply moves the screen sideways by rendering with different offsets using context.paintChild().
But I want to draw chunks of child instead. In this case, vertical strips so I can create the screen melt effect. But that's really just an example; I want to find a way to manipulate the render of the child so I could have other different image-based effects.
What I have tried
Looping and drawing parts with clip rectangles
Instead of simply doing context.paintChild(child, offset), I've tried looping and drawing it chunk by chunk. This is not super generic, but would work for the screen melt effect at least.
Inside paint() (ignore the clumsiness of the prototype code):
int segments = 10;
double width = context.estimatedBounds.width;
double height = context.estimatedBounds.height;
for (var i = 0; i < segments; i++) {
  double l = ((width / segments) * i).round().toDouble();
  double r = ((width / segments) * (i + 1)).round().toDouble();
  double y = (1 - _lastUsedPhase) * 50 * (i + 1);
  layer = context.pushClipRect(
    true,
    Offset(l, y),
    Rect.fromLTWH(0, 0, r - l, height),
    (c, o) => c.paintChild(child, Offset(0, o.dy)),
    oldLayer: layer
  );
}
Unfortunately, this doesn't work. Every call to paintChild() seems to clear out the previous call, so only the last "strip" is kept.
I've tried combinations of this with different "layer" properties, using clipRectAndPaint(), etc, but can't get anything different from the above example.
Capturing the image with toImage()
I haven't gone much further in this, but my first attempt was of course to simply capture a widget as an image, something I assume was straightforward.
Unfortunately this requires that my widget is wrapped around a RepaintBoundary() in the custom route. Something like this:
return CustomTransition(
  animation: animation,
  child: RepaintBoundary(child: child),
);
Then maybe we could just do child.toImage(), manipulate that inside a canvas, and present that.
My issue with that is that every time one defines the transition, the child would need to be wrapped in that way. I'd like the CustomTransition() to handle that instead, but I haven't found a way and I'm wondering if this is actually necessary.
There are other classes with a toImage() function - Picture, Scene, OffsetLayer - but none of them seemed to be readily available. Ideally there would be an easy way for me to capture stuff as an image from inside paint() on RenderAnimatedCustom`. I could then do any kind of manipulation to that image, and paint it instead.
Other orthogonal solutions
I know there's several answers on StackOverflow (and other places) about how to "capture an image from a Widget", but they seem to specific to using an existing Canvas, using RepaintBoundary, etc.
In sum, what I need is: a way to create custom canvas-manipulating screen transitions. An ability to capture arbitrary widgets (without an explicit RepaintBoundary) seem to be the key to this.
Any hints? Am I being foolish for avoiding RepaintBoundary? Is it the only way? Or is there any other way for me to use "layers" for accomplish this sort of segmented child drawing?
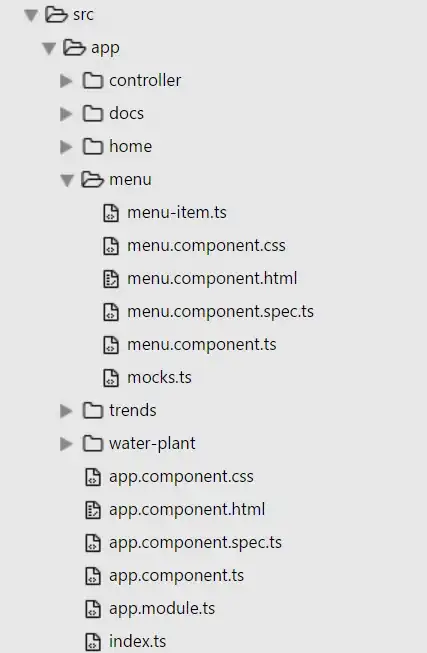
Minimal source code for this app example is available on GitHub.
PS. I'm aware the transition example as it is is trying to manipulate the oncoming screen, not the outgoing one, as it should work for this to work like Doom's screen melt. That's a further problem I'm not investigating right now.

