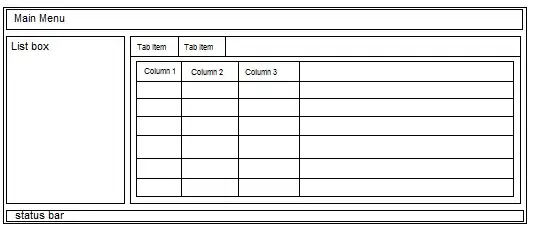
of course, you have to make the navbar yourself and the examples above are very valid, but cdbreact speeds up the process a lot faster. just add cdbreact using
npm I cdbreact
or
yarn add cdbreact
and then import CDBSidebar, CDBSidebarContent, CDBSidebarHeader, etc. with cdbreact, you don't need to bother about installing bootsrap in your react app.
cdbreact also comes with icons, and a lot more.
import React from 'react'
import {CDBSidebar,
CDBSidebarContent,
CDBSidebarHeader,
CDBSidebarFooter, CDBSidebarMenu,
CDBSidebarMenuItem} from 'cdbreact';
import {NavLink, Link} from 'react-router-dom';
import {} from 'react-router-dom';
const Sidebar=()=>{
    return (
        <div style={{display:'flex', height:'100%', overflow:'scroll initial'}}>
            <CDBSidebar textColer="#fff" backgroundColor="rgb(37, 90, 122)">
                <CDBSidebarHeader prefix={<i className="fa fa-bars fa-large"></i>}>
                    <Link to="/dashboard">Dashboard</Link>
                </CDBSidebarHeader>
                <CDBSidebarContent className="sidebar-content">
                    <CDBSidebarMenu>
                        <NavLink exact to="/dashboard" activeClassName="activeClicked">
                            <CDBSidebarMenuItem icon="columns">
                                Transfer
                            </CDBSidebarMenuItem>
                        </NavLink>
                        <NavLink exact to="/dashboard" activeClassName="activeClicked">
                            <CDBSidebarMenuItem icon="columns">
                                Transfer
                            </CDBSidebarMenuItem>
                        </NavLink>
                        <NavLink exact to="/dashboard" activeClassName="activeClicked">
                            <CDBSidebarMenuItem icon="columns">
                                Transfer
                            </CDBSidebarMenuItem>
                        </NavLink>
                        <NavLink exact to="/dashboard" activeClassName="activeClicked">
                             <CDBSidebarMenuItem icon="columns">
                                Transfer
                            </CDBSidebarMenuItem>
                        </NavLink>
                    </CDBSidebarMenu>
                </CDBSidebarContent>
                <CDBSidebarFooter style={{textAlign:'center'}}>
                    <div className="sidebar-btn-wrapper" style={{ padding :'20px 5px' }}>
                        sidebar footer
                    </div>
                </CDBSidebarFooter>
            </CDBSidebar>
        </div>
    )
}

export default Sidebar;
you can also follow the guide here https://dev.to/devwares/how-to-create-a-responsive-sidebar-in-react-using-bootstrap-and-contrast-5gi2 follow this link to see
