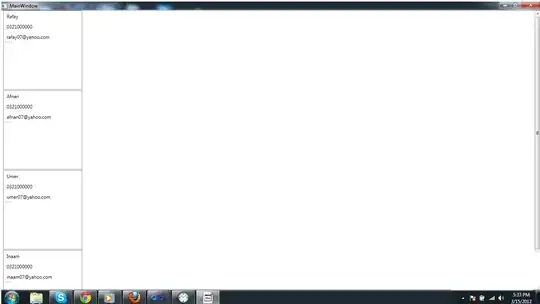
How to create a pull menu similar to the image
Asked
Active
Viewed 100 times
1 Answers
1
You could look at DrawerLayout,set the menu to be opened from right to left.
You should set android:layout_gravityand tools:openDrawer="end" For example:
<?xml version="1.0" encoding="utf-8"?>
<android.support.v4.widget.DrawerLayout
   xmlns:android="http://schemas.android.com/apk/res/android"
   xmlns:app="http://schemas.android.com/apk/res-auto"
   xmlns:tools="http://schemas.android.com/tools"
   android:id="@+id/drawer_layout"
   android:layout_width="match_parent"
   android:layout_height="match_parent"
   android:fitsSystemWindows="true"
   android:layout_gravity="right"
   tools:openDrawer="end">

<include
    layout="@layout/app_bar_main"
    android:layout_width="match_parent"
    android:layout_height="match_parent" />

<android.support.design.widget.NavigationView
    android:id="@+id/nav_view"
    android:layout_width="wrap_content"
    android:layout_height="match_parent"
    android:layout_gravity="right|end"
    android:fitsSystemWindows="true"
    app:headerLayout="@layout/nav_header_main"
    app:menu="@menu/activity_main_drawer" />

</android.support.v4.widget.DrawerLayout>
in your activity :
DrawerLayout drawer = FindViewById<DrawerLayout>(Resource.Id.drawer_layout);
        if(drawer.IsDrawerOpen(GravityCompat.End))
        {
            drawer.CloseDrawer(GravityCompat.End);
        }
        else
        {
            base.OnBackPressed();
        }
the effect like:
you also could refer to the native android case
Update:
<LinearLayout
   xmlns:android="http://schemas.android.com/apk/res/android"
   xmlns:app="http://schemas.android.com/apk/res-auto"
   xmlns:tools="http://schemas.android.com/tools"
   android:layout_width="match_parent"
   android:layout_height="match_parent"
   android:orientation="vertical"
   >
   <LinearLayout
      android:layout_width="match_parent"
      android:layout_height="300dp">
      <TextView
         android:layout_width="wrap_content"
         android:layout_height="wrap_content"
         android:text="Hello"
         android:layout_gravity="center"
         />
   </LinearLayout>
   <android.support.v4.widget.DrawerLayout
       android:id="@+id/drawer_layout"
       android:layout_width="match_parent"
       android:layout_height="match_parent"
       android:fitsSystemWindows="true"
       android:layout_gravity="right"
       tools:openDrawer="end">

       <include
          layout="@layout/app_bar_main"
          android:layout_width="match_parent"
          android:layout_height="match_parent" />

       <android.support.design.widget.NavigationView
          android:id="@+id/nav_view"
          android:layout_width="wrap_content"
          android:layout_height="match_parent"
          android:layout_gravity="right|end"
          android:fitsSystemWindows="true"
          app:headerLayout="@layout/nav_header_main"
          app:menu="@menu/activity_main_drawer" />

   </android.support.v4.widget.DrawerLayout>
</LinearLayout>
the effect :
Leo Zhu
- 15,726
- 1
- 7
- 23
-
I have already learned how to make the menu along the screen, but working here is different for only half of the screen, and that's what I want – maher2020 Apr 20 '20 at 11:24
-
@maher2020 I think you just need change it in its layout.xml,like above – Leo Zhu Apr 21 '20 at 01:40


