9

Background:

The shot below is of Mail.app in OS X Lion. When the source list gets too long, a nice shadowy line appears just above the buttons at the bottom of the source list. When you scroll, the source list moves under that shadowy line. When you expand the window so that everything in the source list fits without scrolling, the shadowy line disappears.

The question:

How can I draw this shadowy line using Cocoa? I'm aware of NSShadow and such, but it seems to me there's more going on here than just a shadow. There's a line that subtly fades to points (as if you applied a gradient mask to each end in Photoshop.) Likewise, the shadow is oval and tapers off as you approach the end of the lines. So it's not just a regular NSShadow, is it? (It's definitely not an image, as it scales nicely when you expand the width of the source view.)

Any tips on how to approach drawing this shape would be greatly appreciated.

enter image description here

And for the sticklers out there, no, this does not violate the NDA, as Mail.app has been shown publicly by Apple.

Bryan
  • 4,628
  • 3
  • 36
  • 62
  • A PDF could scale. You could create the shadow in a vector application and draw the single-point line over it in code so that the line doesn't scale vertically with the rest of the image. –  Aug 17 '12 at 17:31

2 Answers2

16

General Idea:

.

  1. Create a layer "Layer A" with dimensions 150px × 10px
    and fill it with a Gradient with:
    • lower color: #535e71 opacity: 33%
    • upper color: #535e71 opacity: 0%
  2. Create a layer "Layer B" with dimensions 150px × 1px
    and fill it with solid #535e71 opacity: 50%
  3. Compose "Layer A" and "Layer B" together into "Layer C".
  4. Apply reflected gradient mask from #ffffff to #000000 to "Layer C".

Visual Steps:

enter image description here

Functional Code:

MyView.h:

#import <Cocoa/Cocoa.h>

@interface MyView : NSView {
@private

}

@end

MyView.m:

#import "MyView.h"

@implementation MyView

- (CGImageRef)maskForRect:(NSRect)dirtyRect {
    NSSize size = [self bounds].size;
    CGColorSpaceRef colorSpace = CGColorSpaceCreateDeviceRGB();
    CGContextRef context = CGBitmapContextCreate(NULL, size.width, size.height, 8, 0, colorSpace, kCGImageAlphaPremultipliedLast);

    CGContextClipToRect(context, *(CGRect*)&dirtyRect);

    CGRect rect = CGRectMake(0.0, 0.0, size.width, size.height);

    size_t num_locations = 3;
    CGFloat locations[3] = { 0.0, 0.5, 1.0 };
    CGFloat components[12] = {
        1.0, 1.0, 1.0, 1.0,  // Start color
        0.0, 0.0, 0.0, 1.0,  // Middle color
        1.0, 1.0, 1.0, 1.0,  // End color
    };

    CGGradientRef myGradient = CGGradientCreateWithColorComponents(colorSpace, components, locations, num_locations);

    CGPoint myStartPoint = CGPointMake(CGRectGetMinX(rect), CGRectGetMinY(rect));
    CGPoint myEndPoint = CGPointMake(CGRectGetMaxX(rect), CGRectGetMinY(rect));

    CGContextDrawLinearGradient(context, myGradient, myStartPoint, myEndPoint, 0);

    CGImageRef theImage = CGBitmapContextCreateImage(context);
    CGImageRef theMask = CGImageMaskCreate(CGImageGetWidth(theImage), CGImageGetHeight(theImage), CGImageGetBitsPerComponent(theImage), CGImageGetBitsPerPixel(theImage), CGImageGetBytesPerRow(theImage), CGImageGetDataProvider(theImage), NULL, YES);

    [(id)theMask autorelease];

    CGColorSpaceRelease(colorSpace);
    CGContextRelease(context);

    return theMask;
}

- (void)drawRect:(NSRect)dirtyRect {
    NSRect nsRect = [self bounds];
    CGRect rect = *(CGRect*)&nsRect;
    CGRect lineRect = CGRectMake(rect.origin.x, rect.origin.y, rect.size.width, (CGFloat)1.0);

    CGColorSpaceRef colorSpace = CGColorSpaceCreateDeviceRGB();

    CGContextRef context = (CGContextRef) [[NSGraphicsContext currentContext] graphicsPort];
    CGContextClipToRect(context, *(CGRect*)&dirtyRect);
    CGContextClipToMask(context, rect, [self maskForRect:dirtyRect]);

    size_t num_locations = 2;
    CGFloat locations[2] = { 0.0, 1.0 };
    CGFloat components[8] = {
        0.315, 0.371, 0.450, 0.3,  // Bottom color
        0.315, 0.371, 0.450, 0.0  // Top color
    };

    CGGradientRef myGradient = CGGradientCreateWithColorComponents(colorSpace, components, locations, num_locations);

    CGPoint myStartPoint = CGPointMake(CGRectGetMinX(rect), CGRectGetMinY(rect));
    CGPoint myEndPoint = CGPointMake(CGRectGetMinX(rect), CGRectGetMaxY(rect));

    CGContextDrawLinearGradient(context, myGradient, myStartPoint, myEndPoint, 0);

    CGContextSetRGBFillColor(context, 0.315, 0.371, 0.450, 0.5 );
    CGContextFillRect(context, lineRect);

    CGColorSpaceRelease(colorSpace);    
}

@end

(My first time using pure low-level CoreGraphics, thus possibly sub-par optimal, open for improvements.)

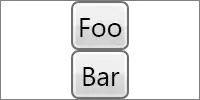
This is an actual screenshot of what the code above produces:
enter image description here
The drawing stretches to the view's dimensions.

(I formerly had two techniques shown here: "Technique A" & "Technique B".
"Technique B" provided superior results and was way simpler to implement as well, so I ditched "Technique A".
Some comments may still refer to "Technique A" though. Just ignore them and enjoy the fully functional code snippet.).

Regexident
  • 29,441
  • 10
  • 93
  • 100
  • @Regexident I agree with the general approach here and I can draw this particular shape in about 45 seconds if I fire up Photoshop. The trouble is that I'm unsure how to translate that process (outlined above) into Cocoa drawing API calls. – Bryan Jun 17 '11 at 07:04
  • @Bryan: Maybe you could use NSGradient, NSBezierPath, and some blending modes. – Tristan Jun 17 '11 at 14:39
  • @bryan, @tristan-seifert: I took the opportunity to practice some CoreGraphics and implemented the drawing as described in my answer. – Regexident Jun 17 '11 at 15:33
  • Thanks a whole darn lot for the code... I was stuck trying to figure out the blending on the sides, and I was sure my code was inefficient as crap. Now all I need to do is to have the bottom corners of my window rounded as well... – Tristan Jun 18 '11 at 15:20
  • @tristan-seifert: Unless rounded borders will be a default (or at least an option) in Lion you'll probably have to implement a subclass of NSWindow for that. – Regexident Jun 18 '11 at 15:49
  • @Regexident I figured as much, but even when Lion comes out, I'd still like 10.5 and 10.6 compatibility. Doing the custom drawing/subclass shouldn't be too hard, really. I'm using INAppStoreWindow anyways, so I could probably just cannibalize the code that draws the top rounded corners and flip it. – Tristan Jun 18 '11 at 16:09
  • @Regexident is it only me or does this simply not draw when I put it in the standard NSView template from XCode? Also, what are the dimensions of the NSView you used this drawing code in? – Tristan Jun 19 '11 at 02:58
  • @tristan-seifert: Are you sure you didn't forget to set the custom subclass in Interface Builder? Anyway, I updated my answer. It now features a complete subclass implementation. A 1:1 dump of my (working) code. Good luck! Oh, and the drawing will stretch to the view's dimensions. Something around 150x24px should do fine. ;) – Regexident Jun 19 '11 at 11:56
  • @Regexident quite interestingly, even with everything set perfectly, nothing is drawing. I dragged a Custom View from the Library, changed it's subclass to what I had named my view, and slapped it on a blank NSWindow. Even then, absolutely nothing is drawn for me where I put this view. Does this seem weird, at all? Also, what SDK was your demo project targeting? (My magical little project targets 10.5) – Tristan Jun 19 '11 at 14:15
  • @tristan-seifert: I'm targeting 10.6. I have no 10.5 SDK installed, cannot check for that. :( Are you sure that your custom `drawRect:` gets called at all (gdb breakpoint)? Btw, I added a screenshot of the programmatically drawn view to my answer. – Regexident Jun 19 '11 at 14:20
  • @Regexident I was adding my source file to the wrong target in my project. I just hate XCode for defaulting to the latest added target now =P Thanks for the help anyways. Also, quick question, how'd you 'tint' your entire window blue? – Tristan Jun 19 '11 at 14:35
  • 2
    @tristan-seifert: `[window setBackgroundColor:[NSColor colorWithCalibratedHue:0.590 saturation:0.057 brightness:0.890 alpha:1.000]];` ;) – Regexident Jun 19 '11 at 14:37
  • @Regexident /me headdesk =P Anyways, thanks for all the help, this code is fantastic! – Tristan Jun 19 '11 at 14:41
  • Instead of code, I've just been using a PDF created in Illustrator and drawing a single-point line over it for the separator. Another option people might like to try. –  Aug 17 '12 at 17:37
0

How about an image that's stretched horizontally?

Or if you know how you'd make one in Photoshop, you could apply those same steps programmatically.

Dave DeLong
  • 242,470
  • 58
  • 448
  • 498
  • If you stretched this horizontally, wouldn't it be pixelated when you stretch it a lot? I should go Resources folder diving later today =P – Tristan Jun 16 '11 at 02:44
  • @Tristan probably, unless perhaps your source image was super-wide to begin with? – Dave DeLong Jun 16 '11 at 02:47
  • @Dave Not sure, but then wouldn't we loose most of the shadowyness and all that fun stuff when scaling it way down? I'm gonna get some sleep and see how this works in Mail (*cough*class-dump*cough*) and maybe try to see if I can get this working in Photoshop too. I'm not sure if this is something specific to Mail on Lion, but I'm too lazy to boot into Lion and test out my project/app I'm working on. – Tristan Jun 16 '11 at 02:54
  • Mail is the only app I've seen do this so far, but it's also the only app I've come across with buttons at the bottom of a source list like this. (By contrast, other apps with a source list, like iTunes, have a bottom bar that goes across the whole window.) I really don't think they're using an image, because this thing looks perfect at all sizes. It would pixelate and stretch as you resized if it were an image. – Bryan Jun 16 '11 at 05:46
  • @Brian: It does not necessarily have to look pixelated when stretched from an image. This is the result from my answer when stretched to a width of 1000px: http://i.imgur.com/uukai.png Not pixelated at all. In production you'd probably want to either go by code or use a horizontally three-tiled image though, in order to fine-tune the (proferably non-proportional) scaling of the horizontal reflected gradient. /cc @dave-delong, @tristan-seifert – Regexident Jun 16 '11 at 11:33
  • @Regexident the stretched image does look surprisingly good. What width did you draw it at to begin with? I wonder how it would do on upcoming retina displays, however. Ideally, I'd like to draw it in code. – Bryan Jun 17 '11 at 07:06
  • @Bryan: It was about 140px in width (and taken from my now deleted "Technique A" recipe) and got stretched to 1000px. The most dominant gradient in the UI element is a vertical one, thus stretching it horizontally doesn't do much damage to it. I posted some actually functional CoreGraphics code though, which you might or might not prefer to stretching images. It adapts to the view's bounds. Check my updated answer. – Regexident Jun 17 '11 at 15:37