55

I'm trying to migrate an existing VM from VMWARE to VirtualBox. I've made a copy of the Virtual Machine folder for the VM (so I can experiment and not destroy the original) and have successfully created a VM in VirtualBox. I've got everything booting and running, but the issue is that VM is using the "flat" disk image instead of the correct disk image causing the disk image to be from the past (I know this because all the files on the machine have a timestamp of 2009).

To elaborate, in the VM's folder i have the following vmdk files:

Win2003.vmdk (1 K)
Win2003-flat.vmdk (15 gigs)
Win2003-000002.vmdk (10 gigs)

NOTE: the disk is dynamic.

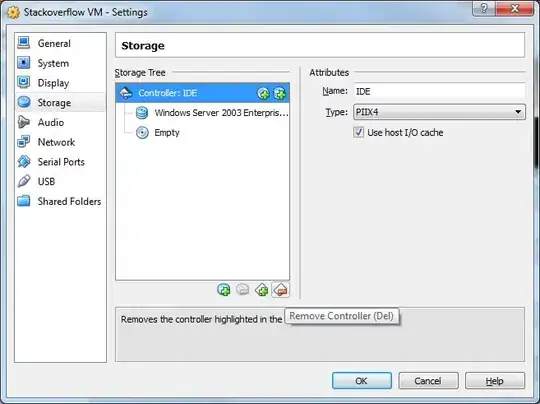
Looking in the configuration of the VM under VMWARE, it says that it's using the win2003-000002.vmdk as the disk image.

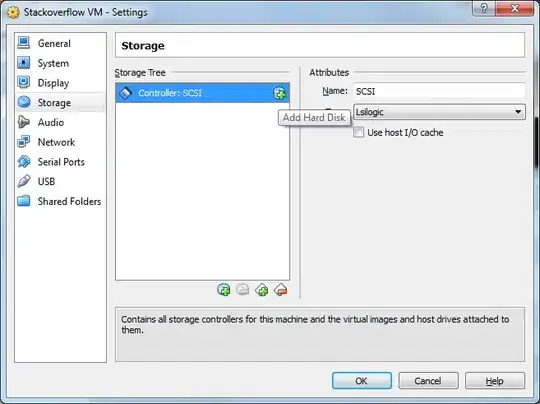
When I import the disk image into VirtualBox (the Win2003.vmdk file), it uses the Win2003-flat.vmdk disk image.

My question is, what can I do to either combine or import the Win2003-000002.vmdk disk image into the Win2003-flat.vmdk disk image so that VirtualBox will use the correct disk image?

I've some instructions on using vmware-vdiskmanager.exe to accomplish this, but I get an error stating "The parent of this virtual disk could not be opened."

tshepang
  • 12,111
  • 21
  • 91
  • 136
rip747
  • 9,375
  • 8
  • 36
  • 47
  • Have you tried using the `Conversion Wizard` (File|Import or Export...) that comes with VMWare Workstation to merge everything into one file and continue from there? – Lieven Keersmaekers Aug 09 '11 at 20:46
  • `VBoxManage clonehd --format VDI server1-disk1.vmdk c:\vms\server2\server2-disk` - source: https://www.jamescoyle.net/how-to/2000-convert-virtual-disk-image-vmware-vmdk-to-virtualbox-vdi – Samuel Sep 19 '19 at 14:18

5 Answers5

69

After many attempts I was finally able to get this working. Essentially what I did was download and use the vmware converter to merge the two disks into one. After that I was able to attach the newly created disk to VitrualBox.

The steps involved are very simple:

BEFORE YOU DO ANYTHING!

1) MAKE A BACKUP!!! Even if you follow these instruction, you could screw things up, so make a backup. Just shutdown the VM and then make a copy of the directory where VM resides.

2) Uninstall VMware Tools from the VM that you are going to convert. If for some reason you forget this step, you can still uninstall it after getting everything running under VirtualBox by following these steps. Do yourself the favor and just do it now.

NOW THE FUN PART!!!

1) Download and install the VMware Converter. I used 5.0.1 build-875114, just use the latest.

2) Download and install VirtualBox

3) Fire up VMWare convertor:

Fire up VMWare convertor

4) Click on Convert machine

6) Browse to the .vmx for your VM and click Next.

Convert machine

7) Give the new VM a name and select the location where you want to put it. Click Next

Give the new VM a name and select the location

8) Click Next on the Options screen. You shouldn't have to change anything here.

Click <code>Next</code> on the <code>Options</code> screen.

9) Click Finish on the Summary screen to begin the conversion.

Click <code>Finish</code> on the <code>Summary</code> screen

10) The conversion should start. This will take a LOOONG time so be patient.

The conversion should start.

11) Hopefully all went well, if it did, you should see that the conversion is completed:

conversion is completed

12) Now open up VirtualBox and click New.

open up VirtualBox and click <code>New</code>

13) Give your VM a name and select what Type and Version it is. Click Next.

Give your VM a name and select what <code>Type</code> and <code>Version</code> it is.

14) Select the size of the memory you want to give it. Click Next.

Select the size of the memory you want to give it.

15) For the Hard Drive, click Use and existing hard drive file and select the newly converted .vmdk file.

Use and existing hard drive file

16) Now Click Settings and select the Storage menu. The issue is that by default VirtualBox will add the drive as an IDE. This won't work and we need as we need to put it on a SCSI controller.

put it on a SCSI controller

17) Select the IDE controller and the Remove Controller button.

Select the IDE controller and the <code>Remove Controller</code> button.

18) Now click the Add Controller button and select Add SCSI Controller

Add SCSI Controller

19) Click the Add Hard Disk button.

Add Hard Disk

20) Click Choose existing disk

Choose existing disk

21) Select your .vmdk file. Click OK

Select your <code>.vmdk</code> file.

22) Select the System menu.

Select the <code>System</code> menu.

23) Click Enable IO APIC. Then click OK

Click <code>Enable IO APIC</code>.

24) Congrats!!! Your VM is now confgiured! Click Start to startup the VM!

Click <code>Start</code> to startup the VM!

Christian Strempfer
  • 7,291
  • 6
  • 50
  • 75
rip747
  • 9,375
  • 8
  • 36
  • 47
  • Sorry... -1 for *I will give more details later* **over a year ago**. Just wanted to know how to do this, and that's less than helpful. I'll gladly reverse my vote if you remember the steps! – Josh Nov 15 '12 at 20:19
  • Any guide with more than 5 instrucctions it's not a good guide, please short it or update the link, that are not working :( – Enrique San Martín Aug 23 '15 at 13:50
  • I think this is outdated. Now you can use `ovftool` instead all of this. – kolobok May 17 '17 at 14:12
  • This works for me. thank a lot. – Lanka Aug 15 '19 at 06:06
9

I will suggest something totally different, we used it at work for many years ago on real computers and it worked perfect.

Boot both old and new machine on linux rescue Cd.

read the disk from one, and write it down to the other one, block by block, effectively copying the dist over the network.

You have to play around a little bit with the command line, but it worked so well that both machine complained about IP-conflict when they both booted :-) :-)

cat /dev/sda | ssh user@othermachine cat - > /dev/sda
UnixShadow
  • 1,222
  • 8
  • 12
  • Wow. Very creative, elegant, and robust. I can't imagine a scenario where it wouldn't work, either direction, any vm host, any vm guest. As long as they can attach and boot an iso as a virtual live CD, you're good to go! – hobs Sep 06 '12 at 17:23
3

QEMU has a fantastic utility called qmeu-img that will translate between all manner of disk image formats. An article on this process is at http://thedarkmaster.wordpress.com/2007/03/12/vmware-virtual-machine-to-virtual-box-conversion-how-to/

I recall in my head that I used qemu-img to roll multiple VMDKs into one, but I don't have that computer with me to retest the process. Even if I'm wrong, the article above includes a section that describes how to convert them with your VMWare tools.

Jeff Ferland
  • 17,832
  • 7
  • 46
  • 76
2

Note: I am not sure this will be of any help to you, but you never know.

I found this link:http://www.ubuntugeek.com/howto-convert-vmware-image-to-virtualbox-image.html

ENJOY :-)

Dynamic
  • 921
  • 1
  • 12
  • 31
  • I can confirm that this actually works and I prefered it since it only involved creation of a new VirtualBox VM. Just remember to uninstall vmware tools before attaching the vmdk to VirtualBox – KalenGi Oct 07 '13 at 13:15
1

This error occurs because VMware has a bug that uses the absolute path of the disk file in certain situations.

If you look at the top of that small *.vmdk file you'll likely see an incorrect absolute path to the original VMDK file that needs to be corrected.

Jakub Konecki
  • 45,581
  • 7
  • 87
  • 126