Examples using this method:

Below is a postprocessing shader intended to let you set the saturation of each color channel.
It first takes the original pixel color, gets the hue, saturation, and luminance. That color is taken to its most saturated, neutral-luminance version. The rgb of that is then multiplied by the desaturation factor to compute the rgb of the new hue. The magnitude of that rgb is multiplied by the original saturation to get the new saturation. This new hue and saturation is fed back in with the original luminance to compute the new color.
Shader "Custom/ChannelSaturation" {
    Properties{
        _MainTex("Base", 2D) = "white" {}
        _rSat("Red Saturation", Range(0, 1)) = 1
        _gSat("Green Saturation", Range(0, 1)) = 1
        _bSat("Blue Saturation", Range(0, 1)) = 1
    }
        SubShader{
            Pass {
                CGPROGRAM
                #pragma vertex vert_img
                #pragma fragment frag
                #include "UnityCG.cginc"

                uniform sampler2D _MainTex;
                float _rSat;
                float _gSat;
                float _bSat;

                /*
                  source: modified version of https://www.shadertoy.com/view/MsKGRW
                  written @ https://gist.github.com/hiroakioishi/
                            c4eda57c29ae7b2912c4809087d5ffd0
                */
                float3 rgb2hsl(float3 c) {
                    float epsilon = 0.00000001;
                    float cmin = min( c.r, min( c.g, c.b ) );
                    float cmax = max( c.r, max( c.g, c.b ) );
                    float cd   = cmax - cmin;
                    float3 hsl = float3(0.0, 0.0, 0.0);
                    hsl.z = (cmax + cmin) / 2.0;
                    hsl.y = lerp(cd / (cmax + cmin + epsilon),
                            cd / (epsilon + 2.0 - (cmax + cmin)),
                            step(0.5, hsl.z));

                    float3 a = float3(1.0 - step(epsilon, abs(cmax - c)));
                    a = lerp(float3(a.x, 0.0, a.z), a, step(0.5, 2.0 - a.x - a.y));
                    a = lerp(float3(a.x, a.y, 0.0), a, step(0.5, 2.0 - a.x - a.z));
                    a = lerp(float3(a.x, a.y, 0.0), a, step(0.5, 2.0 - a.y - a.z));

                    hsl.x = dot( float3(0.0, 2.0, 4.0) + ((c.gbr - c.brg)
                            / (epsilon + cd)), a );
                    hsl.x = (hsl.x + (1.0 - step(0.0, hsl.x) ) * 6.0 ) / 6.0;
                    return hsl;
                }

                /*
                  source: modified version of
                          https://stackoverflow.com/a/42261473/1092820
                */
                float3 hsl2rgb(float3 c) {
                    float3 rgb = clamp(abs(fmod(c.x * 6.0 + float3(0.0, 4.0, 2.0),
                            6.0) - 3.0) - 1.0, 0.0, 1.0);
                    return c.z + c.y * (rgb - 0.5) * (1.0 - abs(2.0 * c.z - 1.0));
                }

                float4 frag(v2f_img i) : COLOR {
                    float3 sat = float3(_rSat, _gSat, _bSat);

                    float4 c = tex2D(_MainTex, i.uv);
                    float3 hslOrig = rgb2hsl(c.rgb);

                    float3 rgbFullSat = hsl2rgb(float3(hslOrig.x, 1, .5));
                    float3 diminishedrgb = rgbFullSat * sat;

                    float diminishedHue = rgb2hsl(diminishedrgb).x;

                    float diminishedSat = hslOrig.y * length(diminishedrgb);
                    float3 mix = float3(diminishedHue, diminishedSat, hslOrig.z);
                    float3 newc = hsl2rgb(mix);

                    float4 result = c;
                    result.rgb = newc;

                    return result;
                }
                ENDCG
            }
        }
}
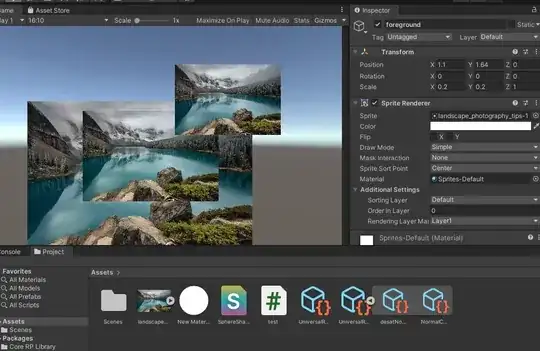
If you're using URP (Universal Rendering Pipeline), which is recommended, you can create a new forward renderer pipeline asset, assign the shader to that asset, and configure it appropriately. Further information including diagrams can be found in the official unity tutorial for custom render passes with URP.
If you aren't using URP, you have other options. You could attach it to specific materials, or use the below script from Wikibooks to the camera's gameobject to apply a material using the above shader as a postprocessing effect to the camera:
using System;
using UnityEngine;

[RequireComponent(typeof(Camera))]
[ExecuteInEditMode]

public class PostProcessingEffectScript : MonoBehaviour {

   public Material material;

   void OnEnable()
   {
      if (null == material || null == material.shader ||
         !material.shader.isSupported)
      {
         enabled = false;
      }
   }

   void OnRenderImage(RenderTexture source, RenderTexture destination)
   {
      Graphics.Blit(source, destination, material);
   }
}
If you use the postprocessing effect, you will want to render the things you want to exclude from the effect with a different camera, then put everything together. However, this is a bit out of scope for this answer.