So here is my solution to the problem. My situation is best described using an image. 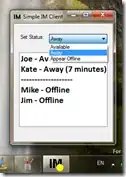 There is a toolbar above and a selection list on the left. Therefore, the SVG-drawing is not at (0,0) in the browser, but could vary.
The trick I am using is that you can ask any SVG-element for its boundingbox. However, this box is absolute in the browsers' viewport. So I need to correct for the offset of the toolbar and selection list.
Having done that I know where my drawing is in normal (browsers') coordinates system. By having some variables to administer panning and zoom correction I can do the right calculations.
I have tested this in Angular 16. An extraction from my template:
<svg xmlns="http://www.w3.org/2000/svg"
       width="calc(100% - 1px)"
       height="calc(100% - 1px)"
       (wheel)="zoomInOut($event)"
       (mouseup)="endAllDragging($event)"
       #svgBaseElement>
<g *ngIf="store.workflowWasSelected" [attr.transform]="transformStr" #transformcontainer>
....
</g>
</svg>
Notice the following:
- mouse wheel (for zooming) is caught at the SVG-element level
- the transformation for panning & zooming is set at a
<g>-element
Ok. So now for the interesting stuff I discovered. Hopefully this will help others.
Be aware!! When using 'transform' on an SVG <G>-element the order in wich the transformations are done will matter. So
<g transform='scale(2) transform(10,20)'>....</g>
will yield different results from
<g transform='transform(10,20) scale(2) '>....</g>
In the first case first the whole contents of the element are scaled by a factor 2, including the coordinates system. After transformation the shapes in the <g>-element are moved in the new coordinates system.
In the second case the whole contents of the element are moved to the given location , and then the whole drawing including coordinates system are scaled to a factor of 2.
Both use cases are valid; it just depends whether you want to do the calculations in the original coordinates system or in the scaled coordinates system.
Compare the output of
<html>
<body>
<div style="width: 500px;height:500px">
  <svg width="100" height="100" viewbox="0 0 100 100" style="background: gray;">
    <circle cx="50" cy="50" r="30" fill="blue"/>
  </svg>
  <svg width="100" height="100" viewbox="0 0 100 100"   style="background: gray;">
    <g transform=" translate(50,0) scale(0.5) ">
      <circle cx="50" cy="50" r="30" fill="orange" />
    </g>
  </svg>
</div>
</body>
</html>
to the output of
<html>
<body>
<div style="width: 500px;height:500px">
  <svg width="100" height="100" viewbox="0 0 100 100" style="background: gray;">
    <circle cx="50" cy="50" r="30" fill="blue"/>
  </svg>
  <svg width="100" height="100" viewbox="0 0 100 100"   style="background: gray;">
    <g transform=" scale(0.5) translate(50,0) ">
      <circle cx="50" cy="50" r="30" fill="orange" />
    </g>
  </svg>
</div>
</body>
</html>
I choose to do the calculations using the original coordinates system and will not take the following two cases into account:
- the position of the mouse so 'zoom in place' is done
- the image could be already moved ('panned') in either X or Y direction
These will be dealt with later!
Now calculate the amount of correction that must be done because the scaling will impact the coordinate system. So, when scaling to 25% (scaleFactor = 0.25) then the drawing will move in the direction of the top-left corner.
The (x,y) coordinates of the -element will be reduced to 25%; so if a rectangle is at (80,100)x(50,60) (x,y)*(w,h) then after transform='scale(0.25)' , it will appear as if it was drawn at a 100% scale with coordinates (20,25)x(12.5,15).
So, in order to keep the drawing at exact the same (x,y) we need to correct using a translation: we have to move the drawing back a certain amount. It should again appear as if it was drawn at (80,100). So we correct it to translate right 60 pixels (calculations displayed are for the X-coordinates, same applies for the Y-coordinates)
80 - 0.25 * 80 = 80 - 20 = 60.
So scaling down means a positive translation to the right. Scaling up means a translation the left.
Scaling up example
Top/left = (80, 100) , scale = 150% (=1.5). Formula:
80 - 1.5 * 80 = 80 - 120 = -40.
So this works: we translate to left because when zooming in, the coordinates will become bigger visually and we the drawing will move to the right. By using a negative translation we will move the coordinates back to the left and the image will stay at the same place visually.
So the formula will be (scalingfactor 1 = 100%, 0.5 = 50%, 1,25 = 125% etc)
new(x) = old(x) * newScalingFactor
correction(x) = old(x) - old(x) * newScalingFactor
Dealing with negative values
What if values for (x,y) position of the drawing turn out to be negative? This can happen if the user moved the image partly out of view to the left.
For instance drawing is at (top/left) (-40, -12) with zoom-factor 1. Then if zoom-factor if changed to 25% the coordinates are scaled down so the top-left is visible as if it was drawn at 100% at coordinates (-10,-3). So now the drawing suddenly moves to the RIGHT according to the coordinates: -10 is to the right of -40 in coordinate systems.
However, because the scale is reduced the drawing is visually still moving to the LEFT! You can try this in the example above.
What if already a translation(x,y) is present?!
So now lets have a look at when the image is already moved.
The diagram could already be moved ('panned') to a different location by the user or because of the correction we applied due to zooming. So we need to know what part of the position is determined by user-panning and what part is determined by the zoom correction. By introducing new variables this can be taken into account:
let zoomCorrectionPanX: number;
let zoomCorrectionPanY: number;
will administer the correction needed due to zooming.
let userPanningX: number;
let userPanningY: number;
will administer the panning done by a user.
Please note: these variables all have values that are in the ORIGINAL coordinates system. Therefore, we can use them to do calculation.
Important: when panning, we do not need to correct for the zoom-factor anymore. The panning can be administered in the normal coordinate system of the browsers' units.
Calculate the RELATIVE position of the drawing within the SVG. This is
- calculated in the original coordinate system (so unzoomed!)
- including panning in X & Y direction.
The panning can be obtained from the variables (userPanningX,userPanningY). So the actual position on the screen is determined by three factors:
- the position of the SVG in the browser's viewport
- the amount of panning
- the position of the complete drawing on screen.
Now the position of the drawing can be determined. In order to facilitate 'center weight zooming' (the center of the image will remain in the same position) the position is increased with half the height and half the width.
Another way of zooming would be to use in the 'in place zooming' (the drawing is zoomed at the place where the mouse is positioned). All we need to do then is use the position of the mouse corrected by the user panning. Both scenarios are depicted below in the final code
zoomInOut(event: WheelEvent): void {

    const mouseX = (event.offsetX);
    const mouseY = (event.offsetY);

    if (event.deltaY < 0) {
      this.scaleFactor = Math.min(this.scaleFactor + 0.1, 2);  // zoom in, max zoom = 2
    } else {
      this.scaleFactor = Math.max(this.scaleFactor - 0.1, 0.4); // zoom out, max zoom = 0.4
    }

    // get the absolute position of the drawing and the SVG so we can calculate where the drawing was originally drawn
    const svgRect = this.svgBaseElement.nativeElement.getBoundingClientRect();
    // note that the getBoundingClientRect() will show the current bounding box as drawn using the Scale + Translate!
    const drawingRect = this.transformcontainer.nativeElement.getBoundingClientRect();


    const centerOfDrawingX = drawingRect.x - svgRect.x - this.userPanningX + drawingRect.width / 2;
    const centerOfDrawingY = drawingRect.y - svgRect.y - this.userPanningY + drawingRect.height / 2;


    // ok, this is not yet working as it should. looking at it presently and will update when it does work!
    let zoomOnMouseX = mouseX - this.userPanningX;
    let zoomOnMouseY = mouseY - this.userPanningY;

    // now the 'in place zooming' is in use.
    this.zoomCorrectionPanX = zoomOnMouseX - (zoomOnMouseX * this.scaleFactor);
    this.zoomCorrectionPanY = zoomOnMouseY - (zoomOnMouseY * this.scaleFactor);

    // when you want to use 'center of drawing' zoom, use the two lines below
    // this.zoomCorrectionPanX = centerOfDrawingX - (centerOfDrawingX * this.scaleFactor);
    // this.zoomCorrectionPanY = centerOfDrawingY - (centerOfDrawingY * this.scaleFactor);

  this.createTransformMatrixString();
}
the function to create the actual transformation string on the <g>-element is crucial:
  /**
   * Method to setup the actual SVG-transform string; is bound using [()] on a SVG-element
   */
  createTransformMatrixString(): void {
    const translateStr = `translate(${this.userPanningX + this.zoomCorrectionPanX} ${this.userPanningY + this.zoomCorrectionPanY})`;
    const scaleStr = `scale(${this.scaleFactor})`;

    this.transformStr = `${translateStr} ${scaleStr}  `;
  }
In order to get a reference to the elements in the <SVG> we use ViewChildin Angular:
  @ViewChild('svgBaseElement') svgBaseElement: ElementRef | undefined;
  @ViewChild('transformcontainer') transformcontainer: ElementRef | undefined;
Finally, my drag-function which is quite simple. The variables startPanDiagramX and startPanDiagramY are set in the startDragging function.
Notice that I want to enable double-click so therefore there is a two-stage drag-detection: click will register the intent to drag. Only when the mouse-move actually detects movement, the other flag (isDraggingDiagram) is set.
  dragDiagramStart(event: MouseEvent): void {
    if (event.button !== 0) {
      return
    }
    event.stopPropagation();
    event.preventDefault();

    this.startDragDiagramX = event.offsetX;
    this.startDragDiagramY = event.offsetY;

    // record the current panning
    this.startPanDiagramX = this.userPanningX;
    this.startPanDiagramY = this.userPanningY;

    this.dragDiagramHasStarted = true;
  }


  dragDiagram(event: MouseEvent): void {
    if (event.button !== 0) {
      return;
    }

    event.stopPropagation();
    event.preventDefault();

    if (this.dragDiagramHasStarted) {
      this.isDraggingDiagram = true;

      const newX = event.offsetX;
      const newY = event.offsetY;

      // calculate the new position by calculating the difference between the start-drag and current-drag position
      const diffX = this.startDragDiagramX - newX;
      const diffY = this.startDragDiagramY - newY;

      // adjust the panning by subtracting the differences (note that dragging left yields a negative PanX-value
      this.userPanningX = this.startPanDiagramX - diffX;
      this.userPanningY = this.startPanDiagramY - diffY;

      this.createTransformMatrixString();
    }
  }

