wikiHow is a “wiki,” similar to Wikipedia, which means that many of our articles are co-written by multiple authors. To create this article, volunteer authors worked to edit and improve it over time.
This article has been viewed 51,888 times.
Learn more...
The method used to add a laser printer to a home network depends upon the device's connection options and whether a local or direct connection to the network is preferred. A local printer will be installed directly to 1 computer on the network. The local printer will then be made available to other computers on the network by adjusting the network settings. A direct connection can only be made with a network printer that is equipped with a built-in network interface. Instead of being connected to a single computer on the network, a network printer will connect to the network router or hub using an Ethernet, USB or wireless connection. This article provides instructions for adding a network or local laser printer to a home network.
Steps
Add a Network Laser Printer to a Home Network
-
1Determine the type of connection to use. To add a network printer directly to a home network, a physical connection to a network router or hub is required. This connection could be made using an Ethernet cable, a USB cable or a wireless connection. Refer to the documentation included with your device to determine which connection methods are available.
-
2Establish a connection between the laser printer and the router or hub using an Ethernet or USB cable. Refer to the device manual for instructions on how to connect the printer to the hub or router.
- Plug 1 end of the Ethernet cable into the Ethernet connection port on the printer, and plug the other end of the Ethernet port on the network router or hub when using an Ethernet connection.
- Insert the square end of the USB cable into the matching port on the laser printer and the rectangular end into and empty USB port on the network router or hub when using a USB connection.
Advertisement -
3Establish a connection between the laser printer and the router or hub using a wireless connection.
- Press the setup button on the laser printer's control panel to open the setup wizard. The name assigned to your network should appear in the list of available networks.
- Enter the network name and password when prompted by the setup wizard, and click OK. A wireless connection has been established between the laser printer and the router or hub.
-
4Establish a connection between the network and the laser printer. Now that a physical connection between the device and the router or hub has been made, it is possible to add the laser printer to the home network.
- Open the control panel from the Start Menu options and click the Printers icon to open the Printers folder.
- Double-click the "Add a printer" option located in the toolbar. The Add Printer dialogue box will open.
- Click on "Add a network, wireless or Bluetooth printer," and click Next.
- Select the newly connected device from the options listed and click Finish. The laser printer has been added to the network.
-
5Make a connection between other computers on the network and the newly installed laser printer. After you have connected the network printer to the router or hub and added it to the network, a connection will need to opened for each computer installed on the network.
- Open the Printers folder from the control panel and double-click the "Add a printer" option in the toolbar.
- Choose "Add a network, wireless or Bluetooth printer," and click Next.
- Select the newly installed printer from the list of available devices and click Finish. Repeat this step for each computer connected to the network. A connection to the laser printer has been opened for each computer installed on the home network.


Add a Local Laser Printer to a Home Network
-
1Connect the device directly to a computer on the network according to the device specifications. Typically, the connection will be made using a USB cable.
- Install the necessary drivers by running the setup disk that was included with the device at the time of purchase. The laser printer has been connected to a computer on the network.
-
2Make the local printer available to other computers on the network. A network connection will need to be established for each computer on the network.
- Open the Printers folder from the control panel and double-click the "Add a printer" option in the toolbar. The Add Printer dialogue box will open.
- Click the Local Printer option, and click Next.
- Select "Create a new port" from the options available, and click "Next" to continue.
- Select Local Port from the menu options, and click Next again.
- Enter the name assigned to the printer and the name of the host printer in the following format: <\\Computer_name\Printer_name > and click Finish. A connection port has been established so other computers on the network can access the laser printer.
-
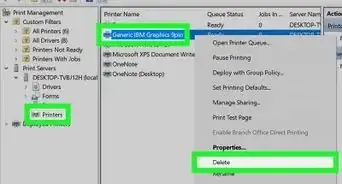
3Confirm that sharing is enabled for the device. Open the Printers folder from the control panel to display all printers connected to the network.
- Right-click the newly installed device and select Sharing from the pull-down menu. Click "Share this printer."
- Repeat these steps for each computer on the network. The laser printer has been added to the network using a local connection.


Install a Network or Local Printer on a Mac Running OS X
-
1Determine the type of connection to use with a Mac OS X-based system. To add a network printer directly to a home network, a physical connection to a network router or hub is required. This connection could be made using an Ethernet cable, a USB cable or a wireless connection. Refer to the documentation included with your device to determine which connection methods are available.
-
2Establish a connection between the laser printer and the router or hub using an Ethernet or USB cable. Refer to the device manual for instructions on how to connect the printer to the hub or router.
- Plug 1 end of the Ethernet cable into the Ethernet connection port on the printer, and plug the other end of the Ethernet port on the network router or hub when using an Ethernet connection.
- Insert the square end of the USB cable into the matching port on the laser printer and the rectangular end into and empty USB port on the network router or hub when using a USB connection.
-
3Establish a connection between the laser printer and the router or hub using a wireless connection. Press the setup button on the laser printer's control panel to open the setup wizard. The name assigned to your network should appear in the list of available networks.
- Enter the network name and password when prompted by the setup wizard, and click OK. A wireless connection has been established between the laser printer and the router or hub.
-
4Establish a connection between the network and the laser printer. Now that a physical connection between the device and the router or hub has been made, it is possible to add the laser printer to the home network.
- Click Go in the Finder menu toolbar, and select Utilities from the pull-down menu.
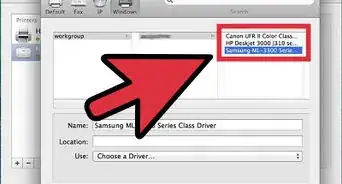
- Double-click the Printer Setup Utility option. The Printer List window will open.
- Highlight the newly installed printer from the options listed in the Printer browser and click the Add button. Repeat this step for each computer on the network. The network laser printer has been added to the home network.