This article was written by Jenny Tran and by wikiHow staff writer, Jennifer Mueller, JD. Jenny Tran is a Hair Stylist and the Founder of JT Hair Lab by Jenny Tran based in the Dallas, Texas metro area. With over seven years of professional hair styling experience, Jenny specializes in hair coloring, haircutting, and hair extensions. JT Hair Lab is an authorized carrier of R+Co and of Milbon and is committed to using products with quality ingredients.
This article has been viewed 1,870 times.
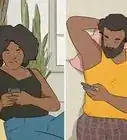
Lopping off your hair doesn't mean you're short on possible styles! Whether you've got a chin-length bob, a super-short pixie cut, or something in between, adding a little curl to your 'do will give you a bouncy, carefree look. No curlers or curling iron handy? Read on to learn the best way to curl your short hair with a flat iron or straightener.
This article is based on an interview with our hair stylist, Jenny Tran, founder of JT Hair Lab by Jenny Tran. Check out the full interview here.
Steps
Curling with a Flat Iron
-
1Apply a heat protectant spray. A heat protectant spray protects your hair from the heat of styling with a flat iron to minimize damage.
-
2Add a styling spray if your hair doesn't hold curl well. A styling spray is similar to a traditional hair spray but not as crunchy. Spray it onto the hair you plan to curl before you start curling and your hair will hold the curl better.
- Give the spray a few seconds to dry before you start curling—you don't want your hair to stick to the plates. Plus, you'll get less gunk on your plates.
Advertisement -
3Warm your flat iron to the lowest heat setting for your hair type. Higher heat won't curl your hair any faster or improve how the curl holds—it will only damage your hair. To minimize damage, use the least amount of heat necessary. Here's a rough guide:[1]
- Fine or damaged hair: 180 to 370 °F (82 to 188 °C)
- Medium thickness, healthy hair: 375 to 395 °F (191 to 202 °C)
- Thick, coarse hair: 400 to 420 °F (204 to 216 °C)
-
4Section off your hair from top to bottom. Start with 2 sections. This doesn't have to be a perfect part between sections, just separate the top of your hair and hold it up with a scrunchy or hairband so it's out of the way. Curl the underneath layer first, then move to the top.
- If you have a lot of hair, you might want to do a middle layer, then the top. That way, your sections won't be quite as thick and the curl will hold better.
- Do a quick run through your hair with the flat iron first to completely straighten it—you'll get prettier curls that way.[2]
-
5Clamp the flat iron around your first section close to the roots. Start with about a 1 inch (2.5 cm) section of hair. Keep a gentle grip—just enough to hold the hair so the flat iron can glide down the section smoothly. Gripping too hard makes it hard to work with the tool and can damage your hair unnecessarily.[3]
- If you have chin-length hair, clamp the section at the root and run it down a little so you don't start the curl too close to the top of your head.
- Use smaller sections if you want a tighter curl pattern or larger sections if you want more of a wavy look.
-
6Rotate the flat iron a half-turn away from your face. Rotate both the flat iron and the hair in the flat iron to make your curl. The amount of rotation dictates your specific curl pattern. For loose, gentle waves, a half-turn is likely enough. For more curl, try a full turn.[4]
- You can even experiment with doing a half-turn on some sections and a full turn on others. After all, natural curls are rarely perfectly consistent. The more variation you have, the more natural your hair will ultimately look.
-
7Pull the flat iron down to the end of the section and release. Your flat iron should glide smoothly down to the end of the section. If it's getting stuck, you either have too much wet product on your hair or you're gripping too tightly.[5]
- The speed at which you do this also determines how much curl you're going to get. If you go slow, your hair gets exposed to more heat, which means more curl. Faster? Your hair gets exposed to less heat for more of a wavy look.
-
8Alternate the direction of the rotation for the next section. Alternating between curls toward your face and curls away from your face gives your hair a more textured, natural look. Your waves will also be a little more bouncy and lively if they're not all turning in the same direction.[6]
-
9Continue the same curling pattern for the rest of your hair. You don't have to be perfectly consistent with the pattern, so play around a little! Some prefer to have most of their curls going in the same direction with only a few going in the opposite direction.[7]
- Remember, if you don't like how a particular section looks, you can always run the flat iron down it to straighten it out and try again. Just keep in mind that you're exposing that section of hair to more heat every time you do that.


Holding Your Style
-
1Give your hair a few seconds to cool. This allows your curls to "set" so they'll ultimately hold longer. If you have thick, coarse hair that holds curl well, this might be all you have to do. But if you have fine hair, it might take a little more work to keep your curls looking their best throughout the day.[8]
-
2Add texture spray to give your hair a little more volume. Texture spray works great on fine hair, especially if you've recently washed your hair. It makes your hair look thicker and helps it hold the curl a little better without making it crunchy or stiff.[9]
-
3Run your fingers through your curls to style them. Get a little of your favorite holding product on your hands and then gently run your fingers through your hair. You might also scrunch the curls a little—just play with it until it looks the way you want it to look.[10]
- Flip your head upside down before your run your fingers through if you want a little more volume and lift.
-
4Apply a final spray to keep your curls in place. Another all-over mist of hair spray is only necessary if you have fine hair that tends to lose curl quickly. But don't go overboard here—you don't want to turn your hair into a helmet.[11]


Getting the Most Beautiful Curls
-
1Wash your hair the night before you style. You do want your hair to be clean, but it'll hold curl better if it's not freshly washed. Washing it the day before gives your hair's natural oils a little time to build back up. This is especially important if you have fine, silky hair.[12]
-
2Use a leave-in conditioner. Since you're going to be styling with heat, a leave-in conditioner will keep your hair more hydrated and protected.
- If you're going to be drying your hair with a hairdryer, use a heat protectant gel or serum that you apply to your hair while it's still wet.
-
3Dry your hair completely. Gently towel-dry your hair, then let it air dry for a bit before you pick up the hairdryer. If you have the time, letting your hair air dry completely is really the best way to go—the less heat damage, the better.[13]
- Make sure your hair is completely dry before you start curling it, though. You'll cause serious damage to your hair if you start ironing it while it's still wet.
-
4Brush your hair to remove all tangles. Use your fingers first to detangle your hair a little while it's wet—you can do this while you're blow-drying it or letting it air dry. Start with your ends and brush them out first, then work your way up to your roots.[14] Make sure you're using the right brush for your hair type:
- Coarse, curly hair: boar bristle brush for smoothing
- Fine to medium hair: metal vent brush for volume
- Straight hair: nylon bristle brush for smoothing
-
5Choose the best flat iron for your hair length. You can curl the shortest hair with a flat iron provided you can rotate the tool down the length of your hair. So, the shorter your hair, the narrower the plate of your flat iron should be. Pencil flat irons are specifically designed for short hair and usually have plates that are about 1⁄2 inch (1.3 cm) wide but some are as small as 1⁄3 inch (0.85 cm).[15]
- A 1⁄2 inch (1.3 cm) pencil flat iron is suitable for bobs and chin-length short styles.
- A 1⁄3 inch (0.85 cm) pencil flat iron is small enough for very short hair and pixy cuts—you can even use it to style men's facial hair!
- Look for solid ceramic plates—they heat evenly so there won't be hot spots that damage your hair.


References
- ↑ https://www.goodhousekeeping.com/beauty/hair/g3050/how-to-curl-your-hair-fast/
- ↑ https://www.terrifictresses.com/short/how-to-use-a-flat-iron-to-curl-short-hair/
- ↑ https://www.terrifictresses.com/short/how-to-use-a-flat-iron-to-curl-short-hair/
- ↑ https://www.goodhousekeeping.com/beauty/hair/g3050/how-to-curl-your-hair-fast/
- ↑ https://www.goodhousekeeping.com/beauty/hair/g3050/how-to-curl-your-hair-fast/
- ↑ https://www.goodhousekeeping.com/beauty/hair/g3050/how-to-curl-your-hair-fast/
- ↑ https://www.terrifictresses.com/short/how-to-use-a-flat-iron-to-curl-short-hair/
- ↑ https://www.teenvogue.com/story/how-to-get-fine-hair-to-hold-curls
- ↑ https://www.teenvogue.com/story/how-to-get-fine-hair-to-hold-curls
- ↑ https://www.goodhousekeeping.com/beauty/hair/g3050/how-to-curl-your-hair-fast/
- ↑ https://www.teenvogue.com/story/how-to-get-fine-hair-to-hold-curls
- ↑ https://www.teenvogue.com/story/how-to-get-fine-hair-to-hold-curls
- ↑ https://www.goodhousekeeping.com/beauty/hair/tips/a21888/how-to-speed-dry-hair/
- ↑ https://www.goodhousekeeping.com/beauty/hair/tips/a26188/hair-brush-tips/
- ↑ https://softerhair.com/five-pencil-flat-irons-for-short-hairstyles/
- ↑ https://www.terrifictresses.com/short/how-to-use-a-flat-iron-to-curl-short-hair/
About This Article