X
wikiHow is a “wiki,” similar to Wikipedia, which means that many of our articles are co-written by multiple authors. To create this article, 31 people, some anonymous, worked to edit and improve it over time.
This article has been viewed 742,776 times.
Learn more...
This wikiHow teaches you how to improve your broadband Internet connection's speed in general, as well as how to squeeze some more speed out of your connection on a Windows or Mac computer.
Steps
Method 1
Method 1 of 3:
Using General Tips
-
1Disable other Internet-connected items. Every Internet-connected item in your home cuts down on the available Internet speed, especially if the items in question are actively being used. Turn off things like consoles, smartphones, tablets, and smart home items when you can in order to increase the amount of speed available to you.
- You can also place some items, such as computers, smartphones, and tablets, in Airplane Mode to restrict their Internet usage.
-
2Turn off downloads or streaming software. If you're downloading a large file or streaming a movie on your computer while trying to use the Internet on a different platform, you'll invariably encounter some slow-down. Close streaming programs and pause any active downloads when you're trying to get the most out of your Internet.Advertisement
-
3Use the 5 GHz channel if possible. If you have a router which supports both 2.4 GHz and 5 GHz bands, try using the 5GHz band to avoid interference from neighboring Internet connections. You can usually find the 5 GHz Internet connection in the Wi-Fi menu of your computer, smartphone, tablet, or other Internet-connected item.
- The appearance of a 5 GHz channel's name will vary depending on your router's manufacturer, but you'll usually see "Media", "5", "5.0", or something similar next to the connection's name.
-
4Use an Ethernet cable. When all else fails, connecting your computer directly to your router (or modem) via an Ethernet cable is a guaranteed way to speed up your Internet by eliminating some of the hiccups which accompany wireless connections.
- This isn't an option on a smartphone or a tablet.
- If you're using a Windows or Mac computer that doesn't have an Ethernet port, you can buy a USB 3.0 (or USB-C for Mac) Ethernet adapter which can plug into one of your computer's available ports.


Advertisement
Method 2
Method 2 of 3:
Changing DNS Settings on Windows
-
1Make sure that you're connected to the Internet. In order to change your Internet connection's properties, you'll have to be actively connected to the Internet.
-
2
-
3
-
4
-
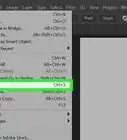
5Click Change adapter options. It's below the "Change your network settings" heading near the top of the page.
-
6Select your current network. Double-click the Wi-Fi (or, if you're using an Ethernet cable, Ethernet) connection that has your network's name. This option will be a computer monitor-shaped icon in the middle of the page. Doing so opens a pop-up window.
-
7Click Properties. It's in the lower-left side of the pop-up window. Another window will open.
- If you aren't on an administrator account, you'll need to enter the administrator password before proceeding.
-
8Select Internet Protocol Version 4 (TCP/IPv4). This option is a line of text in the middle of the window. Clicking it will select it.
-
9Click Properties. It's a button near the bottom of the window. Doing so opens yet another window in which you can change your Internet connection's properties.
-
10Check the "Use the following DNS server addresses" box. You'll find this box near the bottom of the window. Checking this box opens the two text boxes at the bottom of the window.
-
11Enter DNS addresses. You can use different DNS addresses than your computer usually uses in order to get a little bit more speed out of your connection. Both Google and OpenDNS offer free addresses:
- Google — Enter 8.8.8.8 in the "Preferred DNS server" text box, then enter 8.8.4.4 in the "Alternate DNS server" text box.[1]
- OpenDNS — Enter 208.67.222.222 in the "Preferred DNS server" text box, then enter 208.67.220.220 in the "Alternate DNS server" text box.[2]
- You can also mix-and-match between Google and OpenDNS addresses (e.g., use 8.8.8.8 as the first server and 208.67.220.220 as the second server).
-
12Save your changes. Click OK at the bottom of the first "Properties" window, click Close at the bottom of the second "Properties" window, and click Close on the "Status" window.
-
13Flush your computer's DNS cache. You can do this by opening the Command Prompt program, typing in ipconfig /flushdns, and pressing ↵ Enter.
- Flushing the DNS cache will help resolve any website loading errors you might run into when you next open your browser.
-
14


Advertisement
Method 3
Method 3 of 3:
Changing DNS Settings on Mac
-
1Make sure that you're connected to the Internet. In order to change your Internet connection's properties, you'll have to be actively connected to the Internet.
-
2
-
3Click System Preferences…. It's near the top of the drop-down menu. This opens the System Preferences window.
-
4Click Network. This globe-shaped icon is in the System Preferences window.
-
5Select your Internet connection. On the left side of the window, click the Wi-Fi (or Ethernet, if you're using a cable) connection to which your Mac is currently connected.
-
6Click Advanced…. It's in the lower-right side of the window. Doing so opens a pop-up window.
-
7Click the DNS tab. You'll find this option at the top of the pop-up window.
-
8Click +. It's in the lower-left side of the window. Doing so creates a text field in the "DNS Servers" column.
-
9Enter the primary DNS address. Type in the address for a primary DNS server. Both Google and OpenDNS have free servers that you can use here:
- Google — Enter 8.8.8.8 here.
- OpenDNS — Enter 208.67.222.222 here.
-
10Enter the alternate DNS address. Click + again, then enter one of the following addresses:[3]
- Google — Enter 8.8.4.4 here.
- OpenDNS — Enter 208.67.220.220 here.
-
11Click OK. It's at the bottom of the window. This will save your settings and close the "Advanced" pop-up window.
-
12Click Apply. You'll find this option at the bottom of the window. Your settings will be applied to your Internet connection from now on.
-
13Flush your Mac's DNS cache. You can do this by typing sudo killall -HUP mDNSResponder;say DNS cache has been flushed into Terminal and pressing ↵ Enter.
- Flushing the DNS cache will help resolve any website loading errors you might run into when you next open your browser.
-
14


Advertisement
Community Q&A
-
QuestionHow can I find out my WiFi password from my computer?
 VISHAL SHIRALKARCommunity AnswerIf you are using Windows 7/Windows8/Windows8.1/Windows10, you can left click on the monitor icon at the right side bottom corner of your screen, your WiFi should pop up. Right-click on that and you get a menu, left click on properties, then you will get a dialogue box. Go to the securities tab and there should be an option to "Show Password." Select the check box and that will unveil the hidden password.
 -
QuestionWhat do I do if the first option won't work for me on Windows 10? When I tried to run the program from the start menu, I got a message saying the program requested was not recognized.
 Community AnswerThe file gpedit.msc is not installed on Windows 10 machines by default, and must be downloaded separately. Download it before following the steps.
 -
QuestionWhy did my speed fail to increase after following this guide?
 Community AnswerIt will not work for all ISPs/PCs, try other tutorials, or try again. You might have done something wrong.
Advertisement
Warnings
- Changing to a different DNS server may be illegal in your country or against your workplace's rules. Make sure that you aren't violating any laws or rules by changing your Internet's default DNS servers.⧼thumbs_response⧽
Advertisement


References
About This Article
Advertisement