This article was co-authored by wikiHow staff writer, Amy Bobinger. Amy Bobinger has been a writer and editor at wikiHow since 2017. She especially enjoys writing articles that help people overcome interpersonal hurdles but frequently covers a variety of subjects, including health and wellness, spirituality, gardening, and more. Amy graduated with a B.A. in English Lit from Mississippi College in 2011 and now lives in her hometown with her husband and two young sons.
This article has been viewed 124,042 times.
Learn more...
Pressed flowers can be a beautiful addition to scrapbook pages or handmade cards. You can press flowers between the pages of a book, but stacks of books can be cumbersome and flowers are disturbed each time you add new ones. Instead, try making your own flower press out of wood, bolts, and cardboard to create beautiful pressed flowers you can enjoy for years to come.
Steps
Fashioning the Press Covers
-
1Cut 2 wood squares in the size you want for your press. Cut the wood with a table saw or a circular saw. You can make your press any size you want it to be, depending on the size of the plants you’ll be pressing. Between 8–12 inches (20–30 cm) should be big enough for most projects.[1]
- For best results, choose wood that is 3⁄4 inch (1.9 cm) or 1 inch (2.5 cm) thick.
- Visit your local hardware store and ask the employees to cut the wood for you if you don’t want to use a saw. Most hardware stores will perform this service for free.
-
2Measure 1 inch (2.5 cm) diagonally from each corner on both boards. Mark the spot with an X using a pencil. This will be the location for your drill holes.[2]Advertisement
-
3Drill a hole through each of the marks. To ensure your boards will line up perfectly, drill through both of them at the same time. If you’re using 1⁄4 inch (6.4 mm) bolts, use a 5⁄16 inch (7.9 mm) drill bit. [3]
- If you’re using a different bolt and you’re not sure what size drill bit to use, pick a bit you think is about the same size, then drill a test hole through a piece of scrap wood and make sure your bolt slides through easily. Adjust the size as needed.
-
4
-
5Stain or paint the wood if you want. You can personalize your flower press by staining or painting it any color you want. You can also leave the wood plain if you prefer.[5]
- If you do use a paint or stain, allow the wood to dry completely before moving to the next step.
- Try decorating your press with stencils or cut-out illustrations of flowers.


Assembling the Flower Press
-
1Cut 2 pieces of cardboard and 2 pieces of white paper to fit your press. The cardboard and paper should be slightly smaller than your press.
-
2Cut the edges of your cardboard and paper off. Once the cardboard and paper are cut to size, cut away the corners so the paper and cardboard will sit inside the bolt holes. You should cut off a triangle-sized piece from each corner. When you're finished, the paper and cardboard should look like a square with the edges cut off.
- The paper absorbs moisture from the flowers during pressing. You can use any kind of smooth paper, including newsprint, blotting paper, tissue paper, or smooth coffee filters. Avoid paper towels or other textured paper because it may leave an imprint on the petals.[6]
-
3Place 1 piece of plywood on the bolts. Slide the bolts through the 4 holes on the first piece of board, then place the board on your work surface. The head of the bolts should be facing down.[7]
-
4Layer the cardboard and paper on the press. You’ll add 1 piece of cardboard first, followed by the 2 pieces of paper. Top that with the last piece of cardboard.[8]
-
5Add another layer of cardboard and paper if you want. You can add as many layers as will fit on your press. Just cut 2 more pieces of cardboard and 2 more pieces of paper and add them on top of the first layer.[9]
- Even if you only make 1 layer at first, you can still go back and add another layer any time after you make your press.
-
6Top the press with the second board. Once you have added all the layers of cardboard and paper, slide the last board onto the bolts.[10]
-
7Place the washers and wingnuts on the bolts and tighten them. You’ll put down the washers first, then the nuts. Tighten the nut just until it feels secure. You don’t want to tighten them too much, as you’ll need to raise and lower the nuts in order to add flowers to your press.[11]
- Wingnuts are designed to be gripped and can be tightened and loosened more easily than traditional nuts, but if you only have regular nuts on hand, you can use those.


Choosing Flowers to Press
-
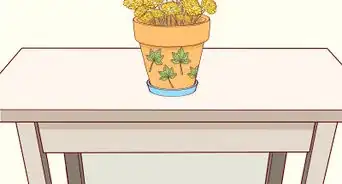
1Pick flowers when they are dry. The best time to pick your flowers is in the morning after the dew has evaporated. This is when they will be the most fresh.[12]
-
2Harvest flowers when they are about to open or just before their peak. Pressed flower buds are lovely, as are flowers which are fully bloomed. Try to pick flowers in a variety of stages for a natural look.[13]
-
3Select flowers with naturally flat blooms, like violets and daisies. Other flowers that press well include single-petal roses, Cosmos, California poppy, and Queen Anne’s Lace.[14]
- Flowers with bulky blooms, like roses or carnations, take much longer to dry and don’t look as nice when they're pressed. You may want to hang them to dry them instead.
-
4Remove any obvious stamens from your flowers. Some flowers, like lilies, have stamens which protrude from the petals. Remove these before you press the flower or the stamen will leave a stain on the dried petals.[15]
-
5Press leaves, ferns, and grasses if you want to accent your flowers. If you're going to display your flowers in a frame, you can add other natural touches by drying leaves, grasses, herbs, and ferns in your press.[16]


Pressing Your Flowers
-
1Unscrew the nuts to make room on your flower press. You don’t have to take the nuts all the way off, just loosen them enough that you can slide the flower into the press.[17]
-
2Place the flowers or leaves between the paper in your flower press. Make sure the flowers are not hanging off of the side of the press. Trim the stem or choose another flower if the one you chose doesn't fit on the press.
-
3Do not overlap the flowers. Arrange the flowers on the paper so they are not touching each other, or else they’ll be stuck together when they’re dry.[18]
-
4Tighten the nuts to close the press. There's no need to force the nuts tighter than you can comfortably tighten them, but it should feel like it's secured. You may want to check the press every few days to tighten it more as the flower dries.
-
5Leave the press undisturbed for at least 3 weeks. You want to allow the moisture in the plants to completely dry in order to preserve them.[19]
-
6Add more layers of cardboard and paper if you decide to add more flowers. If you find more flowers that you want to press while you’re drying the first batch, add the new flowers to a different layer of cardboard and paper, and take care not to disturb the first set.
-
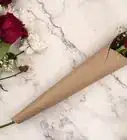
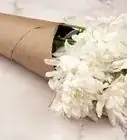
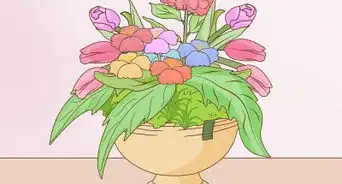
7Store the flowers in a box or display them in a frame after they're pressed. Pressed flowers are very fragile, so you'll want to keep them in a safe place once they're finished drying. Store them in a box until you need them.
- Use pressed petals to decorate homemade cards, as a pretty touch in a handmade candle, or as decorative touches in a shadow box.


Community Q&A
-
QuestionI'm trying to press a clover and a flower into my diary. How do I go about doing it?
 Community AnswerFirst press the clover and flower in different books. When they are completely done, you can put them in your journal.
 -
QuestionI have pressed wild flowers. How do I put them on the wall without frames or make my own wallpaper on painted paneling?
 T. ChinsenTop AnswererLook for a glue that seals, dries clear and is preferably waterproof when dry. Glues can change the color of the dried flowers, and most general purpose glues and varnishes will yellow with age. Ask for help in the glue section of a craft store to find the best product for you needs.
 -
QuestionHow do you maintain even pressure? Doesn't the centre bow this way?
 Nicholas SlaterCommunity AnswerIf you use thick enough wood, then it won't bow in the middle. You could always add a thin piece of wood in the middle as support.
Things you'll need
- 2 pieces of wood that are the same size
- Saw (if your wood is not pre-cut)
- Ruler
- Pencil
- Drill with 5/16-inch drill bit
- Medium-grit sandpaper
- Paint or stain (optional)
- 4 1/4-by-4 inch bolts with wing nuts and washers
- Cardboard
- Flowers or leaves


References
- ↑ https://gardentherapy.ca/handmade-flower-press/
- ↑ https://www.heirloomgardener.com/diy/garden/how-to-make-a-flower-press-zm0z16wzkin
- ↑ https://www.heirloomgardener.com/diy/garden/how-to-make-a-flower-press-zm0z16wzkin
- ↑ https://www.heirloomgardener.com/diy/garden/how-to-make-a-flower-press-zm0z16wzkin
- ↑ https://gardentherapy.ca/handmade-flower-press/
- ↑ https://www.bhg.com/gardening/design/projects/make-pressed-flowers/
- ↑ https://www.heirloomgardener.com/diy/garden/how-to-make-a-flower-press-zm0z16wzkin
- ↑ https://www.heirloomgardener.com/diy/garden/how-to-make-a-flower-press-zm0z16wzkin
- ↑ https://www.heirloomgardener.com/diy/garden/how-to-make-a-flower-press-zm0z16wzkin
- ↑ https://www.heirloomgardener.com/diy/garden/how-to-make-a-flower-press-zm0z16wzkin
- ↑ https://gardentherapy.ca/handmade-flower-press/
- ↑ https://www.bhg.com/gardening/design/projects/make-pressed-flowers/
- ↑ https://www.bhg.com/gardening/design/projects/make-pressed-flowers/
- ↑ https://www.bhg.com/gardening/design/projects/make-pressed-flowers/
- ↑ https://www.bhg.com/gardening/design/projects/make-pressed-flowers/
- ↑ https://www.bhg.com/gardening/design/projects/make-pressed-flowers/
- ↑ https://www.heirloomgardener.com/diy/garden/how-to-make-a-flower-press-zm0z16wzkin
- ↑ https://gardentherapy.ca/handmade-flower-press/
- ↑ https://www.heirloomgardener.com/diy/garden/how-to-make-a-flower-press-zm0z16wzkin
About This Article

To make a flower press, start by cutting out 2 equal-sized wooden squares that are big enough to cover the kinds of flowers you want to press. Then, drill a hole through each corner of the wooden squares. Next, cut 2 pieces of cardboard and paper so they're slightly smaller than the wooden squares and snip off the corners. Then, layer them on one of the squares and place a bolt through each of the holes you drilled. Finally, attach the other square to the bolts using washers and wingnuts. To learn how to use your homemade flower press, scroll down!