This article was co-authored by wikiHow staff writer, Emily Liu. Emily Liu graduated from UCLA in 2021 with a B.A. in Classical Civilization, a B.A. in English, and a minor in Cognitive Science. She has over three years of experience working with students from different backgrounds, ages, and academic interests as a writing tutor and instructor, in subjects ranging from the humanities to sciences to creative work, as well as personal statements and other application materials. She works on the content team at wikiHow and is always excited to discover and learn about new topics.
There are 7 references cited in this article, which can be found at the bottom of the page.
This article has been viewed 16,984 times.
Learn more...
Track shoes that you can put spikes on (also known as track spikes) are designed to help you run faster by providing extra grip and traction. If you want to start practicing with spikes but have never put them on your track shoes before, or you’re replacing your spikes for the first time, you’re in the right place—we’ll walk you through the process step by step![1]
Steps
Choosing Track Spikes
-
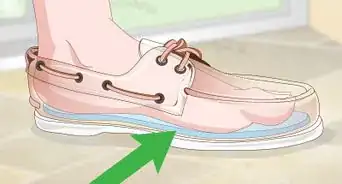
1Sprinting spikes take 8 or more spikes for speed and power.[2] The spikes are normally positioned towards the front since sprinters spend most of the race on their toes; there is minimal cushioning in the heel area. Sprinting spikes are quite stiff, and also the lightest running shoe.[3]
- Sprinting spikes are best for 100, 200, and 400 meter events.
- 6mm spikes are best for track and field events and are the most versatile spike. Spikes come in many lengths, but spikes longer than 6mm are actually illegal on many tracks.[4]
-
2Middle distance spikes have 6-8 spike holes. They are less rigid and contain more cushioning to provide support for longer distances, but are still fairly light.[5]
- Middle distance spikes are ideal for 800, 1500, 1600, and mile distances—but can also be used for 400 and 2 mile events.
- They’re the best option if you’re not sure about what events you’re competing in, or if you compete in a wide range of events.
Advertisement -
3Long distance spikes usually have 4 spike holes. They’re made from more durable but heavier materials to hold up against the long distances, and can take on more force.[6]
- Long distance spikes are recommended for distances of 1500 meters to 10000 meters.
-
4Cross country spikes use longer spike pins. They’re developed for running on uneven terrain, so they also provide more ankle support and a more secure fit.[7]
- 9mm spikes give a good grip for cross country running in muddy and wet conditions.
- You may want to go with 12-15mm spikes for very muddy conditions.


Putting on the Spikes
-
1Find the spike holes in the upper sole of the shoe. When you turn the shoe over, you should see various metal holes, which is what the spikes twist into.[8]
- Remember that the number of spike holes varies depending on what kind of track spikes you have.
-
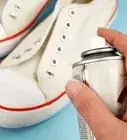
2Unscrew any old spikes with your spike key or wrench. If you’re replacing worn down spikes, you’ll have to remove the old ones first. Align the spike key opening with the pointy end of the spike and twist to the left until the spike comes out of the hole. Repeat the unscrewing process for each remaining hole.[9]
- If your shoes are new, you won’t need to remove any old spikes.
- Make sure you unscrew every single old spike before you begin putting in the new ones.
-
3Pinch the point of the metal spike between your thumb and index finger. The round, broader base of the spike should point away from you.[10]
-
4Align the round base of the spike with the hole. Make sure it’s not crooked and that the circular edges line up completely. The spike should point outwards and away from the sole of the shoe.[11]
-
5Screw in the metal spike tightly. Twist the spike to the right to begin screwing it in. Keep twisting until the spike is completely screwed down, and you can’t tighten it any more.[12]
-
6Repeat the process for each remaining hole. Make sure each spike is screwed in all the way down and that the spikes are flush and even with the sole of the shoe. Unscrew any spikes that are crooked or don’t line up evenly with the sole and rescrew them in.[13]
-
7Tighten each spike fully with your spike key or wrench. Hold the spike key in your dominant hand and grasp the shoe with your other hand. Push the base of the spike key firmly into the point of the spike and twist or spin it to the right to tighten the spike down completely.[14]
-
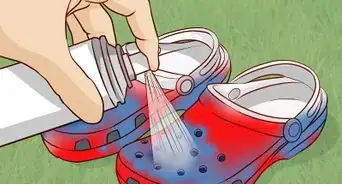
8Install blanks or studs instead of spikes if you don’t want extra traction. Blanks and studs are flat and are designed to cover the spike holes to keep out debris. This will allow you to still wear your track spikes even without the spikes.[15]


Things You’ll Need
- Track shoes (track spikes)
- Spike key (spike wrench)


References
- ↑ https://www.runnersneed.com/expert-advice/gear-guides/running-spikes-buying-guide.html
- ↑ https://thewiredrunner.com/track-spike-buyers-guide/
- ↑ https://www.runnersneed.com/expert-advice/gear-guides/running-spikes-buying-guide.html
- ↑ https://thewiredrunner.com/track-spike-buyers-guide/
- ↑ https://thewiredrunner.com/track-spike-buyers-guide/
- ↑ https://www.runnersneed.com/expert-advice/gear-guides/running-spikes-buying-guide.html
- ↑ https://www.runnersneed.com/expert-advice/gear-guides/running-spikes-buying-guide.html
- ↑ https://youtu.be/x7YUBDqbong?t=56
- ↑ https://www.sportsrec.com/put-spikes-track-shoes-7188349.html
- ↑ https://www.sportsrec.com/put-spikes-track-shoes-7188349.html
- ↑ https://www.sportsrec.com/put-spikes-track-shoes-7188349.html
- ↑ https://www.sportsrec.com/put-spikes-track-shoes-7188349.html
- ↑ https://youtu.be/T4d3Cgna4cU?t=200
- ↑ https://youtu.be/T4d3Cgna4cU?t=310
- ↑ https://thewiredrunner.com/track-spike-buyers-guide/
- ↑ https://www.runnersneed.com/expert-advice/gear-guides/running-spikes-buying-guide.html
- ↑ https://www.runnersworld.com/gear/a20835987/everything-you-need-to-know-about-spikes/
- ↑ https://www.runnersneed.com/expert-advice/gear-guides/running-spikes-buying-guide.html
- ↑ https://www.runnersneed.com/expert-advice/gear-guides/running-spikes-buying-guide.html
- ↑ https://www.runnersneed.com/expert-advice/gear-guides/running-spikes-buying-guide.html
About This Article