This article was co-authored by wikiHow staff writer, Rain Kengly. Rain Kengly is a wikiHow Technology Writer. As a storytelling enthusiast with a penchant for technology, they hope to create long-lasting connections with readers from all around the globe. Rain graduated from San Francisco State University with a BA in Cinema.
This article has been viewed 3,569 times.
Learn more...
Do you want to move an image to the back in Google Slides? You can easily move objects using the Arrange function. Whether you want to send an image, text, or shape to the back, it'll only take a few simple steps. You can do this using Google Slides on your desktop or mobile device. This wikiHow will show you have to bring an object to the back of a slide in Google Slides using your Windows or Mac computer and iPhone or Android device.
Things You Should Know
- You can send an image or object to the back of a slide if you have elements you want to place in front of it.
- On desktop, click the object. Click "Arrange" → "Order" → "Send to back".
- On mobile, tap the object. Tap the right arrow for more options, then tap "Send to back".
Steps
Using Desktop
-
1Open a project in Google Slides. You can also create a new one.[1]
- You can use Google Chrome, Safari, Mozilla Firefox, or another browser.
- If you aren't already logged in, click Sign in to do so now or create an account.
-
2Click the object you want to move. This can be an inserted image, text, table, shape, or other.
- To upload an image, click Insert → Image → select your preferred upload method.
- When the object is selected, it will have a blue border around it.
Advertisement -
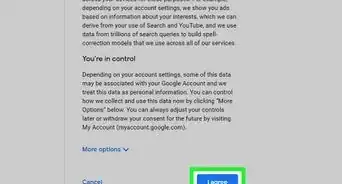
3Click Arrange in the top toolbar. You can also right-click the object to access the drop-down menu.
-
4Click Order, then Send to back. This will send the object to the back of the slide.
- You can also use the shortcut CTRL + Shift + ↓ (Windows) or CMD + Shift + ↓ (Mac).
- If you don't see this option, the object is already placed in the back.
- This method is helpful if you need to wrap text around an object.


Using Mobile
-
1Open a project in the Google Slides app. You can also create a new project.[2]
- Google Slides is available for iOS in the App Store and for Android in the Google Play Store.
- If you aren't already signed in, tap Sign in to do so now, or create an account.
-
2Double-tap the slide you want to edit. You can also long-press the slide and tap Edit Slide.
-
3Tap the object you want to move. This can be an inserted image, text, table, shape, or other. You can also add videos.
- To upload an image, tap + → Image → From photos or From camera.
- When the object is selected, it will have a blue border around it. Options will appear underneath.
-
4Tap Send to back. This will send the object to the back of the slide.
- If you don’t see this option, you may need to click > to expand your options.


References
About This Article