I have many RadioButtons in my app. The RadioButtons are too big for me. Is there any way to make them smaller?
Asked
Active
Viewed 7.3k times
45
-
I guess you could write your own control, but keep in mind that making the controls too small could make it harder for some users to hit the control accurately when in touch mode. This would reduce usability of your app. – codinguser Jun 10 '10 at 15:39
-
I find this solution, see my answer here [https://stackoverflow.com/a/44310577/6112256](https://stackoverflow.com/a/44310577/6112256) – Orlay Garcia Duconge Jun 01 '17 at 14:46
9 Answers
63
One quick hacky solution is to scale the button down:
<RadioButton
  android:scaleX="0.5"
  android:scaleY="0.5" />
This works great for going smaller.
For going larger, this tends to cause some clipping from the container View, so you'll likely have to hardcode the height/width of the RadioGroup to fit the scaled buttons. The button drawable can also get noticeably pixelated the larger you go, so it's not really great if you want something 3x larger...
-
and adding android:textSize="[size]sp" will scale the radio button label too , but matching the button and label size needs some more hard code ... – sepehr Jul 25 '16 at 19:26
-
4
14
you can use scalex and scaley properties , then use translationX and translationY to put it in the radiobutton windows.
<RadioButton
            android:id="@+id/rbtnfkilo"
            android:layout_width="match_parent"
            android:layout_height="wrap_content"
            android:layout_weight="1"
            android:scaleX="1.4"
            android:scaleY="1.4"
            android:text="Kilogram"
            android:textColor="#fff"
            android:textSize="18sp"
            android:translationX="24dp" />
Colone1
- 141
- 1
- 3
13
It can be done but is not as simple as setting the Layout_Width and Layout_height as with EditTexts, Buttons etc. To modify the size/looks of a view like a checkbox/radio button use the "Background" and "Button" properties to specify your own drawables.
This is an older page, and the locations are different now, but this'll give you an idea : http://www.anddev.org/tutorial_change_look_of_checkbox-t4553.html
IM.
- 663
- 2
- 6
- 15
9
Can't be done, the radio button is a built-in control component and as such its size is fixed.
arclight
- 5,299
- 1
- 22
- 26
-
4It might not be easy to do it, but it is possible; see http://stackoverflow.com/a/4787260/3063884 – CJBS Feb 05 '15 at 23:18
-
29Please don't reply esp. with negative remarks as "it can't be done" etc., without being certain! See, Michael has an easy and workable solution! – Apostolos Nov 06 '16 at 10:11
-
There is a alternative approach.by creating custom radio button. See https://stackoverflow.com/a/68220214/5039264 – Black Sep 28 '21 at 08:14
3
I relpaced RadioButton with ToggleButton and applied same style. I did override background and button.
    <ToggleButton
        android:id="@+id/btnToggle1"
        android:layout_width="match_parent"
        android:layout_height="30dp"
        android:layout_weight="1"
        android:checked="true"
        style="@style/ToggleButtonStyle"
        android:button="@null"
        android:textOn="@string/btnTitle"
        android:textOff="@string/btnTitle"/>
and style:
<style name="ToggleButtonStyle">
    <item name="android:background">@drawable/background_radiobutton</item>
    <item name="android:textColor">@color/selector_text_radiobutton</item>
    <item name="android:textAppearance">@null</item>
</style>
Works for me - looks the same, but with custom height.
If your RadioButton is in the RadioGroup, you will need to customize listener, check Android: How to get a radiogroup with togglebuttons?
Andrey Aleev
- 192
- 1
- 1
- 13
3
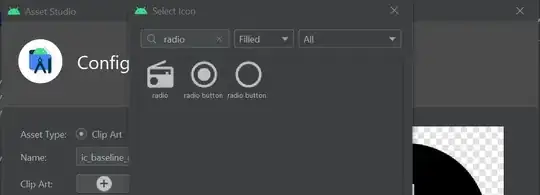
Currently, Android Vector Asset Studio have icons for unchecked, checked radio button.
You can import this vector then change the color by change android:tint inside the vector xml
Then set the background for RadioButton like
bg_radio_selector.xml
<?xml version="1.0" encoding="utf-8"?>
<selector xmlns:android="http://schemas.android.com/apk/res/android">
    <item android:state_checked="false" android:drawable="@drawable/ic_baseline_radio_button_unchecked_24" />
    <item android:state_checked="true" android:drawable="@drawable/ic_baseline_radio_button_checked_24" />
</selector>
..xml
<androidx.appcompat.widget.AppCompatRadioButton
        android:layout_width="@dimen/dp_24"
        android:layout_height="@dimen/dp_24"
        android:background="@drawable/bg_radio_selector"
        android:button="@null" />
Now you are able to change the size of RadioButton to any size you want but maybe it hard to click because the click area is quite small.
To increase the click area, we can use this function (note that padding will not work because we use the background property for RadioButton) (solution from How to increase hit area of Android button without scaling background?)
fun View.increaseTouchArea(pixel: Int) {
    val parent = parent as View
    parent.post {
        val rect = Rect()
        getHitRect(rect)
        rect.top -= pixel
        rect.left -= pixel
        rect.bottom += pixel
        rect.right += pixel
        parent.touchDelegate = TouchDelegate(rect, this)
    }
}
and
yourRadioButton.increaseTouchArea(context.resources.getDimensionPixelOffset(R.dimen.dp_12))
Linh
- 57,942
- 23
- 262
- 279
2
There is an alternative approach to change the size. Import radio button checked and unchecked from vector asset.
Create three drawable
radio_button_check
specify any width and height
radio_button_uncheck
<?xml version="1.0" encoding="utf-8"?>
    <layer-list xmlns:android="http://schemas.android.com/apk/res/android">
        <item
            android:width="60dp"
            android:height="60dp"
            android:drawable="@drawable/ic_radio_button_unchecked" />
    </layer-list>
custom_radio_button
<?xml version="1.0" encoding="utf-8"?>
<selector xmlns:android="http://schemas.android.com/apk/res/android">
    <item android:drawable="@drawable/radio_button_check" android:state_checked="true"></item>
    <item android:drawable="@drawable/radio_button_uncheck"></item>
</selector>
Radio button
In radio Button
<RadioButton
    android:layout_width="wrap_content"
    android:layout_height="wrap_content"
    android:button="@drawable/custom_radio_button"
    android:paddingLeft="10dp"
    android:textSize="39dp"
    android:text="1" />
In case to change the text size use "android:textSize" property
In image first one is the custom radio button and second one is default one

Black
- 140
- 2
- 10
0
I found one workaround for this
we need to use this text/symbol ⭘ and ◉ instead of radio button and add radio button functionality to them.
EXAMPLE:
first create Linear layout for button text and title text
XML
         <LinearLayout
                android:id="@+id/btn1Layout"
                android:layout_width="match_parent"
                android:layout_height="wrap_content"
                android:orientation="horizontal">
                <TextView
                    android:id="@+id/btn1"
                    android:layout_width="wrap_content"
                    android:layout_height="wrap_content"
                    android:layout_gravity="center_horizontal"
                    android:text="⭘"
                    android:textSize="34sp"
                    android:textColor="#ffffff"
                    android:layout_marginStart="25dp"

                    />
                <TextView
                    android:id="@+id/btn1txt"
                    android:layout_width="wrap_content"
                    android:layout_height="wrap_content"
                    android:layout_gravity="bottom"
                    android:layout_marginTop="2dp"
                    android:text="Option 1"
                    android:layout_marginStart="3dp"
                    android:textSize="16sp"
                    android:textColor="#ffffff"
                    />
            </LinearLayout>
            <View
                android:layout_width="match_parent"
                android:layout_height="1dp"
                android:layout_marginLeft="25dp"
                android:background="@android:color/darker_gray"/>
            <LinearLayout
                android:id="@+id/btn2Layout"
                android:layout_width="match_parent"
                android:layout_height="wrap_content"
                android:gravity="top|fill_horizontal"
                android:orientation="horizontal">
                <TextView
                    android:id="@+id/btn2"
                    android:layout_width="wrap_content"
                    android:layout_height="wrap_content"
                    android:layout_gravity="center"
                    android:text="⭘"
                    android:textSize="34sp"
                    android:textColor="#ffffff"
                    android:layout_marginStart="25dp"

                    />
                <TextView
                    android:id="@+id/btn2txt"
                    android:layout_width="wrap_content"
                    android:layout_height="wrap_content"
                    android:layout_gravity="bottom"
                    android:layout_marginTop="2dp"
                    android:text="Option 2"
                    android:layout_marginStart="3dp"
                    android:textSize="16sp"
                    android:textColor="#ffffff"
                    />
            </LinearLayout>
        LinearLayout btn1Layout = findViewById(R.id.btn1Layout);
        LinearLayout btn2Layout = findViewById(R.id.btn2Layout);
        TextView btn1 = (TextView) findViewById(R.id.btn1);
        TextView btn2 = (TextView) findViewById(R.id.btn2);
        btn1.setText(⭘);
        btn2.setText(⭘);

      if(selectedId != null) {

        TextView selectedBtn = (TextView) findViewById(selectedId);
        selectedBtn.setText(◉);
      }
then set click listners to the all Layouts for updating btn symbols.
   btn1Layout.setOnClickListener(new View.OnClickListener() {
            @Override
            public void onClick(View view) {
                selectedId = btn1.getId();
                btn1.setText(◉);
                btn2.setText(⭘);
            }
        });

Aviraj Patel
- 270
- 4
- 16
-4
<RadioGroup android:layout_width="fill_parent"
            android:layout_height="50dp"
            android:orientation="horizontal"
            android:checkedButton="@+id/first">

 <RadioButton android:id="@+id/first"
      android:width="50dp"
      android:height="50dp"
      android:button="@drawable/button_radio"/>

   <RadioButton android:id="@+id/second"
      android:width="50dp"
      android:height="50dp"
      android:button="@drawable/button_radio"/>

   <RadioButton android:id="@+id/third"
      android:width="50dp"
      android:height="50dp"
      android:button="@drawable/button_radio"/>

   <RadioButton android:id="@+id/fourth"
      android:width="50dp"
      android:height="50dp"
      android:button="@drawable/button_radio"/>
</RadioGroup>
Kanaiya Katarmal
- 5,974
- 4
- 30
- 56