2

I want to change the gravity of my inflated menu item in android xml code but i could not find any attribute to solve the problem. i want an item in the left side and another item in right side of corner in Toolbar.

Do you have any idea guys?

Here's my present state:

screenshot of toolbar

Here's my menu xml:

<?xml version="1.0" encoding="utf-8"?>
<menu xmlns:android="http://schemas.android.com/apk/res/android"
    xmlns:app="http://schemas.android.com/apk/res-auto">
    <item
        android:id="@+id/dismis"
        android:icon="@drawable/close"
        android:title="Done"
        app:showAsAction="always"></item>

    <item
        android:id="@+id/saveNote"
        android:icon="@drawable/save"
        android:title="Done"
        app:showAsAction="always"></item>


</menu>
Ferdous Ahamed
  • 21,438
  • 5
  • 52
  • 61
That's Enam
  • 286
  • 2
  • 3
  • 16

2 Answers2

2

Use Toolbar navigation item(LEFT) for dismiss item and option menu(RIGHT) for saveNote item.

Dismiss:

You can use Toolbar navigation item as dismiss action. Set close icon as Toolbar navigation icon by using Toolbar.setNavigationIcon(). To handle the click event, add NavigationOnClickListener to Toolbar.

SaveNote:

Inflate menu XML to Toolbar using Toolbar.inflateMenu(). To handle saveNote item click event, add OnMenuItemClickListener to Toolbar.

Follow below steps:

1. Remove dismiss item from menu XML.

// menu_main.xml
<?xml version="1.0" encoding="utf-8"?>
<menu xmlns:android="http://schemas.android.com/apk/res/android"
      xmlns:app="http://schemas.android.com/apk/res-auto">

    <item
        android:id="@+id/saveNote"
        android:icon="@drawable/save"
        android:title="Done"
        app:showAsAction="always">
    </item>
</menu>

2. In your activity, do below changes for dismiss and saveNote actions.

public class MainActivity extends AppCompatActivity {


    // ToolBar
    Toolbar mToolBar;

    @Override
    protected void onCreate(Bundle savedInstanceState) {
        super.onCreate(savedInstanceState);

        ...........
        .....................

        // ToolBar
        mToolBar = (Toolbar) findViewById(R.id.toolbar);

        // Required to use Toolbar as ActionBar
        setSupportActionBar(mToolBar);
        getSupportActionBar().setDisplayHomeAsUpEnabled(true);
        getSupportActionBar().setTitle("StackOverflow");

        // Dismiss Action
        mToolBar.setNavigationIcon(R.drawable.close);
        mToolBar.setNavigationOnClickListener(new View.OnClickListener() {
            @Override
            public void onClick(View view) {

                // Do something
                Toast.makeText(getApplicationContext(), "Dismiss", Toast.LENGTH_SHORT).show();
            }
        });

        // SaveNote Action
        mToolBar.inflateMenu(R.menu.menu_main);
        mToolBar.setOnMenuItemClickListener(new Toolbar.OnMenuItemClickListener() {
            @Override
            public boolean onMenuItemClick(MenuItem item) {

                if (item.getItemId() == R.id.saveNote)
                {
                    // Do something
                    Toast.makeText(getApplicationContext(), "Save", Toast.LENGTH_SHORT).show();
                }
                return true;
            }
        });


        .............
        ....................... 
    }
}

OUTPUT:
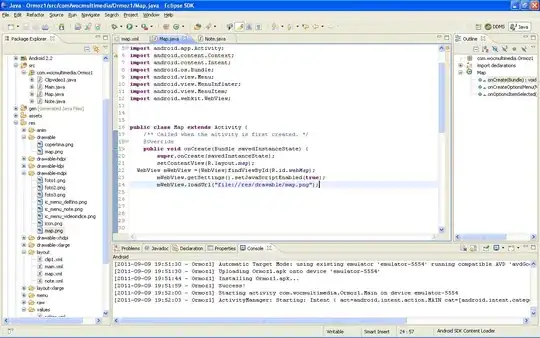
enter image description here

Hope this will help~

Ferdous Ahamed
  • 21,438
  • 5
  • 52
  • 61
  • 1
    it worked.thanks man.but i cant find the id of that item (dismiss button) to get things easier. @FAT – That's Enam May 29 '17 at 15:26
  • As i mentioned in my answer, no need to add dismiss item in `menu.xml`. You can programmatically use Toolbar navigation item for dissmiss action. See step 2. I have commented in activity codes. mToolBar.setNavigationIcon(R.drawable.close); mToolBar.setNavigationOnClickListener(new View.OnClickListener() { @Override public void onClick(View view) { // Do something Toast.makeText(getApplicationContext(), "Dismiss", Toast.LENGTH_SHORT).show(); } }); – Ferdous Ahamed May 29 '17 at 15:41
  • ops you didnt understand what i mean.i want to get the id of that icon like android.R.id.home! now got it??? – That's Enam May 29 '17 at 15:44
  • Its your own icon. You have to add a close/dismiss icon into your drawable folder. Then use it as usual R.drawable.your_icon. – Ferdous Ahamed May 29 '17 at 15:47
  • "i want to get the id of that icon like android.R.id.home!" >>> If you want to handle it from `onOptionItemselected` method then still you can use `android.R.id.home` to handle the dismiss action. But for this cases you don't need `mToolBar.setNavigationOnClickListener()`. Hope you understand. – Ferdous Ahamed May 29 '17 at 15:55
  • did you applied this >> getSupportActionBar().setDisplayHomeAsUpEnabled(true); I have checked it few minutes ago in my pc and its working fine. Here is the code: @Override public boolean onOptionsItemSelected(MenuItem item) { switch (item.getItemId()) { case android.R.id.home: Toast.makeText(getApplicationContext(), "Dismiss", Toast.LENGTH_SHORT).show(); break; } return super.onOptionsItemSelected(item); } – Ferdous Ahamed May 29 '17 at 16:11
0

well, you have to make a custom layout and then attach it to your appbar! you can check here

link1 link2

to make a custom layout for appbar in your activity

MrCurious
  • 150
  • 3
  • 11