1

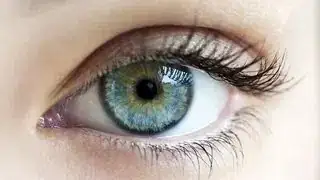
Original Image

enter image description here

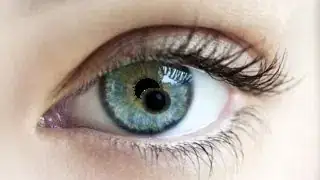
Expected Output.

enter image description here

I am using this code for translating a specific part into the same image, but output is not changing,

import numpy as np
import cv2 as cv

img = cv.imread('eye0.jpg', 0)
rows, cols = img.shape

roi = img[200: 300, 360: 450]

M = np.float32([[1, 0, 100], [0, 1, 50]])
dst = cv.warpAffine(roi, M, roi.shape)

cv.imshow('img', img)
cv.imshow('img', dst)
cv.waitKey(0)
cv.destroyAllWindows()

I see no changes from original image. How can I do so? Moreover, as an openCV newbie I would like to know which function should I use/explore here to get my purpose served?
Sazzad Hissain Khan
  • 37,929
  • 33
  • 189
  • 256

2 Answers2

1

Copy() function can help you instead of warpAffine(). You can check here also:

Here is output and code:

enter image description here

import numpy as np
import cv2 as cv

img = cv.imread('eye.jpg', 1)
#rows, cols = img.shape

roi = img[80: 100, 140: 160]

img2 = img.copy()

img2[95:115, 140:160]=roi

cv.imshow('img', img)
cv.imshow('imaag', img2)
cv.waitKey(0)
cv.destroyAllWindows()
Yunus Temurlenk
  • 4,085
  • 4
  • 18
  • 39
1

**Image after warp affine tranformation... but for circling the part it seem difficult.. **Image out put after warp affine[this is after warp affine and for circle thing it is bit difficult .[1]

import numpy as np
import cv2 as cv

img = cv.imread('eye.jpg')
roi = img[78: 100, 130: 160]
M = np.float32([[1, 0, 6], [0, 1, 4]])
dst = cv.warpAffine(roi, M, (30, 22))
img[80:102, 132:162] = dst
cv.imwrite("newimage.jpg",img)
cv.imshow('img', img)
cv.imshow('img1',dst)
cv.waitKey(0)
cv.destroyAllWindows()
Hariprasad
  • 396
  • 1
  • 4
  • 14