X
wikiHow is a “wiki,” similar to Wikipedia, which means that many of our articles are co-written by multiple authors. To create this article, 11 people, some anonymous, worked to edit and improve it over time.
This article has been viewed 40,735 times.
Learn more...
Knowing how to add a printer to your computer is useful when you get a new printer or a new computer, or want to print on a friend's printer. These steps will teach you how.
Steps
Method 1
Method 1 of 5:
USB Method
-
1Try the USB method first. New computers, both Mac and PC, come preinstalled with the software and drivers for dozens of printers. When you connect the printer with a USB cable, your computer will automatically install the driver for the device. It's the easiest and fastest way to add a printer.
-
2Prep your printer. Before you connect your printer to your computer, make sure the printer is ready. Plug the printer in to a power source. Install fresh ink cartridges, toner and paper if necessary.Advertisement
-
3Connect your printer. You will use a USB printer cable to connect your computer and printer. Locate the printer cable port on your printer. Usually you'll find it on the back of the printer, although some models have ports in the front. Plug the small, square connector into the port on the printer. The other end of the cable has a standard USB connector. Plug that end into any USB port on your computer.
-
4Wait while your computer installs the correct print driver. If your computer can find and install the right driver, it will do so automatically.
- On a Mac you will get a dialog box asking you to confirm whether you want to download and install the software. Click Install to start the installation process.
- On Windows computer, you'll get a pop-up showing you the status of the installation. You'll get another one when the installation is complete. Click "Next" or "Close"if prompted.


Advertisement
Method 2
Method 2 of 5:
Mac OS X v.10.8 (Mountain Lion) and 10.7 (Lion)
-
1Prep your printer. Before you connect your printer software, make sure the printer is ready. Plug the printer in to a power source. Install fresh ink cartridges, toner and paper if necessary. Make sure your printer is connected to your computer.
-
2Run a Software Update (Mountain Lion). Software Update will search for the latest OS updates, including new printer software. Updating your software before adding the printer will give you the best chance of locating the correct software.
- Go to the Apple Menu and choose Software Update. Enter your login and password if necessary.
- The App Store will open. A list of available updates will appear. Any OS X updates will appear at the top of the list.
- Click Update All to download all updates, or choose the updates individually.
-
3Run a Software Update (Lion). Updating your software in Lion is simple. From the Apple Menu, choose Software Update. The Software Update window will open. Select the items you want to install. Click Install.
-
4Add the printer manually. In this step, you will install the printer driver manually. Follow these steps:
- From the Apple Menu, click System Preferences.
- Select View, then Print & Scan. If you are prompted to do so, enter your login and password.
- Click and hold the + (plus sign) button. From the pop-up menu, choose Add Other Printer or Scanner. The Add Printer window will open.
- In the Add Printer window, click the icon that says Default. A list of printers will appear. Find your new printer on the list and select it. Click Add, and your printer will be added.


Advertisement
Method 3
Method 3 of 5:
Windows 7
-
1Prep your printer. Before you install your printer driver, make sure the printer is ready. Plug the printer in to a power source. Install fresh ink cartridges, toner and paper if necessary. Make sure your printer is connected to your computer.
-
2Login with the administrator profile. The administrator profile can change the computer's settings, install hardware and software, and make other changes that affect others who use the machine. If you are not already logged on as the administrator, follow these steps:
- Click on the Windows button in the lower left corner of the screen.
- In the menu that pops up, locate the Shut Down button
- Mouse over the arrow to the right of the Shut Down button.
- Select Switch User from the menu that pops up.
- You'll now be on the Welcome screen, where you can select from all the profiles that exist on your computer.
- Select the administrator profile and login.
-
3Add the printer manually (optional). In this step, you will instruct Windows to add the printer you want to add. Follow these steps.
- Click on the Start Menu (Windows Button) in the lower left corner of the screen.
- Select Devices and Printers from the menu.
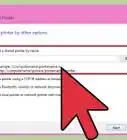
- At the top of the window, select Add A Local Printer
- Go to Choose a Printer Port, and select Use An Existing Port
- From the drop down menu, select the appropriate port. USB001 (Virtual Printer Port for USB) For an older printer that connects with a serial cable, choose... and click Next
- From the menu, select the manufacturer and model number of your printer.
- If it doesn't appear, choose the closest model number. Click Windows Update. Windows will search its driver database for printers from your manufacturer. When it's done, your model number should appear in the list. Select it.
- Your printer will appear in the printer name box, click Next again to install the printer.
-
4Install the printer software from disk (optional). If your printer came with an install disk you can use it to install your print drivers instead. Insert the disk and follow the prompts to install your print driver.


Advertisement
Method 4
Method 4 of 5:
Windows 8
-
1Open the Control Panel. Position your mouse in the lower left corner of the screen, and right-click. From the menu that pops up, select Control Panel. The Control Panel window will open.
-
2Open the Devices and Printers window. In the Control Panel window, click on the icon titled Hardware and Sound. Click the link for Devices and Printers. A window will open showing you all the devices and printers that are installed on your computer. Look for the computer that you are trying to add. If it's there, then you're done.
-
3Add a printer. At the top of the Devices and Printers window, click on the button named Add A Printer. This prompts your computer to look for and identify newly installed printers. A window will pop up showing you its progress.
- If Windows finds your printer in this step, it will guide you through the installation process. Follow the directions as they appear on the screen. If it's successful, you'll see your new printer appear in the list of printers.
-
4Manually install the printer software (optional). If Windows did not find your printer, you will see a button called "The printer I want isn't listed." In that case, you can manually install the software.
- Install from disk - If your printer came with a disk, it may contain the driver. Unplug the USB cable from your printer, insert the disc into the drive, and follow the installation instructions.
- Download and install the driver - Your printer's manufacturer will have printer drivers available for download on its website. Search for your printer's driver, download it and follow the instructions to install.


Advertisement
Method 5
Method 5 of 5:
Print A Test Page
-
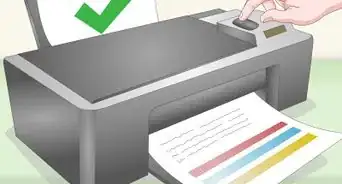
1Make sure the install was successful. To ensure that your printer has been installed correctly, you can print a test page. Here's how.
-
2Print a test page on a Mac. These steps apply to both the Lion and Mountain Lion OS.
- Double click on the Macintosh HD icon located on your desktop.
- Double click on the Users folder and select the icon with the user's name.
- Double click on the Library folder and select the Printers folder.
- Double click on the printer you're working with.
- Select Printer > Print Test Page
-
3Print a test page in Windows. Some printers have a button that will print a test page. If yours doesn't, follow these steps.
- Click on the Start button
- On the Start Menu, select Devices and Printers
- Locate the printer you want to test and right click on it
- From the menu that pops up, select Printer Properties
- On the General tab, click Print Test Page
- Your test page should start printing.


Advertisement
Community Q&A
-
QuestionDoes an HP 1610 work with a Microsoft Surface?
 R2_d2000Top AnswererYes. All printers should work with all computers because they use a standard protocol.
Advertisement


About This Article
Advertisement