This article was co-authored by Lindsay Yoshitomi. Lindsay Yoshitomi is the nail artist behind the blog, Lacquered Lawyer. She was featured as one of Nail It! magazine’s “Bloggers You Should Know,” and has been on the cover of Nail Art Gallery Magazine. She has been practicing nail art for over 15 years.
This article has been viewed 12,862 times.
A French manicure is a classic look that never goes out of style. You can update this classic look by adding additional colors or replacing the traditional white nail tips. Make sure to start with an unpainted and clean set of nails and a steady hand. Then, choose your nail design. For a multicolored French manicure, you can paint use two colors, create a design, or paint multicolored tips.[1]
Steps
Using Two Colors
-
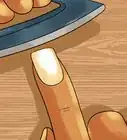
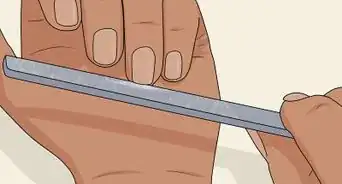
1Prepare your nails. It is important to start with clean and unpainted nails. If you have any nail polish on already, remove it with a cotton pad and nail polish remover. Then, trim your nails if they are broken or uneven. Once you have done this, wash your hands and prepare to paint.
- You may want to set out a few paper towels, Q-tips, and nail polish remover for mistakes.
-
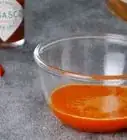
2Choose two colors. The first color will be your base color. The second color will be for your tips. Think of colors that complement each other. Different shades of one color look nice together. Black and pink, white and gold, and blue and and silver are some other options for colors.
- If you're painting your nails for an event, think of the outfit you will be wearing when choosing colors.
Advertisement -
3Paint the first color. Begin painting the first layer of nail polish. Take the nail polish brush and carefully go over each nail. The nail polish should appear smooth and even. You should paint your entire nail. The first layer shouldn't show up when you begin painting your tips. If the first layer is thin, wait a few minutes and paint a second layer.[2]
- Take any excess polish off of your skin with a Q-tip and nail polish remover.
-
4Use the second color on your tips. Next, use the second color to begin painting the tips of your nails. If you have a steady hand, you can glide the polish over the tips of your fingernails. If you need a little more help, cut a thin piece of paper to help you. The top of the paper should have a curved shape to follow the shape of the tip. Hold it up to your nails while painting them to help with the shape of the tip.[3]
- You can purchase nail strips to help with the painting of the tips. To use, you simply remove them from the packaging and apply them to section off the area where you want to paint the tips of the nails. Nail strips can be purchased anywhere where nail polish is sold.
- You can leave some nails without tips to add a little extra flare to your design.
-
5Put on a clear coat. For extra shine and protection, paint on a clear coat. You should wait until your nails have dried before painting on the clear nail polish. Wait at least fifteen minutes, depending on the type of polish you're using. Then, go over each nail with a layer of the clear nail polish. If you're pressed for time, purchase a quick-drying clear top coat to speed up the drying process and get a glossy finish.[4]
-
6Allow drying time. Once every layer has been painted on, wait until your nails have dried before using your hands. You should have chosen a time of day where you won't have to move around a lot for the next hour or so. If possible, don't cook or wear gloves for a few hours after painting your nails.


Creating a Design
-
1Choose your colors. Choose a color for your base, your tips, and the design. For the design, you have the option of choosing multiple colors. Consider colors that would pair well together. For example, blue, white, and yellow look nice together. For a fancier option, choose a base of black and then a glittery gold and silver for the tips and design.[5]
- If you're painting your nails for daily life, take into consideration what colors you wear most often.
-
2Think of a design. There are plenty of design options to choose from. You can paint polka dots, strips, bows, or flowers. For this method, the example of flowers will be used. Consider your artistic ability before choosing a design. Intricate flowers or bows may be difficult if you aren't used to painting designs with nail polish on a small area. In this case, polka dots would be an easy option.[6]
- You can also paint faces, diamonds, and hearts on the tips of your nails.
-
3Paint the first layer. Begin painting the base layer of color on your nails. You can use a color, or choose a simply clear coat or nude shade. Paint every nail and allow at least ten minutes for drying. If you aren't satisfied, paint on another layer.[7]
-
4Paint the tips. Next, paint the tips of your nails. Place your hand on the table and lift your fingers slightly into the air. Take the nail polish brush and paint the tips of your nails. If you need extra help for the shape, use a piece of paper or tape.[8]
-
5Create the design. For a flower design, paint a polka dot on the tip of your nail. Then, drag the nail polish brush outwards, not touching the dot, to create a petal shape. Repeat this about five times to create a full flower. You can also choose to paint the dot towards the tip of your nail and paint on half of a flower.[9]
- Add a rhinestone to the center of the flower for added flourish.


Painting Multicolored Tips
-
1Pick out your colors. You will need to choose a color for the base and at least two colors for the tips. If you only want the tips to be colored, use a clear or nude polish for the base. For the tips, consider using two colors. Use one color for the middle of the tip, and one colors for the edges of each tip.[10]
- Some options to consider are shades of the same color for the tip, white and gold, and a sparkly and matte color.
-
2Paint your first layer. Go over each nail with a layer of the base nail polish. Make sure each nail is fully coated. Wait a few minutes and add a second layer if you aren't satisfied with the first layer. After that, wait at least ten minutes before moving on to the tips.[11]
-
3Paint the tips. Take the first color and paint a strip down the center of your tip. Only paint as far down as the tip of your nail. The end of the tip should be around your cuticles. Next, take the second color and paint a strip on each side of the center color. When you're done, you should have three strips of color with at least two different colors.[12]
- You can also choose to use three different colors for the tips. Or you can make some nails have different colors than other nails.
-
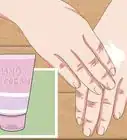
4Put on a clear coat for shine. Once you have give your nails time to dry, apply a layer of clear nail polish. This will protect your polish and add shine. Give it at least ten minutes before you begin moving around and using your hands.[13]

Expert Q&A
-
QuestionShould I apply cuticle oil before or after doing my manicure?
 Lindsay YoshitomiLindsay Yoshitomi is the nail artist behind the blog, Lacquered Lawyer. She was featured as one of Nail It! magazine’s “Bloggers You Should Know,” and has been on the cover of Nail Art Gallery Magazine. She has been practicing nail art for over 15 years.
Nail ArtistApply cuticle oil after, once your manicure is dry. If you apply it before, it will prevent the polish from sticking and it could cause your manicure to chip later on.
Warnings
- Don't move until you're sure that the polish has dried. You may have to redo your nails if you move too soon.⧼thumbs_response⧽
- If you're prone to nail biting, try to avoid it as much as possible when you have polish on them. It is not healthy to swallow the chemicals used in nail polish.⧼thumbs_response⧽
- Keep your nail polish out of direct sunlight.[16]⧼thumbs_response⧽


References
- ↑ http://www.inkyournail.com/22-awesome-french-tip-nails/
- ↑ http://www.inkyournail.com/22-awesome-french-tip-nails/
- ↑ http://www.inkyournail.com/22-awesome-french-tip-nails/
- ↑ http://www.inkyournail.com/22-awesome-french-tip-nails/
- ↑ http://www.cuded.com/2015/05/70-french-manicure/
- ↑ http://www.cuded.com/2015/05/70-french-manicure/
- ↑ http://www.cuded.com/2015/05/70-french-manicure/
- ↑ http://www.cuded.com/2015/05/70-french-manicure/
- ↑ http://www.cuded.com/2015/05/70-french-manicure/
- ↑ http://www.inkyournail.com/22-awesome-french-tip-nails/
- ↑ http://www.inkyournail.com/22-awesome-french-tip-nails/
- ↑ http://www.cuded.com/2015/05/70-french-manicure/
- ↑ http://www.cuded.com/2015/05/70-french-manicure/
- ↑ Lindsay Yoshitomi. Nail Artist. Expert Interview. 12 July 2019.
- ↑ Lindsay Yoshitomi. Nail Artist. Expert Interview. 12 July 2019.
- ↑ Lindsay Yoshitomi. Nail Artist. Expert Interview. 12 July 2019.
About This Article