This article was co-authored by Derick Vogel. Derick Vogel is a Credit Expert and CEO of Credit Absolute, a credit counseling and educational company based in Scottsdale, Arizona. Derick has over 10 years of financial experience and specializes in consulting mortgages, loans, specializes in business credit, debt collections, financial budgeting, and student loan debt relief. He is a member of the National Association of Credit Services Organizations (NASCO) and is an Arizona Association of Mortgage Professional. He holds credit certificates from Dispute Suite in credit repair best practices and in Credit Repair Organizations Act (CROA) competency.
This article has been viewed 75,254 times.
Depositing checks with your iPhone allows you to add money to your bank account when you are not able to get to a bank or when the banks are not open. Making the deposits requires that your bank accept mobile deposits and that you have a mobile banking application, or app, installed on your iPhone. Each bank uses its own app and, as of As of September 2011, only nine banks accepted iPhone mobile banking. If your bank is not one of the nine, you can also use the iPhone PayPal app to deposit checks.
Steps
Via the iPhone App
-
1Go to the iPhone app store and download and install the mobile deposit app for your bank onto your phone.
- For example, if you bank with Chase, you would download and install the Chase Mobile App from the iPhone app store.
- If you are not sure of the name of the app, go to your bank's website and select mobile banking. Your bank should provide a link to the appropriate app.
- If your bank does not provide a link to the app, type the name of your bank in the search field at the iPhone app store to bring up a list of apps with that name. The mobile banking app should appear on that list.
- If your bank does not provide a link and a search does not return the appropriate result, contact your bank's customer service for information on how to use an iPhone to deposit checks.
-
2Configure the iPhone app per the instructions provided in the download.
- Depending on your bank, you might be required to enter your account information or social security number and set up a PIN for mobile access.
Advertisement -
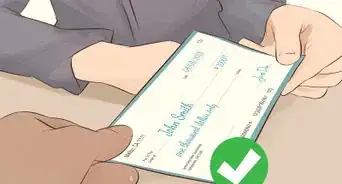
3Deposit your checks per your bank's instructions.
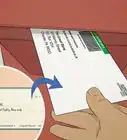
- Banks will vary but, many require you to endorse, or sign, the back of the check, you might need to include your account number as well, and photograph both sides to submit to your bank.
- The app will walk you through the process.
- Save any check you deposit over your mobile phone until the funds clear your account.


Via PayPal
-
1Create a new PayPal account, if you do not already have one.
- Skip this step if you already have a PayPal account.
-
2Link your bank account to your PayPal account.
- Log in to PayPal, click on the "Profile" link at the top of the screen and select "Add or Edit Bank Account."
- Click "Add Bank" and enter your account number and bank routing number. Click continue.
- PayPal will make two small deposits to your bank within 5 business days and send you a verification link via email. When the deposits arrive, click the link and enter the amounts to verify account.
-
3Download and install the PayPal app onto your iPhone.
- Follow the on-screen instructions to configure the app to access your PayPal account.
- Go to "My Money" in the PayPal app and select "Add Money from Checks." Accept the Terms of Use, if prompted.
- Sign the back of your check and take a clear photo of the front and back of the check. The application will upload the photos.
- Wait approximately 6 business days for the check to post to your PayPal account.
-
4Transfer the money from your PayPal account to your checking account when the check clears.
- Log in to PayPal, click the "Withdraw" link and select "Transfer to Bank Account."
- Select your bank account from the drop down list, enter the amount you wish to transfer and click "Continue." Confirm the request, if required.


Community Q&A
-
QuestionI'm getting an error message I never had before, "Failed with error -118252 Cannot use Back Camera."
 Andrew SerranoTop AnswererI would check your settings, usually you have to give your phone permission to be able to access features on your phone to prevent hacking or unauthorized access to personal information (contacts list, stored photos, etc.). Go to Settings -> Privacy -> Camera, this will bring up a screen that should have the app listed there. There should be a toggle to the right, and it's most likely off for that app, meaning for whatever reason you may have at one time denied permission for the app to use the camera. Just flip that toggle switch and try again.


References
About This Article