20

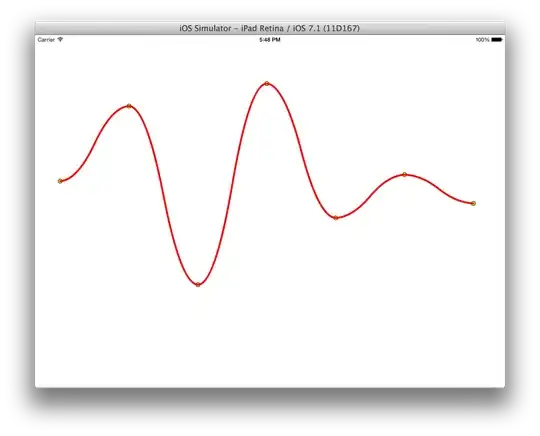
I'm drawing a graph in my application. My problem is that I want to draw line joining vertex points as curves. Currently I'm drawing them with UIBezierPath's function addLineToPoint:. I want to draw them as curves. I'm well aware that UIBezierPath has following two functions to support this feature.

Cubic curve:addCurveToPoint:controlPoint1:controlPoint2: Quadratic curve:addQuadCurveToPoint:controlPoint:

But problem is that I don't have control points. All i have is two end points. Neither I found a method/formula to determine control points. Can anyone help me here? I will appreciate if someone can suggest some alternative...

Abid Hussain
  • 1,529
  • 1
  • 15
  • 33

10 Answers10

27

Expand on Abid Hussain's answer on Dec 5 '12.

i implemeted the code, and it worked but result looked like that: enter image description here

With little adjustment, i was able to get what i wanted: enter image description here

What i did was addQuadCurveToPoint to mid points as well, using mid-mid points as control points. Below is the code based on Abid's sample; hope it helps someone.

+ (UIBezierPath *)quadCurvedPathWithPoints:(NSArray *)points
{
    UIBezierPath *path = [UIBezierPath bezierPath];

    NSValue *value = points[0];
    CGPoint p1 = [value CGPointValue];
    [path moveToPoint:p1];

    if (points.count == 2) {
        value = points[1];
        CGPoint p2 = [value CGPointValue];
        [path addLineToPoint:p2];
        return path;
    }

    for (NSUInteger i = 1; i < points.count; i++) {
        value = points[i];
        CGPoint p2 = [value CGPointValue];

        CGPoint midPoint = midPointForPoints(p1, p2);
        [path addQuadCurveToPoint:midPoint controlPoint:controlPointForPoints(midPoint, p1)];
        [path addQuadCurveToPoint:p2 controlPoint:controlPointForPoints(midPoint, p2)];

        p1 = p2;
    }
    return path;
}

static CGPoint midPointForPoints(CGPoint p1, CGPoint p2) {
    return CGPointMake((p1.x + p2.x) / 2, (p1.y + p2.y) / 2);
}

static CGPoint controlPointForPoints(CGPoint p1, CGPoint p2) {
    CGPoint controlPoint = midPointForPoints(p1, p2);
    CGFloat diffY = abs(p2.y - controlPoint.y);

    if (p1.y < p2.y)
        controlPoint.y += diffY;
    else if (p1.y > p2.y)
        controlPoint.y -= diffY;

    return controlPoint;
}
user1244109
  • 2,166
  • 2
  • 26
  • 24
  • 1
    ur results does look good. At that time i used https://github.com/amogh-talpallikar/smooth-curve-algorithm to draw smooth sinusoidal curves. Hats off for ur effort though. – Abid Hussain Aug 26 '14 at 09:12
  • What would this look like if you had two points that decreased consecutively? I.e. Instead of 1, 5, 3, 10 you had 3, 1 , 5, 10? Would it show the smooth increase properly? – Fogmeister Mar 30 '15 at 10:00
  • @Fogmeister it would not. I have tried this algorithm and while it works very nicely for alternating up and down strokes, it results in a stairs like line if the values go like 6, 10, 12, 18. Many thanks for the effort though! – Jeroen Bouma Mar 31 '15 at 10:16
  • How can i achieve this http://stackoverflow.com/questions/37805197/draw-a-beizer-curve – Diksha Jun 14 '16 at 11:26
  • This code doesn't give me the results like this at all, I have an array containing like 100 points which are CGPoints that are collected from user's touch points in the screen and i use that ns array to draw a smooth path using this method and the result isnt smooth at all. Here is the result : http://i.imgur.com/NFainFt.jpg if you look closely it gets very wavy, I think it draws badly when there are too many points in an array. Why is that? – Reza.Ab Sep 24 '16 at 00:23
  • 1
    Drag and drop solution! Great answer – Jacopo Penzo Feb 20 '17 at 02:21
  • I've converted your code to Swift 3 here: http://stackoverflow.com/a/43813458/5544335 and it works great! thanks for the solid code. – aBikis May 05 '17 at 20:43
  • 1
    So Roman's cubic curve below does fix the stairstep problem and makes for much better fitting curves. I also patched it to handle variable x increments. – mackworth May 06 '17 at 00:12
26

Using @user1244109's answer I implement a better algorithm in Swift 5. chart with my implementation

class GraphView: UIView {

    var data: [CGFloat] = [2, 6, 12, 4, 5, 7, 5, 6, 6, 3] {
        didSet {
            setNeedsDisplay()
        }
    }

    func coordYFor(index: Int) -> CGFloat {
        return bounds.height - bounds.height * data[index] / (data.max() ?? 0)
    }

    override func draw(_ rect: CGRect) {

        let path = quadCurvedPath()

        UIColor.black.setStroke()
        path.lineWidth = 1
        path.stroke()
    }

    func quadCurvedPath() -> UIBezierPath {
        let path = UIBezierPath()
        let step = bounds.width / CGFloat(data.count - 1)

        var p1 = CGPoint(x: 0, y: coordYFor(index: 0))
        path.move(to: p1)

        drawPoint(point: p1, color: UIColor.red, radius: 3)

        if (data.count == 2) {
            path.addLine(to: CGPoint(x: step, y: coordYFor(index: 1)))
            return path
        }

        var oldControlP: CGPoint?

        for i in 1..<data.count {
            let p2 = CGPoint(x: step * CGFloat(i), y: coordYFor(index: i))
            drawPoint(point: p2, color: UIColor.red, radius: 3)
            var p3: CGPoint?
            if i < data.count - 1 {
                p3 = CGPoint(x: step * CGFloat(i + 1), y: coordYFor(index: i + 1))
            }

            let newControlP = controlPointForPoints(p1: p1, p2: p2, next: p3)

            path.addCurve(to: p2, controlPoint1: oldControlP ?? p1, controlPoint2: newControlP ?? p2)

            p1 = p2
            oldControlP = antipodalFor(point: newControlP, center: p2)
        }
        return path;
    }

    /// located on the opposite side from the center point
    func antipodalFor(point: CGPoint?, center: CGPoint?) -> CGPoint? {
        guard let p1 = point, let center = center else {
            return nil
        }
        let newX = 2 * center.x - p1.x
        let diffY = abs(p1.y - center.y)
        let newY = center.y + diffY * (p1.y < center.y ? 1 : -1)

        return CGPoint(x: newX, y: newY)
    }

    /// halfway of two points
    func midPointForPoints(p1: CGPoint, p2: CGPoint) -> CGPoint {
        return CGPoint(x: (p1.x + p2.x) / 2, y: (p1.y + p2.y) / 2);
    }

    /// Find controlPoint2 for addCurve
    /// - Parameters:
    ///   - p1: first point of curve
    ///   - p2: second point of curve whose control point we are looking for
    ///   - next: predicted next point which will use antipodal control point for finded
    func controlPointForPoints(p1: CGPoint, p2: CGPoint, next p3: CGPoint?) -> CGPoint? {
        guard let p3 = p3 else {
            return nil
        }

        let leftMidPoint  = midPointForPoints(p1: p1, p2: p2)
        let rightMidPoint = midPointForPoints(p1: p2, p2: p3)

        var controlPoint = midPointForPoints(p1: leftMidPoint, p2: antipodalFor(point: rightMidPoint, center: p2)!)

        if p1.y.between(a: p2.y, b: controlPoint.y) {
            controlPoint.y = p1.y
        } else if p2.y.between(a: p1.y, b: controlPoint.y) {
            controlPoint.y = p2.y
        }


        let imaginContol = antipodalFor(point: controlPoint, center: p2)!
        if p2.y.between(a: p3.y, b: imaginContol.y) {
            controlPoint.y = p2.y
        }
        if p3.y.between(a: p2.y, b: imaginContol.y) {
            let diffY = abs(p2.y - p3.y)
            controlPoint.y = p2.y + diffY * (p3.y < p2.y ? 1 : -1)
        }

        // make lines easier
        controlPoint.x += (p2.x - p1.x) * 0.1

        return controlPoint
    }

    func drawPoint(point: CGPoint, color: UIColor, radius: CGFloat) {
        let ovalPath = UIBezierPath(ovalIn: CGRect(x: point.x - radius, y: point.y - radius, width: radius * 2, height: radius * 2))
        color.setFill()
        ovalPath.fill()
    }

}

extension CGFloat {
    func between(a: CGFloat, b: CGFloat) -> Bool {
        return self >= Swift.min(a, b) && self <= Swift.max(a, b)
    }
}
Roman Filippov
  • 2,289
  • 2
  • 11
  • 17
  • Very nice! I'm backporting to ObjC and had couple questions. Conceptually, what does imaginFor do? Second, why take abs and then conditionally multiply by -1? (e.g. in imaginFor, just `let newY = center.y*2 - p1.y` just like newX) – mackworth Mar 30 '17 at 02:41
  • @mackworth Yeah looks like it can be simplified at least in my tests its the same. – Daniel Ryan Oct 05 '20 at 02:54
  • 1
    This answer works nicely, no issues so far unlike the other answers I've tested. I've even converted it to SwiftUI, and it works all good. – Daniel Ryan Oct 05 '20 at 02:55
  • 1
    @DanielRyan are you willing to post you SwiftUI version somewhere? – Gargoyle Dec 30 '20 at 01:53
  • @Gargoyle I've posted my answer. Enjoy. – Daniel Ryan Jan 07 '21 at 01:06
  • if i want to draw one line after other i.e after every second i add a value and line get draw with animation.. how can i do that.? i want to do as shown in this link https://stackoverflow.com/questions/68131375/draw-line-graph-with-dynamic-values-objective-c-swift – Zღk Jun 27 '21 at 09:37
  • People like you make Stack Overflow successful. – Eric Apr 01 '22 at 06:48
  • To avoid the cutoff on the edges, you can just subtract your margin from basically anywhere you see `bounds.height` and `bounds.width`, and add the x-margin to the starting x value (so replace 0 with your margin). – Eric Apr 01 '22 at 06:51
12

If you only have two points then you cannot really extrapolate them out into a curve.

If you have more than two points (i.e. several points along a curve) then you can roughly draw a curve to follow them.

If you do the following...

OK, say you have 5 points. p1, p2, p3, p4, and p5. You need to work out the midpoint between each pair of points. m1 = midpoint of p1 and p2 (and so on)...

So you have m1, m2, m3, and m4.

Now you can use the mid points as the end points of the sections of the curve and the points as the control points for a quad curve...

So...

Move to point m1. Add quad curve to point m2 with p2 as a control point.

Add quad curve to point m3 with p3 as a control point.

Add quad curve to point m4 with p4 as a control point.

and so on...

This will get you all apart from the ends of the curve (can't remember how to get them at the moment, sorry).

Fogmeister
  • 76,236
  • 42
  • 207
  • 306
  • But bro what about increasing and decreasing effect. For example y-cordinates of poits in order are y1=10,y2=15,y=8. Now Curve y1->y2 should be above the line and curve y2->y3 should be below the line. That means we can't just put middle point of line as control points we need to translate middle points Y up/down aswell. – Abid Hussain Dec 05 '12 at 08:54
  • You are right, this is only an estimation of the curve. The closer the points are together, the more accurate the curve. Also, the sharper the change in gradient of the curve the further away from the actual points you will be. This is the fastest, easiest way of getting a fairly accurate estimation though. To get greater accuracy will require more difficult maths and a lot more of it. It's a lot harder to extrapolate a curve in code than it is by eye :D – Fogmeister Dec 05 '12 at 08:59
  • Hello @Fogmeister, I am doing same thing as you have suggested above, but I dont get very smooth curves. here is the link http://stackoverflow.com/questions/20881721/calculate-controlpoints-while-drawing-in-ios. What can be done better. I request you to please help me out. Waiting for your reply – Ranjit Jan 02 '14 at 13:23
8

SO I found a work around based on @Fogmeister's answer.

    UIBezierPath *path = [UIBezierPath bezierPath];
    [path setLineWidth:3.0];
    [path setLineCapStyle:kCGLineCapRound];
    [path setLineJoinStyle:kCGLineJoinRound];

    // actualPoints are my points array stored as NSValue

    NSValue *value = [actualPoints objectAtIndex:0];
    CGPoint p1 = [value CGPointValue];
    [path moveToPoint:p1];

    for (int k=1; k<[actualPoints count];k++) {

        NSValue *value = [actualPoints objectAtIndex:k];
        CGPoint p2 = [value CGPointValue];

        CGPoint centerPoint = CGPointMake((p1.x+p2.x)/2, (p1.y+p2.y)/2);

        // See if your curve is decreasing or increasing
        // You can optimize it further by finding point on normal of line passing through midpoint 

        if (p1.y<p2.y) {
             centerPoint = CGPointMake(centerPoint.x, centerPoint.y+(abs(p2.y-centerPoint.y)));
        }else if(p1.y>p2.y){
             centerPoint = CGPointMake(centerPoint.x, centerPoint.y-(abs(p2.y-centerPoint.y)));
        }

        [path addQuadCurveToPoint:p2 controlPoint:centerPoint];
        p1 = p2;
    }

    [path stroke];
Abid Hussain
  • 1,529
  • 1
  • 15
  • 33
5

I've done a bit of work on this and get pretty good results from the Catmull-Rom spline. Here is a method that takes an array of CGPoints (stored as NSValues) and adds the line to the given view.

- (void)addBezierPathBetweenPoints:(NSArray *)points
                        toView:(UIView *)view
                     withColor:(UIColor *)color
                andStrokeWidth:(NSUInteger)strokeWidth
{
    UIBezierPath *path = [UIBezierPath bezierPath];

    float granularity = 100;

    [path moveToPoint:[[points firstObject] CGPointValue]];

    for (int index = 1; index < points.count - 2 ; index++) {

        CGPoint point0 = [[points objectAtIndex:index - 1] CGPointValue];
        CGPoint point1 = [[points objectAtIndex:index] CGPointValue];
        CGPoint point2 = [[points objectAtIndex:index + 1] CGPointValue];
        CGPoint point3 = [[points objectAtIndex:index + 2] CGPointValue];

        for (int i = 1; i < granularity ; i++) {
            float t = (float) i * (1.0f / (float) granularity);
            float tt = t * t;
            float ttt = tt * t;

            CGPoint pi;
            pi.x = 0.5 * (2*point1.x+(point2.x-point0.x)*t + (2*point0.x-5*point1.x+4*point2.x-point3.x)*tt + (3*point1.x-point0.x-3*point2.x+point3.x)*ttt);
            pi.y = 0.5 * (2*point1.y+(point2.y-point0.y)*t + (2*point0.y-5*point1.y+4*point2.y-point3.y)*tt + (3*point1.y-point0.y-3*point2.y+point3.y)*ttt);

            if (pi.y > view.frame.size.height) {
                pi.y = view.frame.size.height;
            }
            else if (pi.y < 0){
                pi.y = 0;
            }

            if (pi.x > point0.x) {
                [path addLineToPoint:pi];
            }
        }

        [path addLineToPoint:point2];
    }

    [path addLineToPoint:[[points objectAtIndex:[points count] - 1] CGPointValue]];

    CAShapeLayer *shapeView = [[CAShapeLayer alloc] init];

    shapeView.path = [path CGPath];

    shapeView.strokeColor = color.CGColor;
    shapeView.fillColor = [UIColor clearColor].CGColor;
    shapeView.lineWidth = strokeWidth;
    [shapeView setLineCap:kCALineCapRound];

    [view.layer addSublayer:shapeView];
 }

I use it here https://github.com/johnyorke/JYGraphViewController

johnyorke
  • 471
  • 5
  • 5
3

A good solution would be to create a straight UIBezierPath through your points and then use a spline to curve the line. Check out this other answer which gives a category for UIBezierPath that performs a Catmull-Rom Spline. Drawing Smooth Curves - Methods Needed

Community
  • 1
  • 1
ade177
  • 146
  • 4
3

While analyzing the code from @roman-filippov, I simplified the code some. Here's a complete Swift playground version, and an ObjC version below that.

I found that if x increments are not regular, then the original algorithm creates some unfortunate retrograde lines when points are close together on the x axis. Simply constraining the control points to not exceed the following x-value seems to fix the problem, although I have no mathematical justification for this, just experimentation. There are two sections marked as //**added` which implement this change.

import UIKit
import PlaygroundSupport

infix operator °
func °(x: CGFloat, y: CGFloat) -> CGPoint {
    return CGPoint(x: x, y: y)
}

extension UIBezierPath {
    func drawPoint(point: CGPoint, color: UIColor, radius: CGFloat) {
        let ovalPath = UIBezierPath(ovalIn: CGRect(x: point.x - radius, y: point.y - radius, width: radius * 2, height: radius * 2))
        color.setFill()
        ovalPath.fill()
    }

    func drawWithLine (point: CGPoint, color: UIColor) {
        let startP = self.currentPoint
        self.addLine(to: point)
        drawPoint(point: point, color: color, radius: 3)
        self.move(to: startP)
    }

}

class TestView : UIView {
    var step: CGFloat = 1.0;
    var yMaximum: CGFloat = 1.0
    var xMaximum: CGFloat = 1.0
    var data: [CGPoint] = [] {
        didSet {
            xMaximum = data.reduce(-CGFloat.greatestFiniteMagnitude, { max($0, $1.x) })
            yMaximum = data.reduce(-CGFloat.greatestFiniteMagnitude, { max($0, $1.y) })
            setNeedsDisplay()
        }
    }

    func scale(point: CGPoint) -> CGPoint {
        return  CGPoint(x: bounds.width * point.x / xMaximum ,
                        y: (bounds.height - bounds.height * point.y / yMaximum))
    }

    override func draw(_ rect: CGRect) {
        if data.count <= 1 {
            return
        }
        let path = cubicCurvedPath()

        UIColor.black.setStroke()
        path.lineWidth = 1
        path.stroke()
    }

    func cubicCurvedPath() -> UIBezierPath {
        let path = UIBezierPath()

        var p1 = scale(point: data[0])
        path.drawPoint(point: p1, color: UIColor.red, radius: 3)
        path.move(to: p1)
        var oldControlP = p1

        for i in 0..<data.count {
            let p2 = scale(point:data[i])
            path.drawPoint(point: p2, color: UIColor.red, radius: 3)
            var p3: CGPoint? = nil
            if i < data.count - 1 {
                p3 = scale(point:data [i+1])
            }

            let newControlP = controlPointForPoints(p1: p1, p2: p2, p3: p3)
            //uncomment the following four lines to graph control points
            //if let controlP = newControlP {
            //    path.drawWithLine(point:controlP, color: UIColor.blue)
            //}
            //path.drawWithLine(point:oldControlP, color: UIColor.gray)

            path.addCurve(to: p2, controlPoint1: oldControlP , controlPoint2: newControlP ?? p2)
            oldControlP = imaginFor(point1: newControlP, center: p2) ?? p1
            //***added to algorithm
            if let p3 = p3 {
                if oldControlP.x > p3.x { oldControlP.x = p3.x }
            }
            //***
            p1 = p2
        }
        return path;
    }

    func imaginFor(point1: CGPoint?, center: CGPoint?) -> CGPoint? {
        //returns "mirror image" of point: the point that is symmetrical through center.
        //aka opposite of midpoint; returns the point whose midpoint with point1 is center)
        guard let p1 = point1, let center = center else {
            return nil
        }
        let newX = center.x + center.x - p1.x
        let newY = center.y + center.y - p1.y

        return CGPoint(x: newX, y: newY)
    }

    func midPointForPoints(p1: CGPoint, p2: CGPoint) -> CGPoint {
        return CGPoint(x: (p1.x + p2.x) / 2, y: (p1.y + p2.y) / 2);
    }

    func clamp(num: CGFloat, bounds1: CGFloat, bounds2: CGFloat) -> CGFloat {
        //ensure num is between bounds.
        if (bounds1 < bounds2) {
            return min(max(bounds1,num),bounds2);
        } else {
            return min(max(bounds2,num),bounds1);
        }
    }

    func controlPointForPoints(p1: CGPoint, p2: CGPoint, p3: CGPoint?) -> CGPoint? {
        guard let p3 = p3 else {
            return nil
        }

        let leftMidPoint  = midPointForPoints(p1: p1, p2: p2)
        let rightMidPoint = midPointForPoints(p1: p2, p2: p3)
        let imaginPoint = imaginFor(point1: rightMidPoint, center: p2)

        var controlPoint = midPointForPoints(p1: leftMidPoint, p2: imaginPoint!)

        controlPoint.y = clamp(num: controlPoint.y, bounds1: p1.y, bounds2: p2.y)

        let flippedP3 = p2.y + (p2.y-p3.y)

        controlPoint.y = clamp(num: controlPoint.y, bounds1: p2.y, bounds2: flippedP3);
        //***added:
        controlPoint.x = clamp (num:controlPoint.x, bounds1: p1.x, bounds2: p2.x)
        //***
        // print ("p1: \(p1), p2: \(p2), p3: \(p3), LM:\(leftMidPoint), RM:\(rightMidPoint), IP:\(imaginPoint), fP3:\(flippedP3), CP:\(controlPoint)")
        return controlPoint
    }

}

let u = TestView(frame: CGRect(x: 0, y: 0, width: 700, height: 600));
u.backgroundColor = UIColor.white

PlaygroundPage.current.liveView = u
u.data = [0.5 ° 1, 1 ° 3, 2 ° 5, 4 ° 9, 8 ° 15, 9.4 ° 8, 9.5 ° 10, 12 ° 4, 13 ° 10, 15 ° 3, 16 ° 1]

And the same code in ObjC (more or less. this doesn't include the drawing routines themselves, and it does allow the points array to include missing data

+ (UIBezierPath *)pathWithPoints:(NSArray <NSValue *> *)points open:(BOOL) open {
    //based on Roman Filippov code: http://stackoverflow.com/a/40203583/580850
    //open means allow gaps in path.
    UIBezierPath *path = [UIBezierPath bezierPath];
    CGPoint p1 = [points[0] CGPointValue];
    [path moveToPoint:p1];
    CGPoint oldControlPoint = p1;
    for (NSUInteger pointIndex = 1; pointIndex< points.count; pointIndex++) {
        CGPoint p2 = [points[pointIndex]  CGPointValue];  //note: mark missing data with CGFloatMax

        if (p1.y >= CGFloatMax || p2.y >= CGFloatMax) {
            if (open) {
                [path moveToPoint:p2];
            } else {
                [path addLineToPoint:p2];
            }
            oldControlPoint = p2;
        } else {
            CGPoint p3 = CGPointZero;
            if (pointIndex +1 < points.count) p3 = [points[pointIndex+1] CGPointValue] ;
            if (p3.y >= CGFloatMax) p3 = CGPointZero;
            CGPoint newControlPoint = controlPointForPoints2(p1, p2, p3);
            if (!CGPointEqualToPoint( newControlPoint, CGPointZero)) {
                [path addCurveToPoint: p2 controlPoint1:oldControlPoint controlPoint2: newControlPoint];
                oldControlPoint = imaginForPoints( newControlPoint,  p2);
                //**added to algorithm
                if (! CGPointEqualToPoint(p3,CGPointZero)) {
                   if (oldControlPoint.x > p3.x ) {
                       oldControlPoint.x = p3.x;
                   }
                //***
            } else {
                [path addCurveToPoint: p2 controlPoint1:oldControlPoint controlPoint2: p2];
                oldControlPoint = p2;
            }
        }
        p1 = p2;
    }
    return path;
}

static CGPoint imaginForPoints(CGPoint point, CGPoint center) {
    //returns "mirror image" of point: the point that is symmetrical through center.
    if (CGPointEqualToPoint(point, CGPointZero) || CGPointEqualToPoint(center, CGPointZero)) {
        return CGPointZero;
    }
    CGFloat newX = center.x + (center.x-point.x);
    CGFloat newY = center.y + (center.y-point.y);
    if (isinf(newY)) {
        newY = BEMNullGraphValue;
    }
    return CGPointMake(newX,newY);
}

static CGFloat clamp(CGFloat num, CGFloat bounds1, CGFloat bounds2) {
    //ensure num is between bounds.
    if (bounds1 < bounds2) {
        return MIN(MAX(bounds1,num),bounds2);
    } else {
        return MIN(MAX(bounds2,num),bounds1);
    }
}

static CGPoint controlPointForPoints2(CGPoint p1, CGPoint p2, CGPoint p3) {
    if (CGPointEqualToPoint(p3, CGPointZero)) return CGPointZero;
    CGPoint leftMidPoint = midPointForPoints(p1, p2);
    CGPoint rightMidPoint = midPointForPoints(p2, p3);
    CGPoint imaginPoint = imaginForPoints(rightMidPoint, p2);
    CGPoint controlPoint = midPointForPoints(leftMidPoint, imaginPoint);

    controlPoint.y = clamp(controlPoint.y, p1.y, p2.y);

    CGFloat flippedP3 = p2.y + (p2.y-p3.y);

    controlPoint.y = clamp(controlPoint.y, p2.y, flippedP3);
   //**added to algorithm
    controlPoint.x = clamp(controlPoint.x, p1.x, p2.x);
   //**
    return controlPoint;
}
Dominik Bucher
  • 2,120
  • 2
  • 16
  • 25
mackworth
  • 5,873
  • 2
  • 29
  • 49
3

here's @user1244109 's answer converted to Swift 3

private func quadCurvedPath(with points:[CGPoint]) -> UIBezierPath {
   let path = UIBezierPath()
   var p1 = points[0]

   path.move(to: p1)

   if points.count == 2 {
     path.addLine(to: points[1])
     return path
   }

   for i in 1..<points.count {
    let mid = midPoint(for: (p1, points[i]))
     path.addQuadCurve(to: mid,
                     controlPoint: controlPoint(for: (mid, p1)))
     path.addQuadCurve(to: points[i],
                    controlPoint: controlPoint(for: (mid, points[i])))
     p1 = points[i]
   }
  return path
}


private func midPoint(for points: (CGPoint, CGPoint)) -> CGPoint {
   return CGPoint(x: (points.0.x + points.1.x) / 2 , y: (points.0.y + points.1.y) / 2)
}


private func controlPoint(for points: (CGPoint, CGPoint)) -> CGPoint {
   var controlPoint = midPoint(for: points)
   let diffY = abs(points.1.y - controlPoint.y)

   if points.0.y < points.1.y {
     controlPoint.y += diffY
   } else if points.0.y > points.1.y {
     controlPoint.y -= diffY
   }
   return controlPoint
}
Alexander Volkov
  • 7,904
  • 1
  • 47
  • 44
aBikis
  • 323
  • 4
  • 16
3

If you need "horizontal" curve near every point:

let path = createCurve(from: points, withSmoothness: 0.5) // 0.5 smoothness

enter image description here

let path = createCurve(from: points, withSmoothness: 0) // 0 smoothness

enter image description here

    /// Create UIBezierPath
    ///
    /// - Parameters:
    ///   - points: the points
    ///   - smoothness: the smoothness: 0 - no smooth at all, 1 - maximum smoothness
    private func createCurve(from points: [CGPoint], withSmoothness smoothness: CGFloat, addZeros: Bool = false) -> UIBezierPath {

        let path = UIBezierPath()
        guard points.count > 0 else { return path }
        var prevPoint: CGPoint = points.first!
        let interval = getXLineInterval()
        if addZeros {
            path.move(to: CGPoint(x: interval.origin.x, y: interval.origin.y))
            path.addLine(to: points[0])
        }
        else {
            path.move(to: points[0])
        }
        for i in 1..<points.count {
            let cp = controlPoints(p1: prevPoint, p2: points[i], smoothness: smoothness)
            path.addCurve(to: points[i], controlPoint1: cp.0, controlPoint2: cp.1)
            prevPoint = points[i]
        }
        if addZeros {
            path.addLine(to: CGPoint(x: prevPoint.x, y: interval.origin.y))
        }
        return path
    }

    /// Create control points with given smoothness
    ///
    /// - Parameters:
    ///   - p1: the first point
    ///   - p2: the second point
    ///   - smoothness: the smoothness: 0 - no smooth at all, 1 - maximum smoothness
    /// - Returns: two control points
    private func controlPoints(p1: CGPoint, p2: CGPoint, smoothness: CGFloat) -> (CGPoint, CGPoint) {
        let cp1: CGPoint!
        let cp2: CGPoint!
        let percent = min(1, max(0, smoothness))
        do {
            var cp = p2
            // Apply smoothness
            let x0 = max(p1.x, p2.x)
            let x1 = min(p1.x, p2.x)
            let x = x0 + (x1 - x0) * percent
            cp.x = x
            cp2 = cp
        }
        do {
            var cp = p1
            // Apply smoothness
            let x0 = min(p1.x, p2.x)
            let x1 = max(p1.x, p2.x)
            let x = x0 + (x1 - x0) * percent
            cp.x = x
            cp1 = cp
        }
        return (cp1, cp2)
    }

    /// Defines interval width, height (not used in this example) and coordinate of the first interval.
    /// - Returns: (x0, y0, step, height)
    internal func getXLineInterval() -> CGRect {
        return CGRect.zero
    }
Alexander Volkov
  • 7,904
  • 1
  • 47
  • 44
  • What does `getXLineInterval` method do? – Xernox Feb 12 '20 at 08:44
  • 1
    @Xernox It can return `CGRect.zero`. The solution was more complex and `getXLineInterval ` was used to layout Ox labels with customized paddings (slightly differ from curve points, but close to them). – Alexander Volkov Feb 14 '20 at 15:49
3

This answer is a modified version of Roman Filippov answer to get it to work on SwiftUI. Roman's was the best version out of the ones I tested and able to get working.

extension Path {
    
    /// This draws a curved path from a path of points given.
    /// Modified from https://stackoverflow.com/q/13719143/515455
    mutating func quadCurvedPath(from data: [CGPoint]) {
        var prevousPoint: CGPoint = data.first!
        
        self.move(to: prevousPoint)
        
        if (data.count == 2) {
            self.addLine(to: data[1])
            return
        }
        
        var oldControlPoint: CGPoint?
        
        for i in 1..<data.count {
            let currentPoint = data[i]
            var nextPoint: CGPoint?
            if i < data.count - 1 {
                nextPoint = data[i + 1]
            }
            
            let newControlPoint = controlPointForPoints(p1: prevousPoint, p2: currentPoint, next: nextPoint)
            
            self.addCurve(to: currentPoint, control1: oldControlPoint ?? prevousPoint, control2: newControlPoint ?? currentPoint)
            
            prevousPoint = currentPoint
            oldControlPoint = antipodalFor(point: newControlPoint, center: currentPoint)
        }
    }
    
    /// Located on the opposite side from the center point
    func antipodalFor(point: CGPoint?, center: CGPoint?) -> CGPoint? {
        guard let p1 = point, let center = center else {
            return nil
        }
        let newX = 2.0 * center.x - p1.x
        let newY = 2.0 * center.y - p1.y
        
        return CGPoint(x: newX, y: newY)
    }
    
    /// Find the mid point of two points
    func midPointForPoints(p1: CGPoint, p2: CGPoint) -> CGPoint {
        return CGPoint(x: (p1.x + p2.x) / 2, y: (p1.y + p2.y) / 2);
    }
    
    /// Find control point
    /// - Parameters:
    ///   - p1: first point of curve
    ///   - p2: second point of curve whose control point we are looking for
    ///   - next: predicted next point which will use antipodal control point for finded
    func controlPointForPoints(p1: CGPoint, p2: CGPoint, next p3: CGPoint?) -> CGPoint? {
        guard let p3 = p3 else {
            return nil
        }
        
        let leftMidPoint  = midPointForPoints(p1: p1, p2: p2)
        let rightMidPoint = midPointForPoints(p1: p2, p2: p3)
        
        var controlPoint = midPointForPoints(p1: leftMidPoint, p2: antipodalFor(point: rightMidPoint, center: p2)!)
        
        if p1.y.between(a: p2.y, b: controlPoint.y) {
            controlPoint.y = p1.y
        } else if p2.y.between(a: p1.y, b: controlPoint.y) {
            controlPoint.y = p2.y
        }
        
        let imaginContol = antipodalFor(point: controlPoint, center: p2)!
        if p2.y.between(a: p3.y, b: imaginContol.y) {
            controlPoint.y = p2.y
        }
        if p3.y.between(a: p2.y, b: imaginContol.y) {
            let diffY = abs(p2.y - p3.y)
            controlPoint.y = p2.y + diffY * (p3.y < p2.y ? 1 : -1)
        }
        
        // make lines easier
        controlPoint.x += (p2.x - p1.x) * 0.1
        
        return controlPoint
    }
}

extension CGFloat {
    func between(a: CGFloat, b: CGFloat) -> Bool {
        return self >= Swift.min(a, b) && self <= Swift.max(a, b)
    }
}

You can then use it in SwiftUI code like so:

    ZStack(alignment: .topLeading) {
        // Draw the line.
        Path { path in
            path.quadCurvedPath(from: linePoints)
        }.stroke(graphData.colour, style: StrokeStyle(lineWidth: 4, lineCap: .round, lineJoin: .round))
    }
Daniel Ryan
  • 6,976
  • 5
  • 45
  • 62