I had to puzzle my way through self-signed certificates on Windows by combining bits and pieces from the given answers and further resources. Here is my own (and hopefully complete) walk-through. Hope it will spare you some of my own painful learning curve. It also contains infos on related topics that will pop up sooner or later when you create your own certs.
Create a self-signed certificate on Windows 10 and below
Don't use makecert.exe. It has been deprecated by Microsoft.
The modern way uses a Powershell command.
Windows 10:
Open Powershell with Administrator privileges:
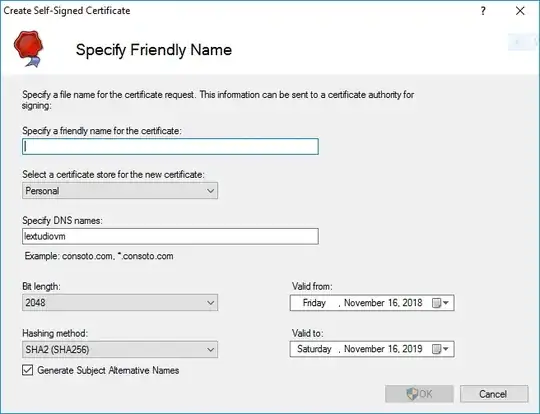
New-SelfSignedCertificate -DnsName "*.dev.local", "dev.local", "localhost" -CertStoreLocation cert:\LocalMachine\My -FriendlyName "Dev Cert *.dev.local, dev.local, localhost" -NotAfter (Get-Date).AddYears(15)
Windows 8, Windows Server 2012 R2:
In Powershell on these systems the parameters -FriendlyName and -NotAfter do not exist. Simply remove them from the above command line.
Open Powershell with Administrator privileges:
New-SelfSignedCertificate -DnsName "*.dev.local", "dev.local", "localhost" -CertStoreLocation cert:\LocalMachine\My
An alternative is to use the method for older Windows version below, which allows you to use all the features of Win 10 for cert creation...
Older Windows versions:
My recommendation for older Windows versions is to create the cert on a Win 10 machine, export it to a .PFX file using an mmc instance (see "Trust the certificate" below) and import it into the cert store on the target machine with the old Windows OS. To import the cert do NOT right-click it. Although there is an "Import certificate" item in the context menu, it failed all my trials to use it on Win Server 2008. Instead open another mmc instance on the target machine, navigate to "Certificates (Local Computer) / Personal / Certificates", right click into the middle pane and select All tasks → Import.
The resulting certificate
Both of the above commands create a certificate for the domains localhost and *.dev.local.
The Win10 version additionally has a live time of 15 years and a readable display name of "Dev Cert *.dev.local, dev.local, localhost".
Update: If you provide multiple hostname entries in parameter -DnsName (as shown above) the first of these entries will become the domain's Subject (AKA Common Name). The complete list of all hostname entries will be stored in the field Subject Alternative Name (SAN) of the certificate. (Thanks to @BenSewards for pointing that out.)
After creation the cert will be immediately available in any HTTPS bindings of IIS (instructions below).
Trust the certificate (on the machine where you created it)
The new cert is not part of any chain of trust and is thus not considered trustworthy by any browsers. To change that, we will copy the cert to the certificate store for Trusted Root CAs on your machine:
Open mmc.exe, File → Add/Remove Snap-In → choose "Certificates" in left column → Add → choose "Computer Account" → Next → "Local Computer..." → Finish → OK
In the left column choose "Certificates (Local Computer) / Personal / Certificates".
Find the newly created cert (in Win 10 the column "Friendly name" may help).
Select this cert and hit Ctrl-C to copy it to clipboard.
In the left column choose "Certificates (Local Computer) / Trusted Root CAs / Certificates".
Hit Ctrl-V to paste your certificate to this store.
The certificate should appear in the list of Trusted Root Authorities and is now considered trustworthy.
Trust the certificate (on a different machine)
To trust the same cert on a different machine you have to export it on the machine where you created it and import it on the other machine.
On the source machine in MMC right-click the cert → All tasks → Export. Export without(!) private key to .DER format.
Then copy the resulting file to the target machine, right-click and install the cert into the store "Local Computer / Trusted Root CAs". After that all applications that use the windows cert store (i.e. Chrome and IE but NOT Firefox) should trust your self-signed certificate.
Use in IIS
(We are back on the machine, where you created the new certificate!)
Now you may go to IIS Manager, select the bindings of a local website → Add → https → enter a host name of the form myname.dev.local (your cert is only valid for *.dev.local) and select the new certificate → OK.
Add to hosts
Also add your host name to C:\Windows\System32\drivers\etc\hosts:
127.0.0.1 myname.dev.local
Happy
Now Chrome and IE should treat the certificate as trustworthy and load your website when you open up https://myname.dev.local.
Firefox maintains its own certificate store. To add your cert here, you must open your website in FF and add it to the exceptions when FF warns you about the certificate.
For Edge browser there may be more action needed (see further down).
Test the certificate
To test your certs, Firefox is your best choice. (Believe me, I'm a Chrome fan-boy myself, but FF is better in this case.)
Here are the reasons:
- Firefox uses its own SSL cache, which is purged on shift-reload. So any changes to the certs of your local websites will reflect immediately in the warnings of FF, while other browsers may need a restart or a manual purging of the windows SSL cache.
- Also FF gives you some valuable hints to check the validity of your certificate: Click on Advanced when FF shows its certificate warning. FF will show you a short text block with one or more possible warnings in the central lines of the text block:
The certificate is not trusted because it is self-signed.
This warning is correct! As noted above, Firefox does not use the Windows certificate store and will only trust this certificate, if you add an exception for it right within Firefox. The button to do this is right below the warnings.
The certificate is not valid for the name ...
This warning shows, that you did something wrong. The (wildcard) domain of your certificate does not match the domain of your website. The problem must be solved by either changing your website's (sub-)domain or by issuing a new certificate that matches. In fact you could add an exception in FF even if the cert does not match, but you would never get a green padlock symbol in Chrome with such a combination.
Firefox can display many other nice and understandable cert warnings at this place, like expired certs, certs with outdated signing algorithms, etc. I found no other browser that gave me that level of feedback to nail down any problems.
Which (sub-)domain pattern should I choose to develop?
In the above New-SelfSignedCertificate command we used the wildcard domain *.dev.local.
You may think: Why not use *.local?
Simple reason: It is illegal as a wildcard domain.
Wildcard certificates must contain at least a literal second level domain name. The asterisk (*) is allowed only from the third level upwards.
So, domains of the form xyz.local are ok when you develop under HTTP and you don't need certs. But if you use that domain pattern with HTTPS you would be forced to issue a new matching certificate for each new project that you start. Better use domains of the form xyz.dev.local and a single wildcard cert for *.dev.local.
Important side notes:
- Valid host domains may ONLY contain letters a through z, digits, hyphens and dots. No underscores allowed! Some browsers are really picky about this detail and can give you a hard time when they stubbornly refuse to match your domain
motör_head.dev.local to your wildcard pattern *.dev.local. They will comply when you switch to motoer-head.dev.local.
- A wildcard in a certificate will only match ONE label (= section between two dots) in a domain, never more.
*.dev.local matches myname.dev.local but NOT other.myname.dev.local!
- Multi level wildcards (
*.*.dev.local) are NOT possible in certificates.
So other.myname.dev.local can only be covered by a wildcard of the form *.myname.dev.local. As a result, it is best not to use a forth level domain part. Put all your variations into the third level part. This way you will get along with a single certificate for all your dev sites.
The problem with Edge
(This is about the old MS Edge version – non-Chromium. I don't think this still applies to the new Chromium version. But I'm not sure.)
This is not really about self-signed certificates, but still related to the whole process:
After following the above steps, Edge may not show any content when you open up myname.dev.local.
The reason is a characteristic feature of the network management of Windows 10 for Modern Apps, called "Network Isolation".
To solve that problem, open a command prompt with Administrator privileges and enter the following command once:
CheckNetIsolation LoopbackExempt -a -n=Microsoft.MicrosoftEdge_8wekyb3d8bbwe
More infos about Edge and Network Isolation can be found here:
https://blogs.msdn.microsoft.com/msgulfcommunity/2015/07/01/how-to-debug-localhost-on-microsoft-edge/