147

I'm using PIL to convert a transparent PNG image uploaded with Django to a JPG file. The output looks broken.
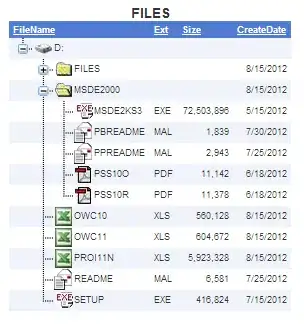
Source file

transparent source file

Code

Image.open(object.logo.path).save('/tmp/output.jpg', 'JPEG')

or

Image.open(object.logo.path).convert('RGB').save('/tmp/output.png')
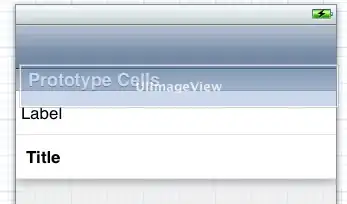
Result

Both ways, the resulting image looks like this:

resulting file

Is there a way to fix this? I'd like to have white background where the transparent background used to be.


Solution

Thanks to the great answers, I've come up with the following function collection:

import Image
import numpy as np


def alpha_to_color(image, color=(255, 255, 255)):
    """Set all fully transparent pixels of an RGBA image to the specified color.
    This is a very simple solution that might leave over some ugly edges, due
    to semi-transparent areas. You should use alpha_composite_with color instead.

    Source: http://stackoverflow.com/a/9166671/284318

    Keyword Arguments:
    image -- PIL RGBA Image object
    color -- Tuple r, g, b (default 255, 255, 255)

    """ 
    x = np.array(image)
    r, g, b, a = np.rollaxis(x, axis=-1)
    r[a == 0] = color[0]
    g[a == 0] = color[1]
    b[a == 0] = color[2] 
    x = np.dstack([r, g, b, a])
    return Image.fromarray(x, 'RGBA')


def alpha_composite(front, back):
    """Alpha composite two RGBA images.

    Source: http://stackoverflow.com/a/9166671/284318

    Keyword Arguments:
    front -- PIL RGBA Image object
    back -- PIL RGBA Image object

    """
    front = np.asarray(front)
    back = np.asarray(back)
    result = np.empty(front.shape, dtype='float')
    alpha = np.index_exp[:, :, 3:]
    rgb = np.index_exp[:, :, :3]
    falpha = front[alpha] / 255.0
    balpha = back[alpha] / 255.0
    result[alpha] = falpha + balpha * (1 - falpha)
    old_setting = np.seterr(invalid='ignore')
    result[rgb] = (front[rgb] * falpha + back[rgb] * balpha * (1 - falpha)) / result[alpha]
    np.seterr(**old_setting)
    result[alpha] *= 255
    np.clip(result, 0, 255)
    # astype('uint8') maps np.nan and np.inf to 0
    result = result.astype('uint8')
    result = Image.fromarray(result, 'RGBA')
    return result


def alpha_composite_with_color(image, color=(255, 255, 255)):
    """Alpha composite an RGBA image with a single color image of the
    specified color and the same size as the original image.

    Keyword Arguments:
    image -- PIL RGBA Image object
    color -- Tuple r, g, b (default 255, 255, 255)

    """
    back = Image.new('RGBA', size=image.size, color=color + (255,))
    return alpha_composite(image, back)


def pure_pil_alpha_to_color_v1(image, color=(255, 255, 255)):
    """Alpha composite an RGBA Image with a specified color.

    NOTE: This version is much slower than the
    alpha_composite_with_color solution. Use it only if
    numpy is not available.

    Source: http://stackoverflow.com/a/9168169/284318

    Keyword Arguments:
    image -- PIL RGBA Image object
    color -- Tuple r, g, b (default 255, 255, 255)

    """ 
    def blend_value(back, front, a):
        return (front * a + back * (255 - a)) / 255

    def blend_rgba(back, front):
        result = [blend_value(back[i], front[i], front[3]) for i in (0, 1, 2)]
        return tuple(result + [255])

    im = image.copy()  # don't edit the reference directly
    p = im.load()  # load pixel array
    for y in range(im.size[1]):
        for x in range(im.size[0]):
            p[x, y] = blend_rgba(color + (255,), p[x, y])

    return im

def pure_pil_alpha_to_color_v2(image, color=(255, 255, 255)):
    """Alpha composite an RGBA Image with a specified color.

    Simpler, faster version than the solutions above.

    Source: http://stackoverflow.com/a/9459208/284318

    Keyword Arguments:
    image -- PIL RGBA Image object
    color -- Tuple r, g, b (default 255, 255, 255)

    """
    image.load()  # needed for split()
    background = Image.new('RGB', image.size, color)
    background.paste(image, mask=image.split()[3])  # 3 is the alpha channel
    return background

Performance

The simple non-compositing alpha_to_color function is the fastest solution, but leaves behind ugly borders because it does not handle semi transparent areas.

Both the pure PIL and the numpy compositing solutions give great results, but alpha_composite_with_color is much faster (8.93 msec) than pure_pil_alpha_to_color (79.6 msec). If numpy is available on your system, that's the way to go. (Update: The new pure PIL version is the fastest of all mentioned solutions.)

$ python -m timeit "import Image; from apps.front import utils; i = Image.open(u'logo.png'); i2 = utils.alpha_to_color(i)"
10 loops, best of 3: 4.67 msec per loop
$ python -m timeit "import Image; from apps.front import utils; i = Image.open(u'logo.png'); i2 = utils.alpha_composite_with_color(i)"
10 loops, best of 3: 8.93 msec per loop
$ python -m timeit "import Image; from apps.front import utils; i = Image.open(u'logo.png'); i2 = utils.pure_pil_alpha_to_color(i)"
10 loops, best of 3: 79.6 msec per loop
$ python -m timeit "import Image; from apps.front import utils; i = Image.open(u'logo.png'); i2 = utils.pure_pil_alpha_to_color_v2(i)"
10 loops, best of 3: 1.1 msec per loop
Danilo Bargen
  • 18,626
  • 15
  • 91
  • 127
  • For a bit more speed, I believe `im = image.copy()` can be removed from `pure_pil_alpha_to_color_v2` without changing the result. (After changing subsequent instances of `im` to `image`, of course.) – unutbu Feb 27 '12 at 19:16

8 Answers8

165

Here's a version that's much simpler - not sure how performant it is. Heavily based on some django snippet I found while building RGBA -> JPG + BG support for sorl thumbnails.

from PIL import Image

png = Image.open(object.logo.path)
png.load() # required for png.split()

background = Image.new("RGB", png.size, (255, 255, 255))
background.paste(png, mask=png.split()[3]) # 3 is the alpha channel

background.save('foo.jpg', 'JPEG', quality=80)

Result @80%

enter image description here

Result @ 50%
enter image description here

Yuji 'Tomita' Tomita
  • 115,817
  • 29
  • 282
  • 245
  • 1
    Looks like your version is the fastest: http://pastebin.com/mC4Wgqzv Thanks! Two things about your post though: The png.load() command seems to be unnecessary, and line 4 should be `background = Image.new("RGB", png.size, (255, 255, 255))`. – Danilo Bargen Feb 27 '12 at 14:39
  • 3
    Congratulations on figuring out how to make `paste` do a proper blend. – Mark Ransom Feb 27 '12 at 15:41
  • @DaniloBargen, ah! Indeed it was missing size, but the `load` method is required for the `split` method. And that's awesome to hear it's actually fast /and/ simple! – Yuji 'Tomita' Tomita Feb 27 '12 at 18:16
  • Why not use Image.composite(image1, image2, mask) instead of messing with paste? – Gonzo Oct 23 '12 at 07:30
  • 14
    This code was causing a error for me: `tuple index out of range`. I fixed this by following another question(http://stackoverflow.com/questions/1962795/how-to-get-alpha-value-of-a-png-image-with-pil). I had to convert the PNG to RGBA first and then slice it: `alpha = img.split()[-1]` then use that on the background mask. – joehand Nov 02 '12 at 00:56
  • 1
    `background.paste(image, mask=image.getchannel('A'))` -- is a bit better with the pixel range issue. And likely would work for some other modes like `LA` – Tatarize Aug 27 '20 at 20:59
49

By using Image.alpha_composite, the solution by Yuji 'Tomita' Tomita become simpler. This code can avoid a tuple index out of range error if png has no alpha channel.

from PIL import Image

png = Image.open(img_path).convert('RGBA')
background = Image.new('RGBA', png.size, (255, 255, 255))

alpha_composite = Image.alpha_composite(background, png)
alpha_composite.save('foo.jpg', 'JPEG', quality=80)
shuuji3
  • 1,233
  • 13
  • 20
15

The transparent parts mostly have RGBA value (0,0,0,0). Since the JPG has no transparency, the jpeg value is set to (0,0,0), which is black.

Around the circular icon, there are pixels with nonzero RGB values where A = 0. So they look transparent in the PNG, but funny-colored in the JPG.

You can set all pixels where A == 0 to have R = G = B = 255 using numpy like this:

import Image
import numpy as np

FNAME = 'logo.png'
img = Image.open(FNAME).convert('RGBA')
x = np.array(img)
r, g, b, a = np.rollaxis(x, axis = -1)
r[a == 0] = 255
g[a == 0] = 255
b[a == 0] = 255
x = np.dstack([r, g, b, a])
img = Image.fromarray(x, 'RGBA')
img.save('/tmp/out.jpg')

enter image description here


Note that the logo also has some semi-transparent pixels used to smooth the edges around the words and icon. Saving to jpeg ignores the semi-transparency, making the resultant jpeg look quite jagged.

A better quality result could be made using imagemagick's convert command:

convert logo.png -background white -flatten /tmp/out.jpg

enter image description here


To make a nicer quality blend using numpy, you could use alpha compositing:

import Image
import numpy as np

def alpha_composite(src, dst):
    '''
    Return the alpha composite of src and dst.

    Parameters:
    src -- PIL RGBA Image object
    dst -- PIL RGBA Image object

    The algorithm comes from http://en.wikipedia.org/wiki/Alpha_compositing
    '''
    # http://stackoverflow.com/a/3375291/190597
    # http://stackoverflow.com/a/9166671/190597
    src = np.asarray(src)
    dst = np.asarray(dst)
    out = np.empty(src.shape, dtype = 'float')
    alpha = np.index_exp[:, :, 3:]
    rgb = np.index_exp[:, :, :3]
    src_a = src[alpha]/255.0
    dst_a = dst[alpha]/255.0
    out[alpha] = src_a+dst_a*(1-src_a)
    old_setting = np.seterr(invalid = 'ignore')
    out[rgb] = (src[rgb]*src_a + dst[rgb]*dst_a*(1-src_a))/out[alpha]
    np.seterr(**old_setting)    
    out[alpha] *= 255
    np.clip(out,0,255)
    # astype('uint8') maps np.nan (and np.inf) to 0
    out = out.astype('uint8')
    out = Image.fromarray(out, 'RGBA')
    return out            

FNAME = 'logo.png'
img = Image.open(FNAME).convert('RGBA')
white = Image.new('RGBA', size = img.size, color = (255, 255, 255, 255))
img = alpha_composite(img, white)
img.save('/tmp/out.jpg')

enter image description here

unutbu
  • 842,883
  • 184
  • 1,785
  • 1,677
  • Thank you, that explanation makes a whole lot of sense :) – Danilo Bargen Feb 06 '12 at 20:24
  • @DaniloBargen, did you notice that the quality of the conversion is poor? This solution doesn't account for partial transparency. – Mark Ransom Feb 06 '12 at 20:30
  • @MarkRansom: True. Do you know how to fix that? – unutbu Feb 06 '12 at 20:32
  • It requires a full blend (with white) based on the alpha value. I've been searching PIL for a natural way to do it and I've come up empty. – Mark Ransom Feb 06 '12 at 20:35
  • @MarkRansom yes, i've noticed that problem. but in my case that will only affect a very small percentage of the input data, so the quality is good enough for me. – Danilo Bargen Feb 06 '12 at 20:40
  • 1
    Awesome question mate + awesome answer. Thank you i really learned a lot. – John Riselvato Feb 06 '12 at 21:36
  • The alpha compositing you just added is exactly what I was getting at, although the implementation seems more complicated than I would have expected. I'm very surprised that PIL can't do it on its own. – Mark Ransom Feb 06 '12 at 21:41
  • I compared the alpha blending solution to the pure PIL solution (see answer below). The numpy version is much faster (8.92ms vs 79.7ms, see http://pastebin.com/rv4zcpAV). – Danilo Bargen Feb 07 '12 at 10:43
  • @DaniloBargen: Thanks for the summary. I've simplified `alpha_composite` a bit, and changed the variable names to correspond with those used on the [Wikipedia page](http://en.wikipedia.org/wiki/Alpha_compositing). – unutbu Feb 07 '12 at 12:27
  • @unutbu Thanks, I've updated the summary. I didn't change the variable names though, as I think the current ones are more clear than "src" and "dst". – Danilo Bargen Feb 07 '12 at 13:30
  • Seems like there is another, even faster version with pure PIL. See new answer. – Danilo Bargen Feb 27 '12 at 14:46
  • Of course the decision is yours, but I'd be happy to see Yuji's become the accepted answer. – unutbu Feb 27 '12 at 18:57
4

Here's a solution in pure PIL.

def blend_value(under, over, a):
    return (over*a + under*(255-a)) / 255

def blend_rgba(under, over):
    return tuple([blend_value(under[i], over[i], over[3]) for i in (0,1,2)] + [255])

white = (255, 255, 255, 255)

im = Image.open(object.logo.path)
p = im.load()
for y in range(im.size[1]):
    for x in range(im.size[0]):
        p[x,y] = blend_rgba(white, p[x,y])
im.save('/tmp/output.png')
Mark Ransom
  • 299,747
  • 42
  • 398
  • 622
1

It's not broken. It's doing exactly what you told it to; those pixels are black with full transparency. You will need to iterate across all pixels and convert ones with full transparency to white.

Ignacio Vazquez-Abrams
  • 776,304
  • 153
  • 1,341
  • 1,358
  • Thanks. But around the blue circle there are blue areas. Are those semi-transparent areas? Is there a way I can fix those too? – Danilo Bargen Feb 06 '12 at 20:06
0
import numpy as np
import PIL

def convert_image(image_file):
    image = Image.open(image_file) # this could be a 4D array PNG (RGBA)
    original_width, original_height = image.size

    np_image = np.array(image)
    new_image = np.zeros((np_image.shape[0], np_image.shape[1], 3)) 
    # create 3D array

    for each_channel in range(3):
        new_image[:,:,each_channel] = np_image[:,:,each_channel]  
        # only copy first 3 channels.

    # flushing
    np_image = []
    return new_image
user1098761
  • 579
  • 1
  • 5
  • 16
0

Based on above examples:

It takes in an RGBA image and returns an RGB image with alpha channel converted to white color.

from PIL import Image

def imageAlphaToWhite(image):
    background = Image.new("RGBA", image.size, "WHITE")
    alphaComposite = Image.alpha_composite(background, image)
    alphaComposite.convert("RGB")
    return alphaComposite
nvd
  • 2,995
  • 28
  • 16
-1
from PIL import Image
 
def fig2img ( fig ):
    """
    @brief Convert a Matplotlib figure to a PIL Image in RGBA format and return it
    @param fig a matplotlib figure
    @return a Python Imaging Library ( PIL ) image
    """
    # put the figure pixmap into a numpy array
    buf = fig2data ( fig )
    w, h, d = buf.shape
    return Image.frombytes( "RGBA", ( w ,h ), buf.tostring( ) )

def fig2data ( fig ):
    """
    @brief Convert a Matplotlib figure to a 4D numpy array with RGBA channels and return it
    @param fig a matplotlib figure
    @return a numpy 3D array of RGBA values
    """
    # draw the renderer
    fig.canvas.draw ( )
 
    # Get the RGBA buffer from the figure
    w,h = fig.canvas.get_width_height()
    buf = np.fromstring ( fig.canvas.tostring_argb(), dtype=np.uint8 )
    buf.shape = ( w, h, 4 )
 
    # canvas.tostring_argb give pixmap in ARGB mode. Roll the ALPHA channel to have it in RGBA mode
    buf = np.roll ( buf, 3, axis = 2 )
    return buf

def rgba2rgb(img, c=(0, 0, 0), path='foo.jpg', is_already_saved=False, if_load=True):
    if not is_already_saved:
        background = Image.new("RGB", img.size, c)
        background.paste(img, mask=img.split()[3]) # 3 is the alpha channel

        background.save(path, 'JPEG', quality=100)   
        is_already_saved = True
    if if_load:
        if is_already_saved:
            im = Image.open(path)
            return np.array(im)
        else:
            raise ValueError('No image to load.')
Simba
  • 23,537
  • 7
  • 64
  • 76